Easy Recipes to Support a Healthier You
Let’s eat! Now that you’re all schooled up on healthier habits, it’s time to enjoy the flavors and nutritional benefits of some delightfully easy recipes. Here you’ll find a sampling of the most popular recipes from my blog, along with some client favorites and a few that are brand new just for this book.
The selection here is a mere sampling of the endless healthy whole food meals and snacks available to create. I mentioned back in Chapter 3 that I don’t label my eating habits, so you’ll notice that these don’t fall into the exact same categories. I have, however, added a few dietary labels for quick identification for those who need them.
We had room for 50 recipes here, but head on over to my website (elizabethrider.com) for dozens more.
Check that the protein powder is dairy-free, if desired. There are a variety of protein powders available. Whey protein comes from milk and works for some people who tolerate dairy. Pea protein and hemp protein are dairy-free, vegan sources of protein.
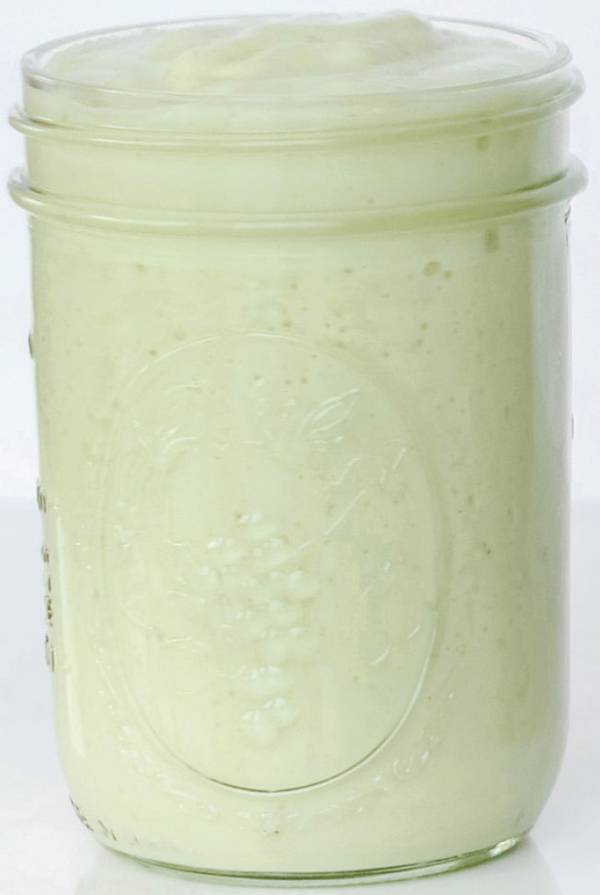
If you’d like to transport yourself to a warmer, sunnier climate, this smoothie will help do the trick. It’s nutritious and delicious—and you’ll feel like you’re lounging on a beach in the Bahamas. Not a bad deal for a smoothie!
MAKES 1 SERVING | Gluten-Free, Dairy-Free, Vegan
½ cup full-fat coconut milk (from a can, not a carton)
1 cup filtered water
½ avocado
½ cup fresh or frozen pineapple (not canned)
Ice
Blend all the ingredients and enjoy immediately.
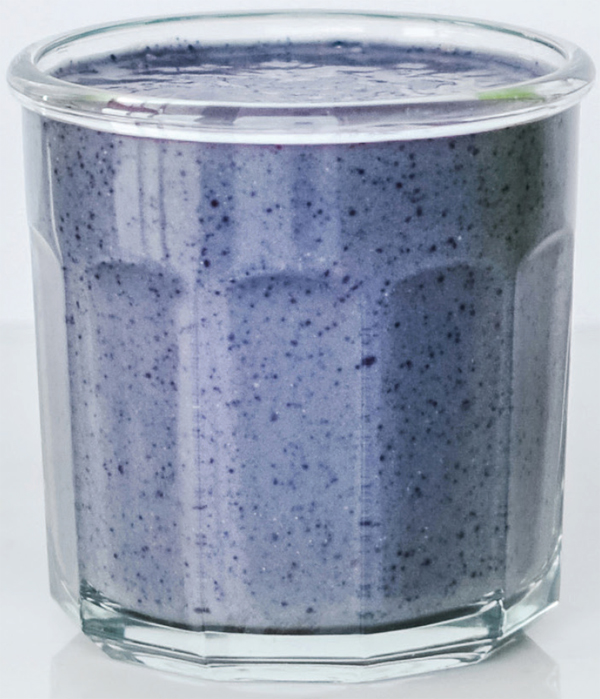
There are antioxidants and polyphenols galore in this balanced smoothie of low-glycemic berries, protein, healthy fats from nuts and seeds, and just a bit of sweetness from a banana. Voilà! The perfect quick meal.
MAKES 1 SERVING | Gluten-Free, Dairy-Free
1 serving high-quality protein powder
½ cup fresh or frozen berries of your choice
1 small frozen banana
1 teaspoon seeds or nuts
12 to 16 ounces filtered water
1 serving collagen powder, optional
Blend all the ingredients and enjoy immediately.
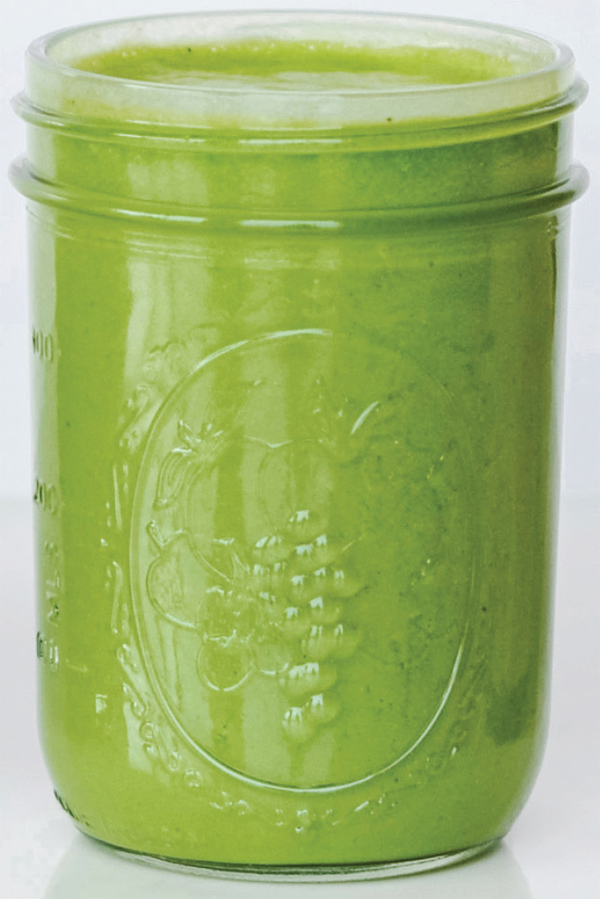
Get your daily dose of leafy greens with this healthy and delicious smoothie. Collagen powder helps keep your skin firm and your hair and nails long and strong. It’s not vegan, so omit if you prefer a vegan smoothie.
MAKES 1 SERVING | Gluten-Free, Dairy-Free
1 serving high-quality vanilla protein powder
1 handful of fresh greens
1 small frozen banana
1 teaspoon seeds or nuts
12 to 16 ounces filtered water
1 serving collagen powder, optional
Blend all the ingredients and enjoy immediately.
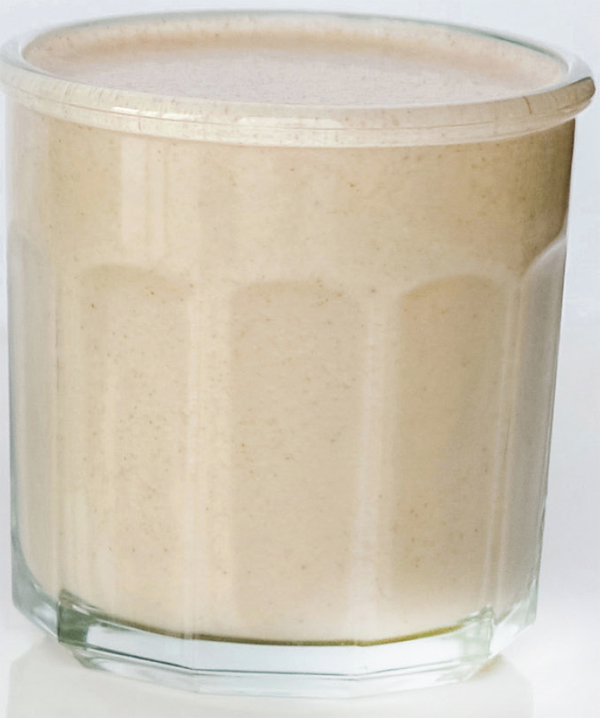
This smoothie sounds heavenly and even a little sinful, I know—but rest assured, it’s all health coach-approved. And it’s actually healthy, too.
MAKES 1 SERVING | Gluten-Free, Dairy-Free, Vegan
1 serving high-quality protein powder
1 small frozen banana
2 teaspoons unsweetened almond butter
¼ teaspoon high-quality vanilla extract
1 small pinch of sea salt
12 to 16 ounces filtered water
1 soaked, pitted date for extra sweetness, optional
Blend all the ingredients and enjoy immediately.
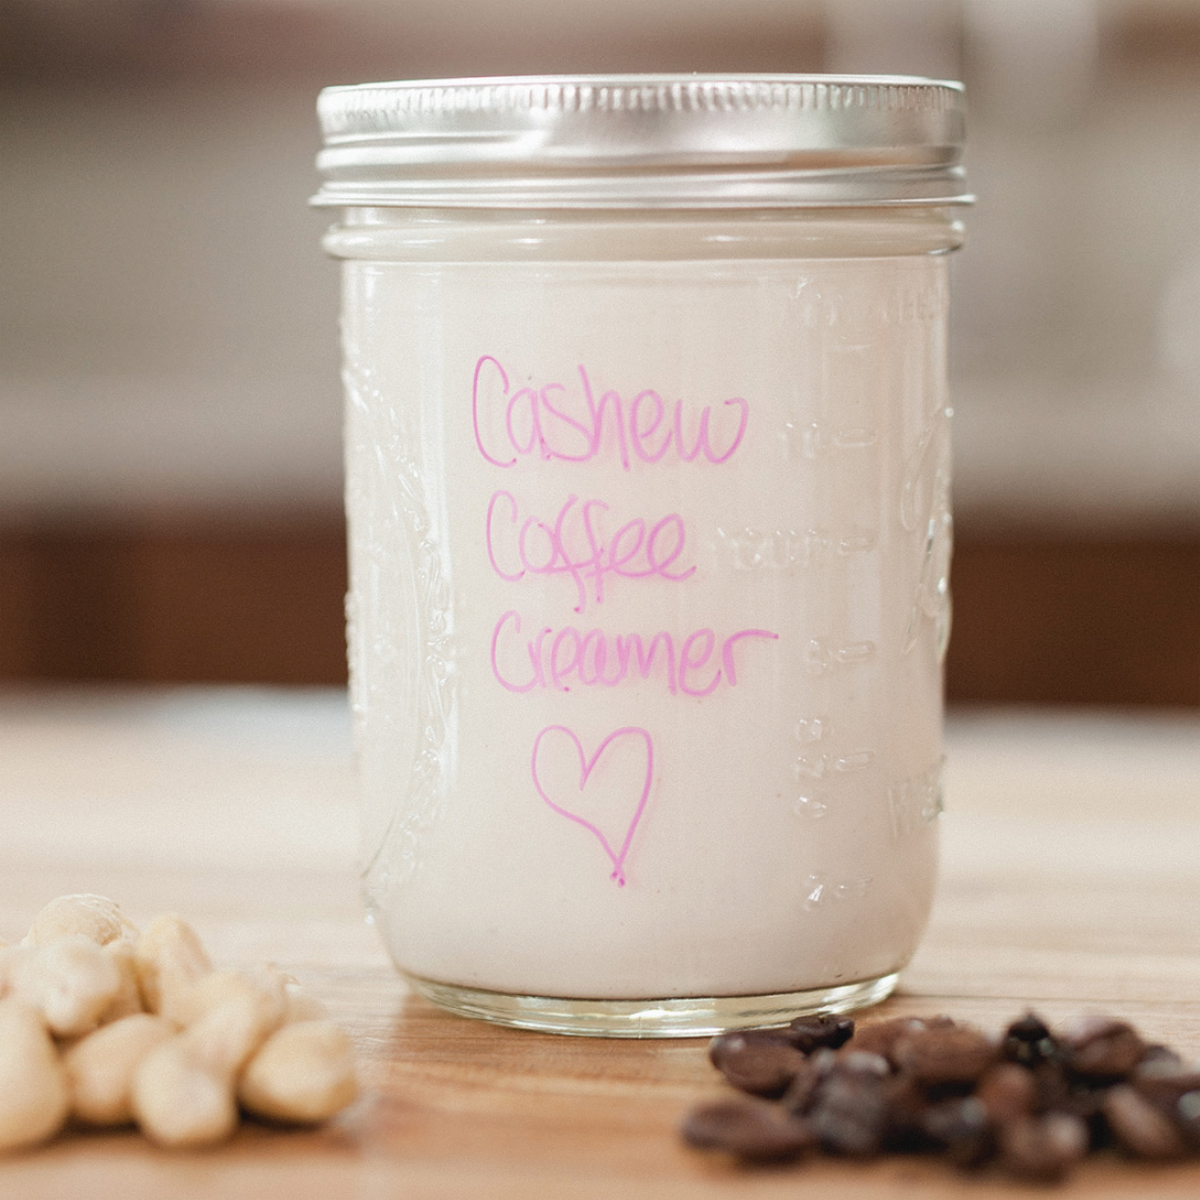
This recipe is dairy-free, gluten-free, and of course way healthier than the store-bought version, which usually includes casein, sugar, sodium, and corn syrup (yuck!). This homemade option ensures you’ll have a nutritious and healthy creamer, and for less money, too.
MAKES 2 CUPS | Gluten-Free, Dairy-Free, Vegan option
½ cup raw cashews, soaked for 12 hours
1½ cups filtered water
Pinch of sea salt
2 teaspoons maple syrup (vegan) or manuka honey (not vegan)
¼ teaspoon cinnamon
¼ teaspoon vanilla (more or less to taste)
Drain and rinse the cashews. Blend all the ingredients on high in a high-speed blender until smooth. Store for up to 1 week in the refrigerator.
NOTE: You can choose to soak your cashew nuts overnight at room temp, or you can do a quick soak in hot (but not boiling) water for 1 hour.
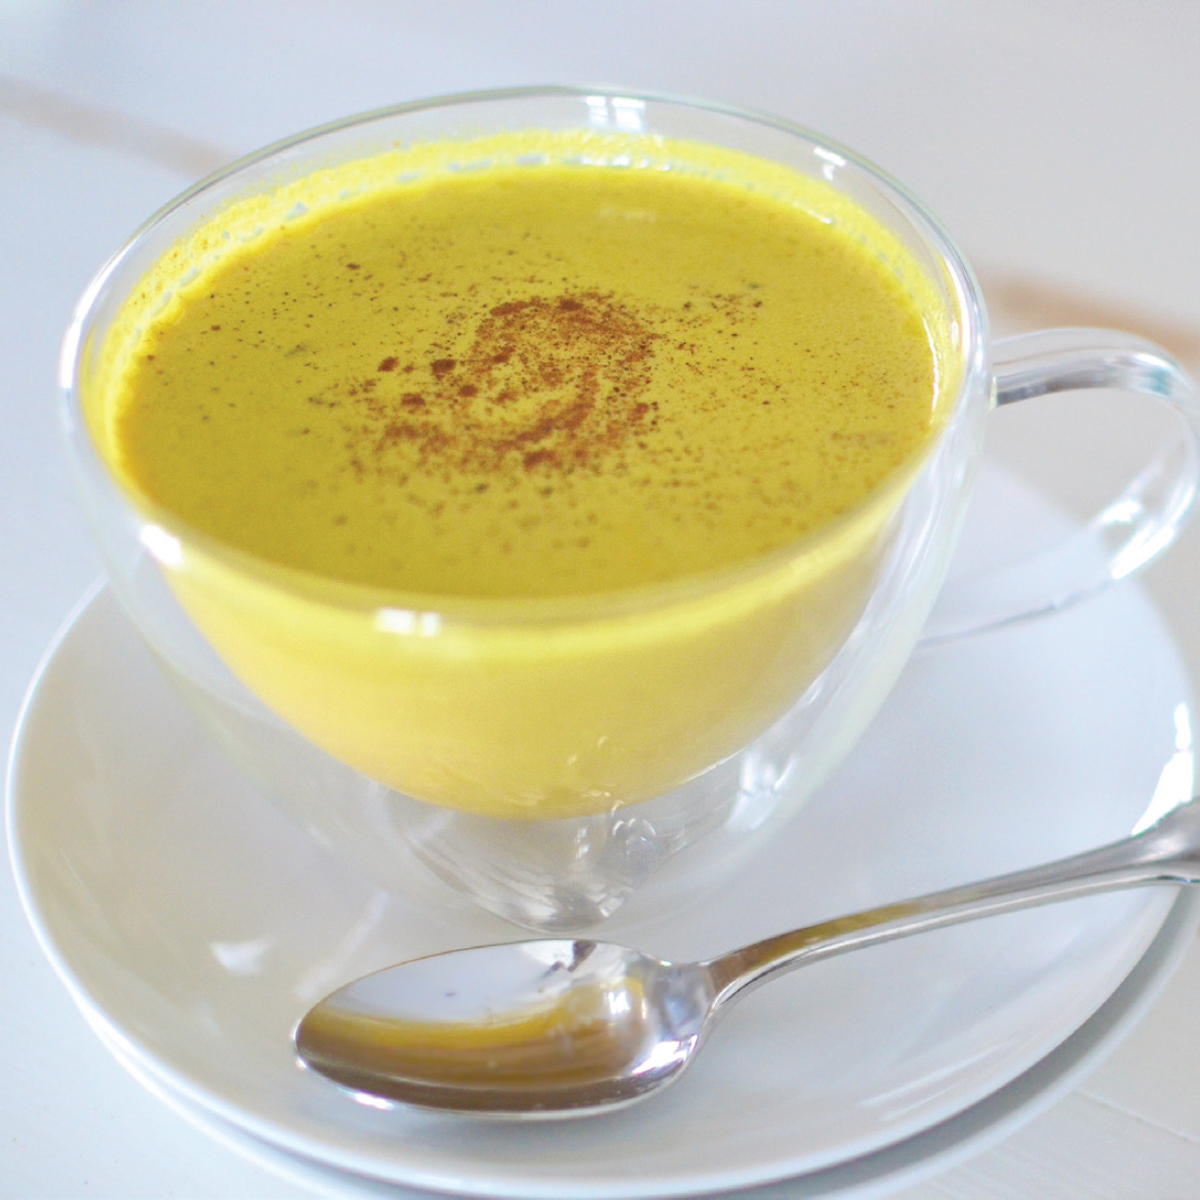
If you haven’t tried golden milk (aka turmeric tea or turmeric latte), then now is the perfect time to whip up a batch. This traditional Ayurvedic drink is nourishing and smooth, and it’s quite simple to make. The pinch of black pepper helps your body better absorb all the anti-inflammatory elements in the turmeric. Enjoy any time of day.
MAKES 2 SERVINGS | Gluten-Free, Dairy-Free, Vegan option
1 cup unsweetened almond milk
1 to 2 teaspoons almond oil
½ teaspoon ground turmeric
Big pinch of freshly ground black pepper
1 small (¼-inch) piece of ginger root, peeled and grated
Big pinch of ground cardamom
¼ teaspoon raw honey (not vegan) or maple syrup (vegan) added off the heat, optional
Blend all the ingredients, then warm on the stove. Simmer (do not boil) for 15 minutes. You can blend the ingredients by hand or in a high-speed blender for a frothier drink.
Try this simple natural concoction for a more restful night’s sleep. Honey has been used for centuries as a sleep aid. Choose raw honey as it will have more enzymes and be less processed. Hot water will kill some of the enzymes in both the honey and apple cider vinegar, but it doesn’t ruin all of their nutritional benefits (this is why we use hot, not boiling, water). For this recipe, I boil water in my electric kettle and let it sit for 5 to 10 minutes before using. There aren’t any scientific studies as to why this nighttime drink works, but it does. Some nutrition experts hypothesize that raw honey replenishes liver glycogen more efficiently than anything else, which allows you to stay asleep longer. Try not to drink so much liquid that it wakes you up in the middle of the night, which disrupts your good night’s sleep.
MAKES 1 SERVING | Gluten-Free, Dairy-Free, Vegan option
1 tablespoon raw honey (I prefer manuka)
1 tablespoon apple cider vinegar
8 to 12 ounces of hot (but not boiling) filtered water
1 tea bag made for sleep, optional
Boil the water, then let it sit for about five minutes. Mix in the rest of the ingredients and enjoy about 1 hour before bedtime. The honey and apple cider vinegar alone does the trick for most people. Add 1 bag of sleep-inducing tea from a trusted brand for nights when you need even more help.

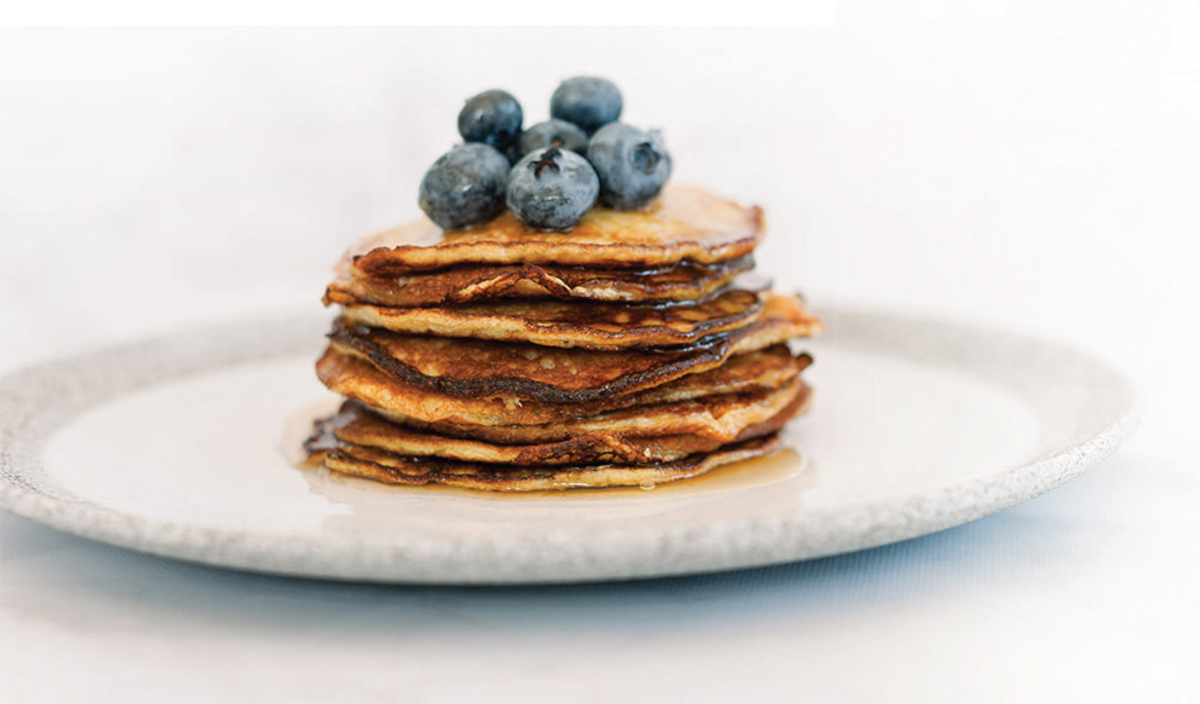
You can make healthy and delicious pancakes with just banana, egg, and a little healthy oil (I use coconut oil) for the cast-iron pan. A cast-iron pan over medium heat is best for this; trust me, I’ve made many a batch of egg and banana pancakes that won’t flip or stick to the pan. I also like to boost up the flavor with a high-quality vanilla extract and cinnamon.
MAKES 2 SERVINGS (2 TO 3 SMALL PANCAKES EACH) | Gluten-Free, Dairy-Free
1 medium to large ripe banana*
2 large eggs
⅛ teaspoon sea salt, optional
¼ teaspoon pure vanilla extract, optional
¼ teaspoon cinnamon, optional
½ teaspoon coconut oil (for cooking)
*Proportions can vary, but in general, a medium to large banana and 2 large (not extra-large or jumbo) eggs work. If you have a small banana and a jumbo egg, just use 1 of each. One banana and 2 eggs will give you about 5 or maybe 6 pancakes when you use a ¼-cup measuring cup.
Preheat a cast-iron pan over medium heat for 10 minutes. A nice medium heat is important: If the pan is too hot, the pancakes will burn; if it’s not hot enough, they won’t set. If you have a newer/professional-style gas stove top, start with medium-low heat, because those puppies have more power than a standard stove top.
While the pan preheats, mix the ingredients into a smooth batter. I use a hand mixer because I find it easy, but you can use a blender, mixer, or do it by hand by mashing the banana really well then mixing in your other ingredients. Regardless of the method, mix the batter until it’s well-combined, about 30 to 60 seconds, but don’t whip too much air into it (eggs will eventually whip up into foam if you let it go too long).
Add about ½ teaspoon coconut oil to the pan and spread it around with your spatula right before you add the batter. Don’t preheat the oil with the pan because it will get too hot. Grape-seed oil or macadamia nut oil can work too, but extra-virgin olive oil doesn’t have a high enough smoke point and will smoke too much. Coconut oil is healthy, can withstand high heat, and adds a very light, yummy flavor to the pancakes, so it’s my oil of choice here.
Using a ¼-cup measuring cup, add your batter to the pan right after the coconut oil is melted (that only takes about 10 seconds). Important: Set your kitchen timer for 2 minutes. I cook them on the first side for 2 minutes to allow them to set properly. Check them at 1 minute 45 seconds, but don’t try to flip them too early. Once you get the hang of it, you’ll know when to flip.
Once the pancakes are set (again, about 2 minutes—give or take 10 to 15 seconds), use a spatula big enough to get under the entire pancake and flip them over. Cook another 1 ½ minutes (give or take 10 to 15 seconds) for the perfect 2-ingredient pancake.
Stack ’em up! If you want, drizzle the top with 1 tablespoon raw honey, pure maple syrup, and ½ cup berries, or maple cashew cream.
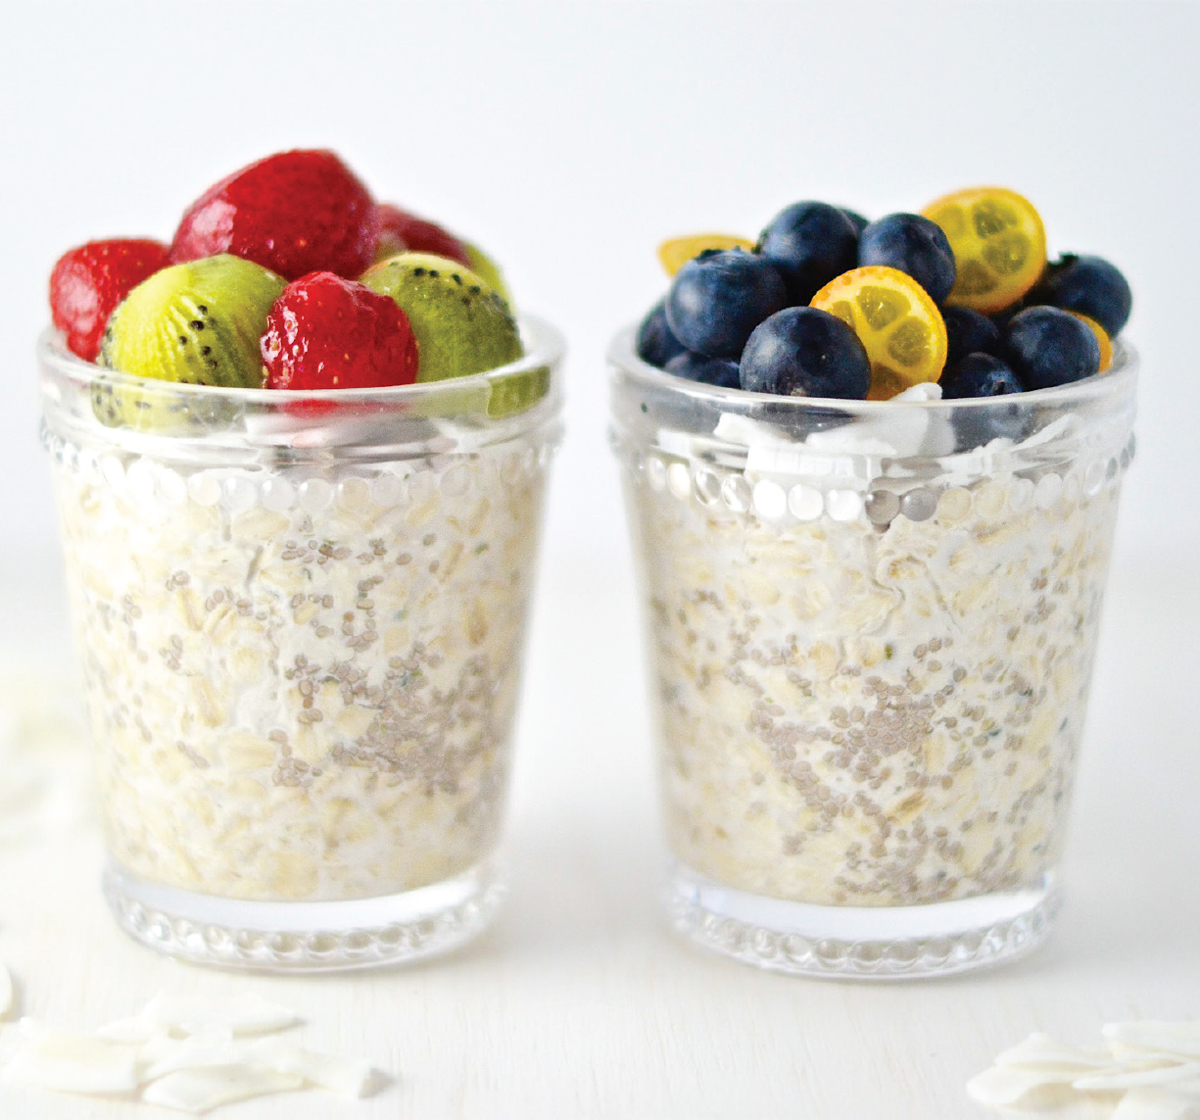
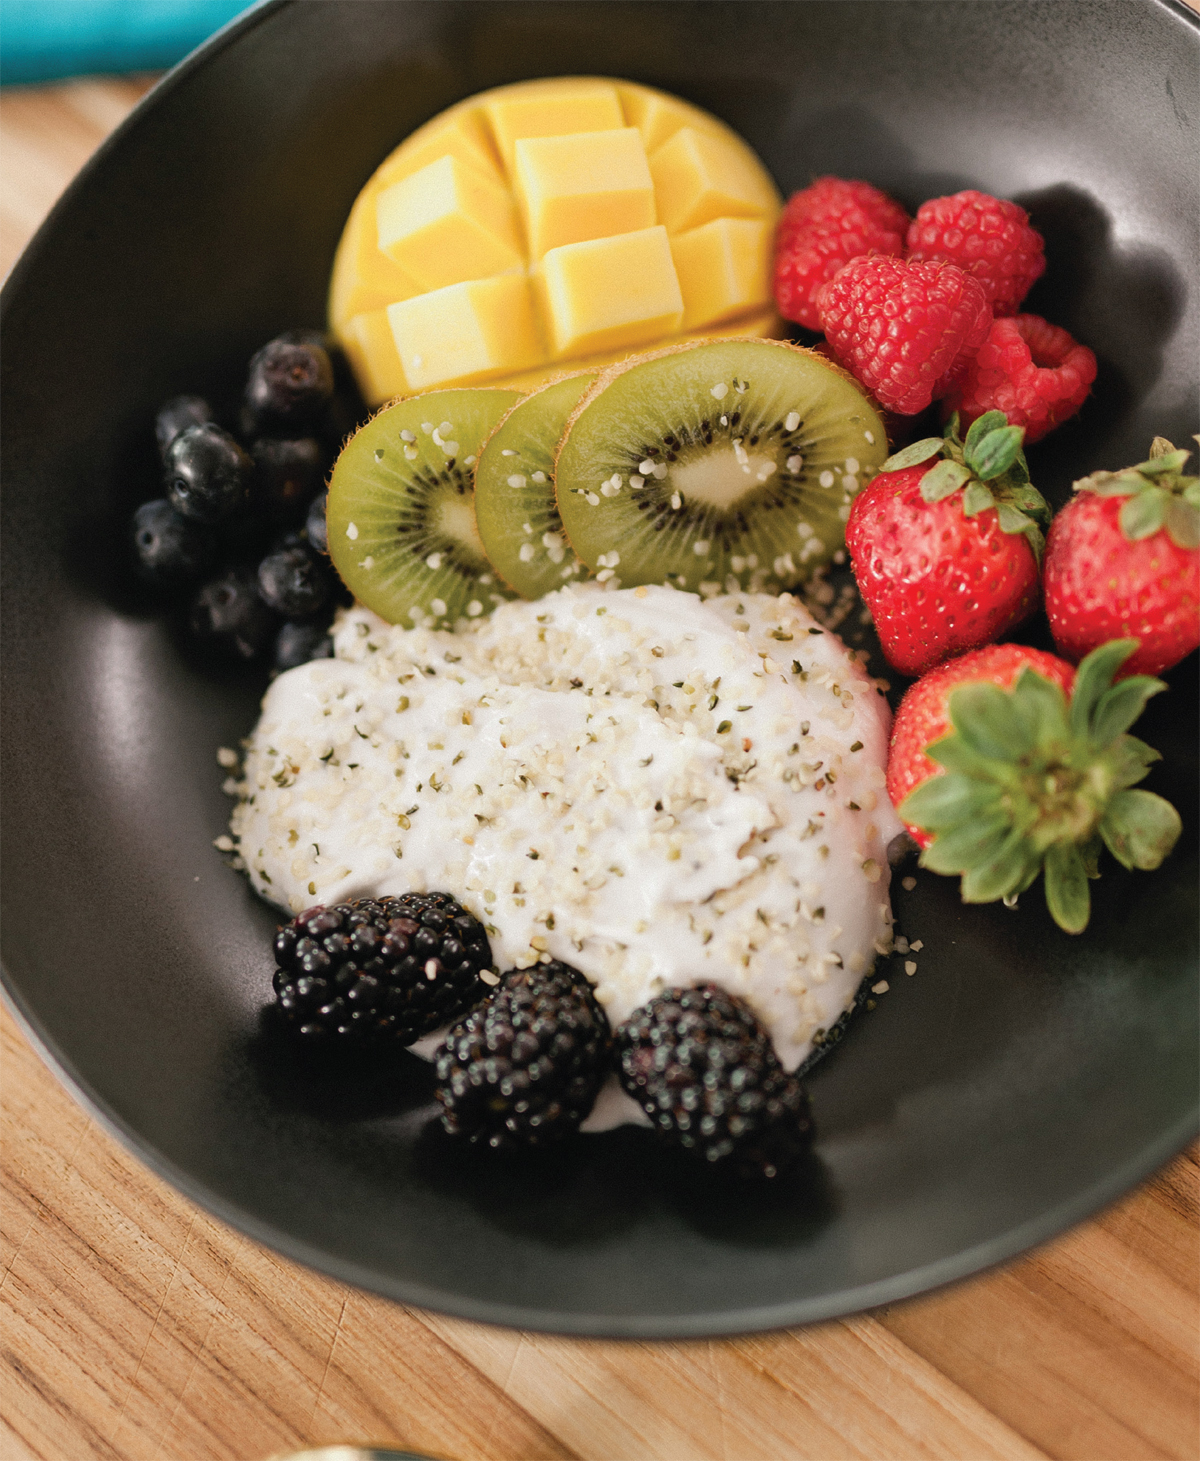
Preparing overnight oats is as simple as pouring nut milk over a few ingredients. Healthy eating doesn’t get any easier than this. And, it’s delicious (of course). This recipe will become a staple in your healthy kitchen in no time.
MAKES 1 SERVING | Gluten-Free, Dairy-Free, Vegan option
½ cup whole rolled oats, preferably organic
2 teaspoons chia seeds
2 teaspoons hemp seeds (aka hemp hearts)
1 tablespoon unsweetened coconut flakes, optional
½ cup unsweetened almond milk or other nondairy milk of your choice
About ⅓ cup fresh or frozen berries (for topping)
Drizzle of raw honey (not vegan) or maple syrup (vegan) for flavor, nutrients, and natural sweetness, optional
Mix the oats, chia seeds, and hemp seeds in a small bowl or jar (I use 8-ounce containers). Top with the unsweetened coconut flakes, if using. Pour the nut milk over the oat mixture—it should be saturated to the point where the milk pools on top a little. Cover and refrigerate overnight, or up to 3 days. Top with berries and/or a small drizzle of raw honey or maple syrup before eating, if using.
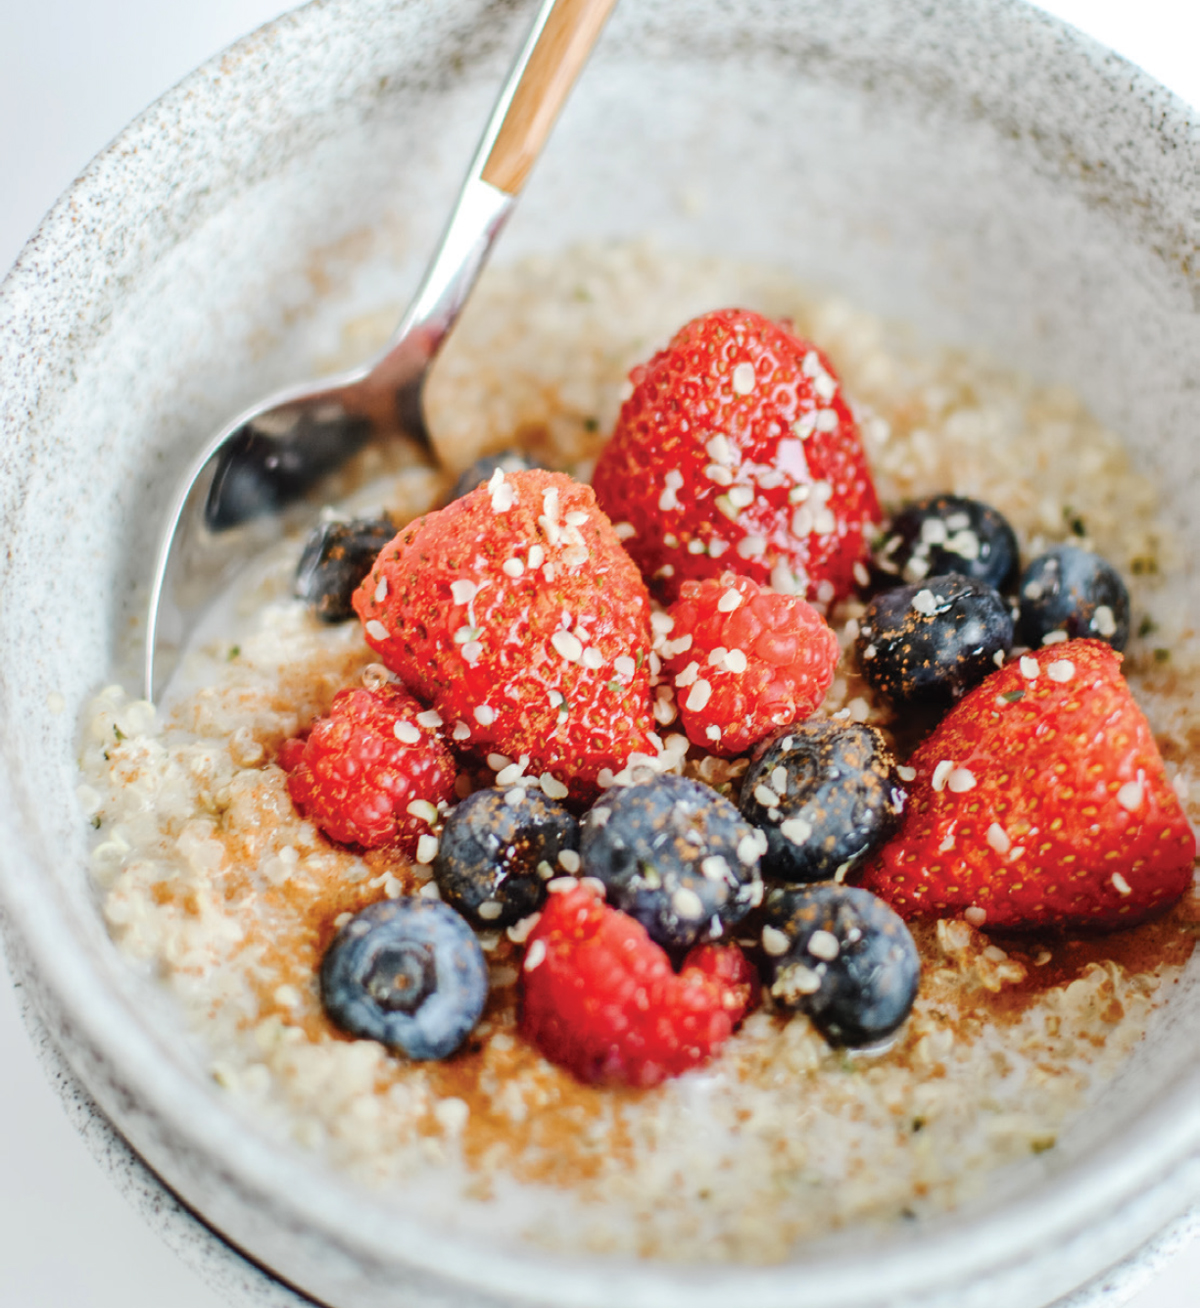
A seed that cooks like a grain, cooked quinoa is one of the most versatile ingredients in your kitchen. It makes a great substitute for cooked rice or grains in just about any savory dish, but you might not know that it’s great in sweet preparations, too. This breakfast bowl makes a great, simple, healthy breakfast when you’re trying to avoid grains and/or boost your protein intake in the morning.
MAKES 1 SERVING | Gluten-Free, Dairy-Free, Vegan
½ cup cooked quinoa
Sprinkle of cinnamon
Nondairy milk of your choice, such as almond milk, oat milk, or cashew milk
⅓ cup berries
1 teaspoon chia seeds, flaxseeds, or hemp seeds (or a combo of all 3)
1 teaspoon of raw honey or maple syrup, optional
Place the quinoa in a bowl, sprinkle with cinnamon, then top with nondairy milk. Add the berries, sprinkle the seeds over, and top with honey or syrup, if desired. Enjoy.
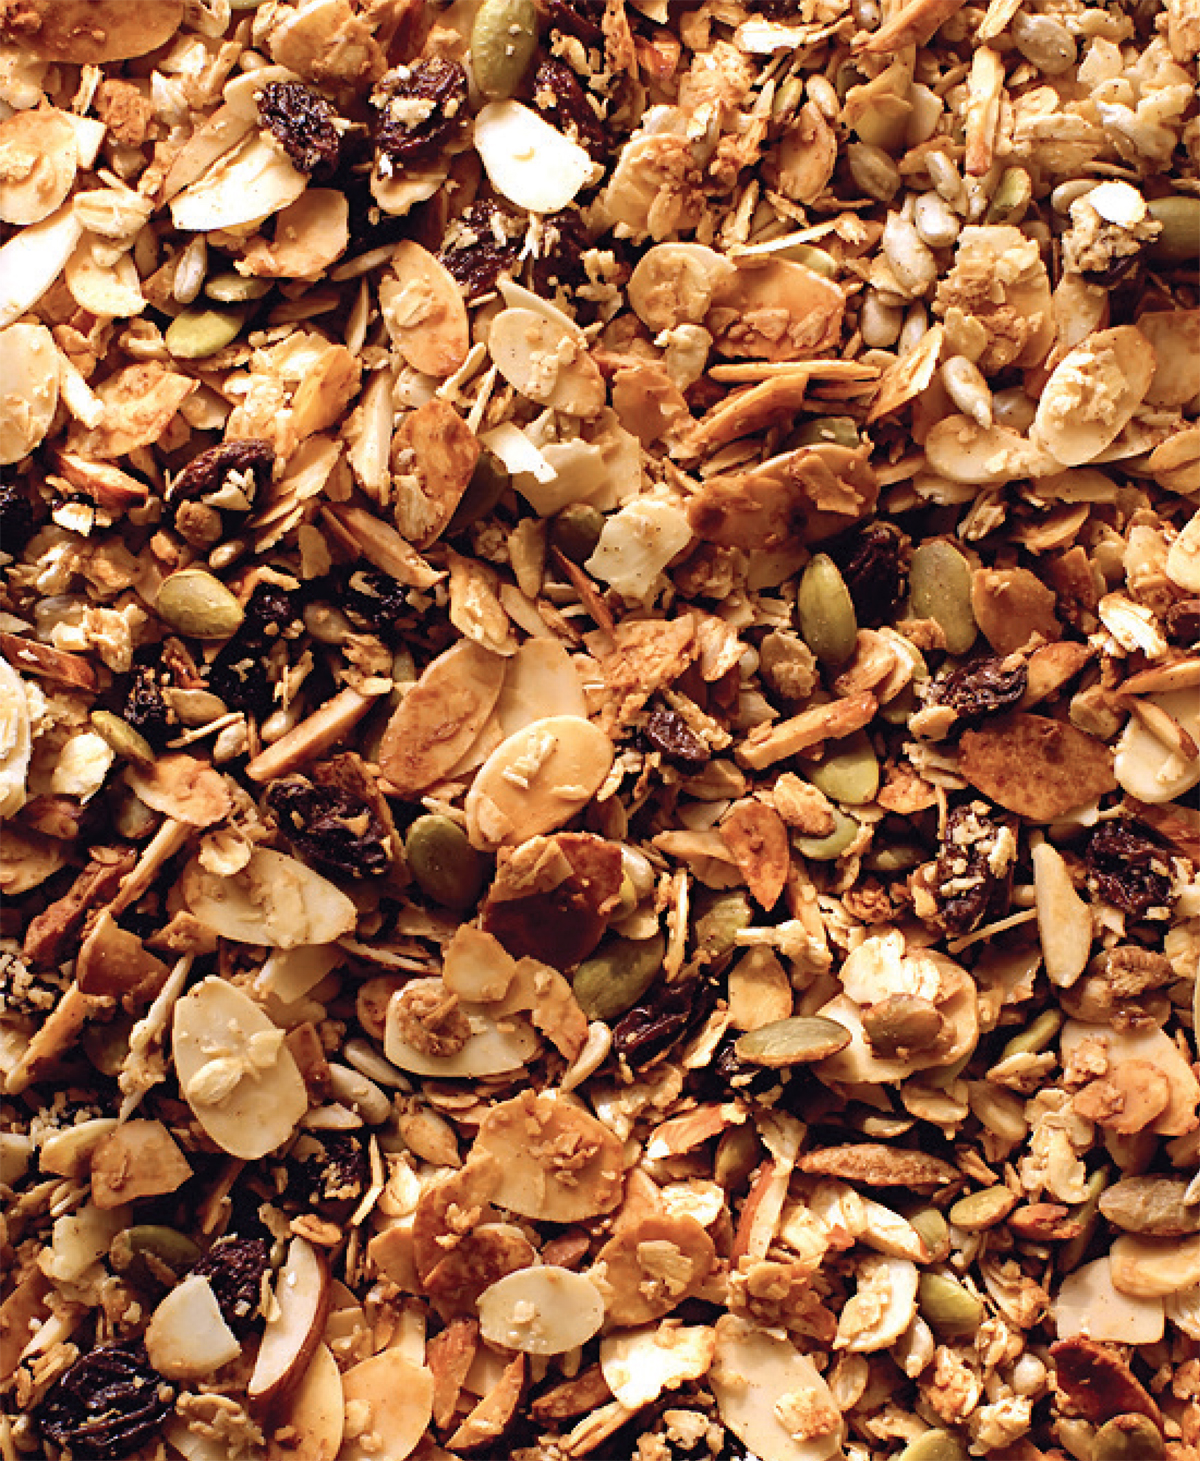
Homemade granola can be a healthy, comforting, and delicious treat. Whipping up your own at home is super easy and quick. Homemade granola also makes your house smell amazing—like you’ve been slaving in the kitchen all day. This is the number-one homemade granola recipe on Google for good reason. It’s delicious, simple, and definitely healthier than store-bought granola.
MAKES 3 CUPS (ABOUT 6 ½-CUP SERVINGS) | Gluten-Free, Dairy-Free, Vegan
2 cups raw whole rolled oats* (aka old-fashioned oats), preferably organic
½ cup raw nuts, chopped
¼ cup raw seeds (sunflower or pumpkin seeds are great)
½ cup unsweetened dried fruit, chopped, optional
2 to 3 tablespoons maple syrup (vegan) or raw honey (not vegan), or a combo of both
2 tablespoons virgin coconut oil or other healthy cooking oil
½ teaspoon vanilla extract or almond extract
1 large pinch of fine sea salt
*Oats are gluten-free by nature, but most are held in facilities that contain gluten. Check the package label if you are concerned with any gluten content.
Preheat the oven to 300ºF.
Combine all the ingredients in a mixing bowl. Use your clean hands to mix well and toss to coat; it will be sticky and messy, but that’s the fun part. The coconut oil might be solid depending on your climate (it has a melting point of about 75ºF). Your hands will warm it up and melt it into the mixture if it’s solid; just be sure to mix it all through the other ingredients so there aren’t any chunks of oil left.
Spread the mixture in a thin layer on a baking sheet lined with parchment paper and bake for 10 minutes, until very lightly toasted. (To make this recipe completely raw-friendly, dehydrate the mixture for 5 to 6 hours at 115ºF in a food dehydrator instead.)
Cool before serving or storing. This granola can be kept in an airtight container in a cool, dry place for up to 2 weeks. I keep mine in a mason jar in the refrigerator at home and in a BPA-free plastic bag when traveling.
NOTE: Homemade granola will taste like burned popcorn if you overcook it; keep it at a low temperature for 8 to 10 minutes to let it come together.
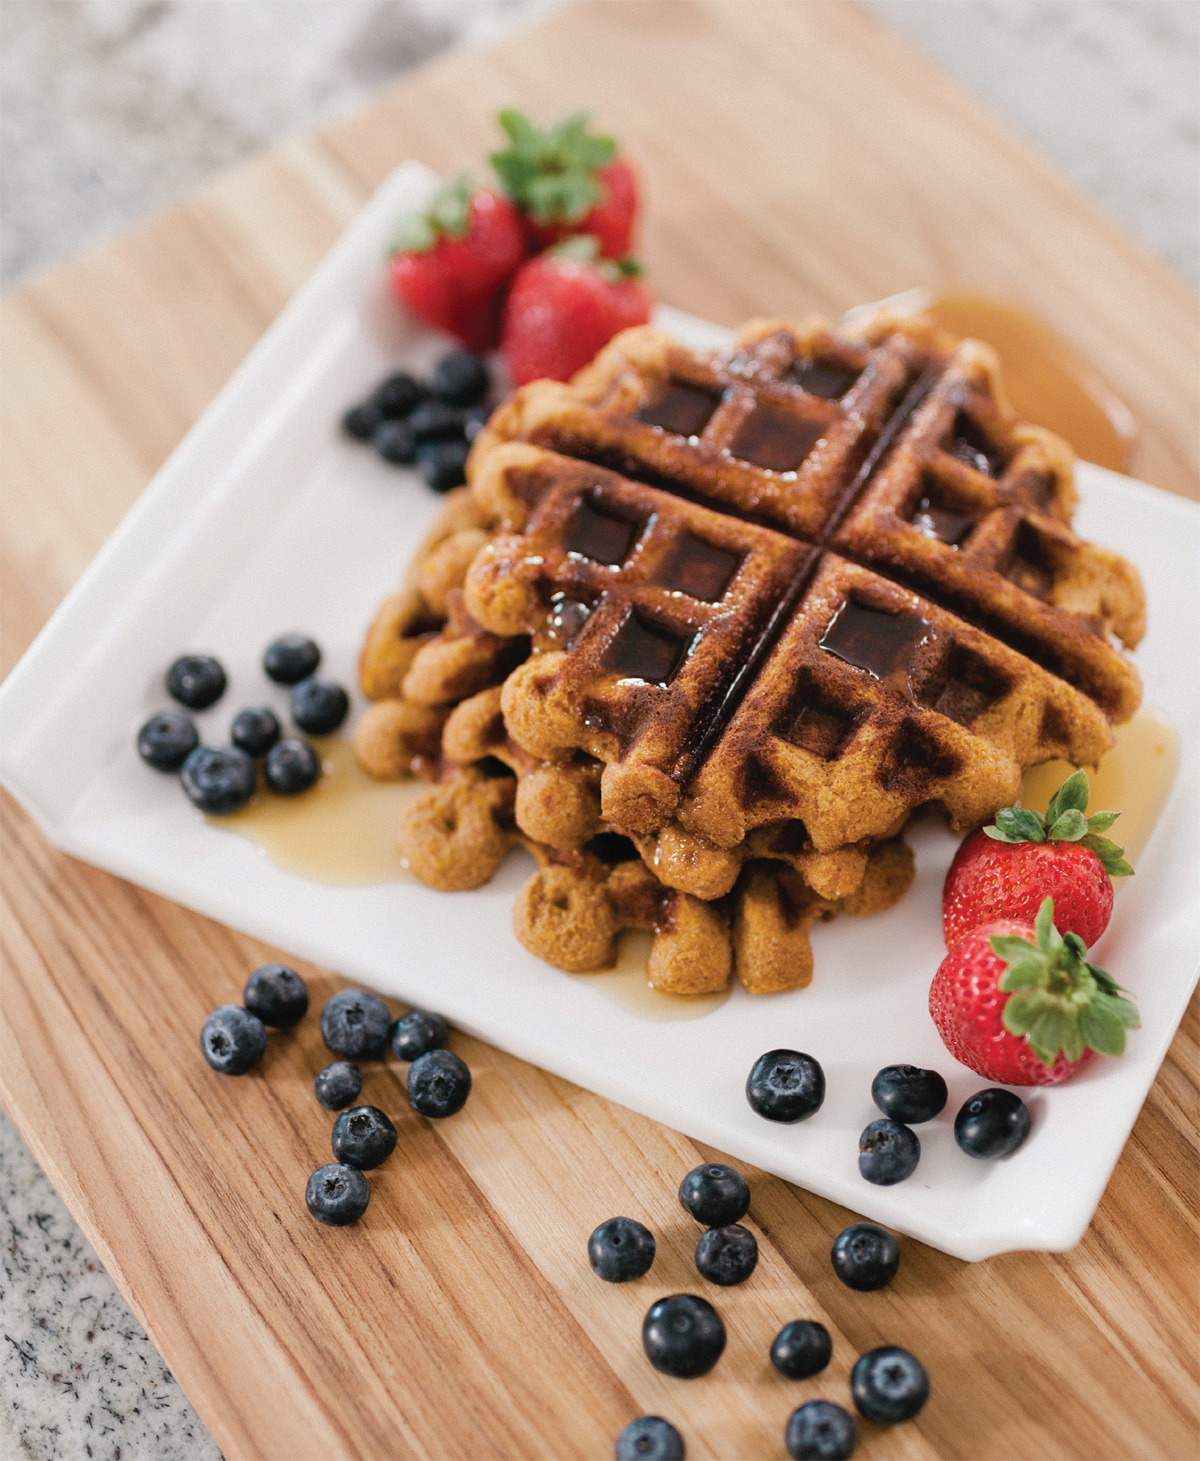
This is one of those recipes that after testing a few times, even I was surprised at how amazing the waffles turned out. Who knew the humble sweet potato could be turned into such an incredible yet healthy breakfast swap? I throw a few whole sweet potatoes in the oven if roasting veggies on Thursday or Friday to make these on Sunday morning in a snap. These waffles easily go from the freezer to the toaster to your plate.
MAKES 5 TO 6 WAFFLES | Gluten-Free, Dairy-Free, Vegetarian
WET INGREDIENTS
1 medium whole sweet potato, roasted, skin removed (about 2 cups if chopped into 1-inch pieces)
1 tablespoon virgin coconut oil
2 tablespoons real maple syrup
⅓ cup unsweetened almond milk
1 tablespoon vanilla extract
2 eggs
DRY INGREDIENTS
1 ½ cups almond flour
1 teaspoon baking soda
½ teaspoon cinnamon
¼ teaspoon salt
Roast the sweet potato whole at 400°F for 35 to 45 minutes, until you can pierce it easily with a fork. Let it cool at least 1 hour before using. It can be roasted up to 3 days in advance and stored in the refrigerator if desired.
Remove the sweet potato skin after it cools. Chop the roasted sweet potato into large chunks and add to a food processor along with the coconut oil, eggs, milk, maple syrup, vanilla extract, and cinnamon. Blend until smooth. Add the remaining dry ingredients to mixture in the food processor and blend until incorporated.
Spoon ½-cup batter into a waffle maker and cook according to the appliance’s instructions, approximately 5 minutes. (I have to set my ceramic waffle maker just shy of the maximum temperature to make these waffles.) When cooked, remove the waffles from your waffle maker and place them on a cooling rack to prevent the bottoms from getting soggy from steam. Serve with real maple syrup and top with fresh berries.
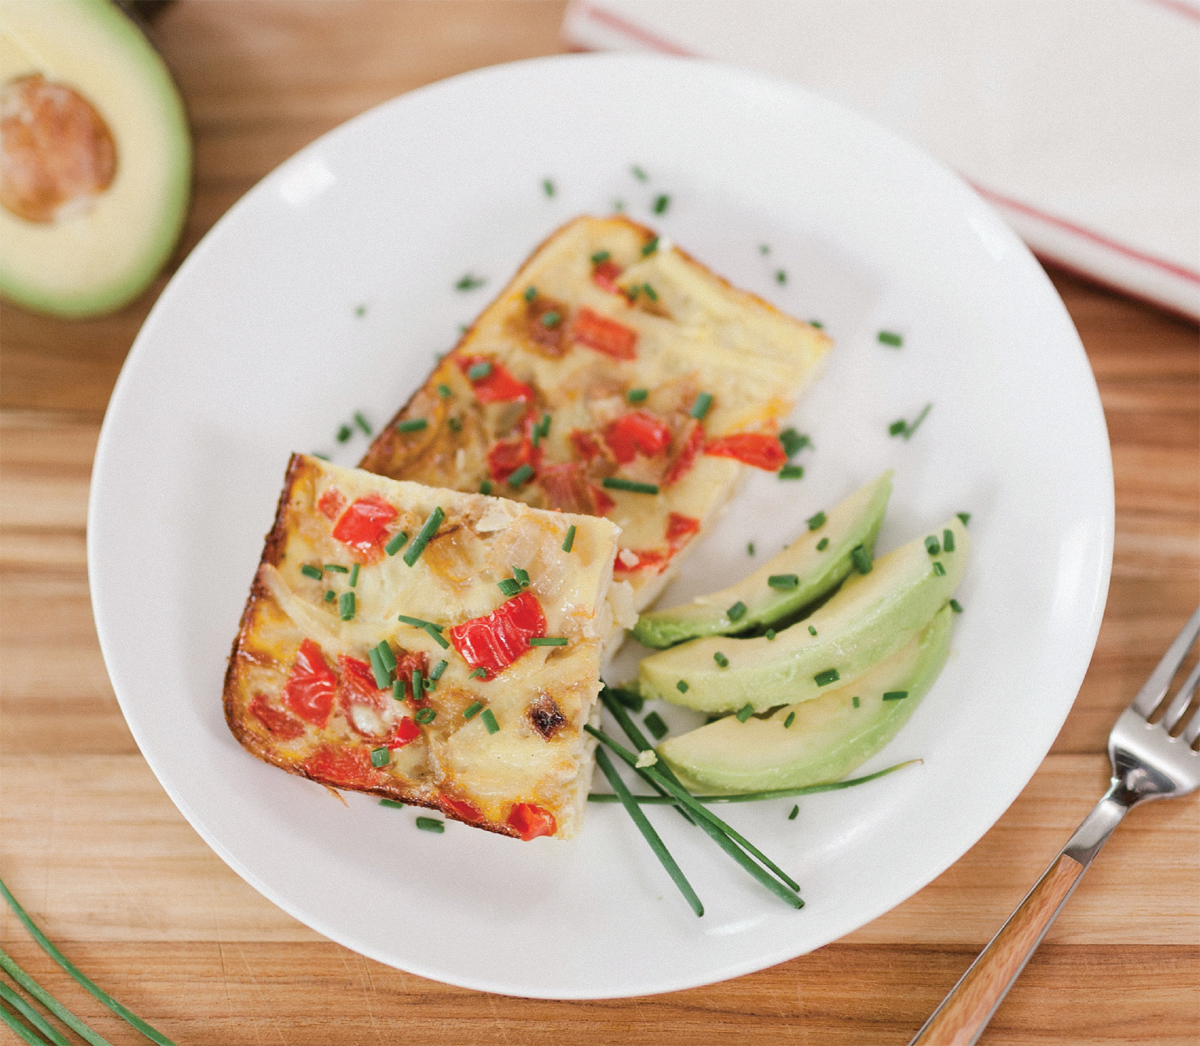
Hashbrown casserole is a mainstay in the American Midwest; it’s known for being delicious, but also unhealthy. It gets a total revamp and healthy makeover in this new and improved recipe, which is gluten-free, dairy-free, and big on flavor. This crowd-pleaser makes an excellent breakfast or brunch, and keeps in the refrigerator all week for a simple yet hearty meal any time of day.
MAKES 8 TO 12 SERVINGS | Gluten-Free, Dairy-Free
VEGGIES
2 tablespoons extra-virgin olive oil (dairy-free option) or ghee (not dairy-free)
1 medium onion, chopped
1 red bell pepper, chopped
2 garlic cloves, grated or pressed
½ teaspoon sea salt
Freshly ground black pepper
CASSEROLE
One 16-ounce package organic hash browns
10 eggs, preferably organic
⅓ cup unsweetened almond milk or nondairy milk of choice
½ teaspoon sea salt
Freshly ground black pepper
Healthy cooking spray for the pan (I use grapeseed oil or extra virgin olive oil)
FOR SERVING
Chives, optional
Avocado, optional
Fermented salsa, optional
Heat 2 tablespoons oil or ghee in a sauté pan over medium heat. Add the onion, red bell pepper, and garlic and sauté 5 to 6 minutes until soft and fragrant. Turn heat to medium-low and add the garlic. Cook another 2 to 3 minutes until the garlic is fragrant. Remove from heat and allow to cool for 5 minutes (as hot veggies might pre-cook the eggs).
While the veggies cool, spread the entire package of hash browns in the bottom of a 9 × 13-inch pan sprayed with grapeseed oil or another healthy cooking spray. Layer in the (slightly cooled) sautéed veggies.
Combine the eggs, almond milk, salt, and pepper in a separate bowl. Whisk together, then pour over the hash browns and veggies. Cover and let sit overnight in the refrigerator.
The next morning, preheat the oven to 350°F. Pull the casserole dish out of the fridge to let it come to room temperature while the oven preheats. Bake for 45 to 50 minutes, until the eggs are set and the top is crisp.
Garnish with chopped chives and serve with sliced avocado and fermented salsa (or salsa of your choice), if desired.
Mastering the art of the veggie frittata is key to every healthy cook’s repertoire. Frittatas are great warm, room temperature, or cold, and they store and pack well for simple meals on the go. This no-sugar-added, balanced meal will help keep your blood sugar stable and your energy levels high. The ingredients list includes my favorite combo of veggies, but this dish is flexible, so feel free to get creative or use up leftover veggies you have on hand.
MAKES 6 SERVINGS | Gluten-Free, Dairy-Free
6 eggs
⅓ cup unsweetened almond milk
¼ teaspoon sea salt
1 tablespoon extra virgin olive oil
1 cup shredded purple sweet potato
1 cup chopped broccoli florets
4 to 5 cremini mushrooms, sliced
2 red or Swiss chard leaves, stemmed and chopped
Garlic scape, optional
About ½ teaspoon sea salt, divided
Preheat the oven to 375°F.
Preheat the oil in a sauté pan over medium heat. Sauté the vegetables with a pinch of sea salt 4 to 5 minutes or until soft.
While veggies are cooking, grate the sweet potato onto a plate or cutting board. Whisk the eggs, almond milk, and ¼ teaspoon sea salt in a medium bowl. Mix the sautéed vegetables (broccoli, mushrooms, chard, and the garlic scape, if using) with the potato and add to a 10-inch pie pan or cooked quiche crust.
Pour the egg mixture over the veggie-potato mixture. Cook for 15 to 20 minutes, until the eggs are set.
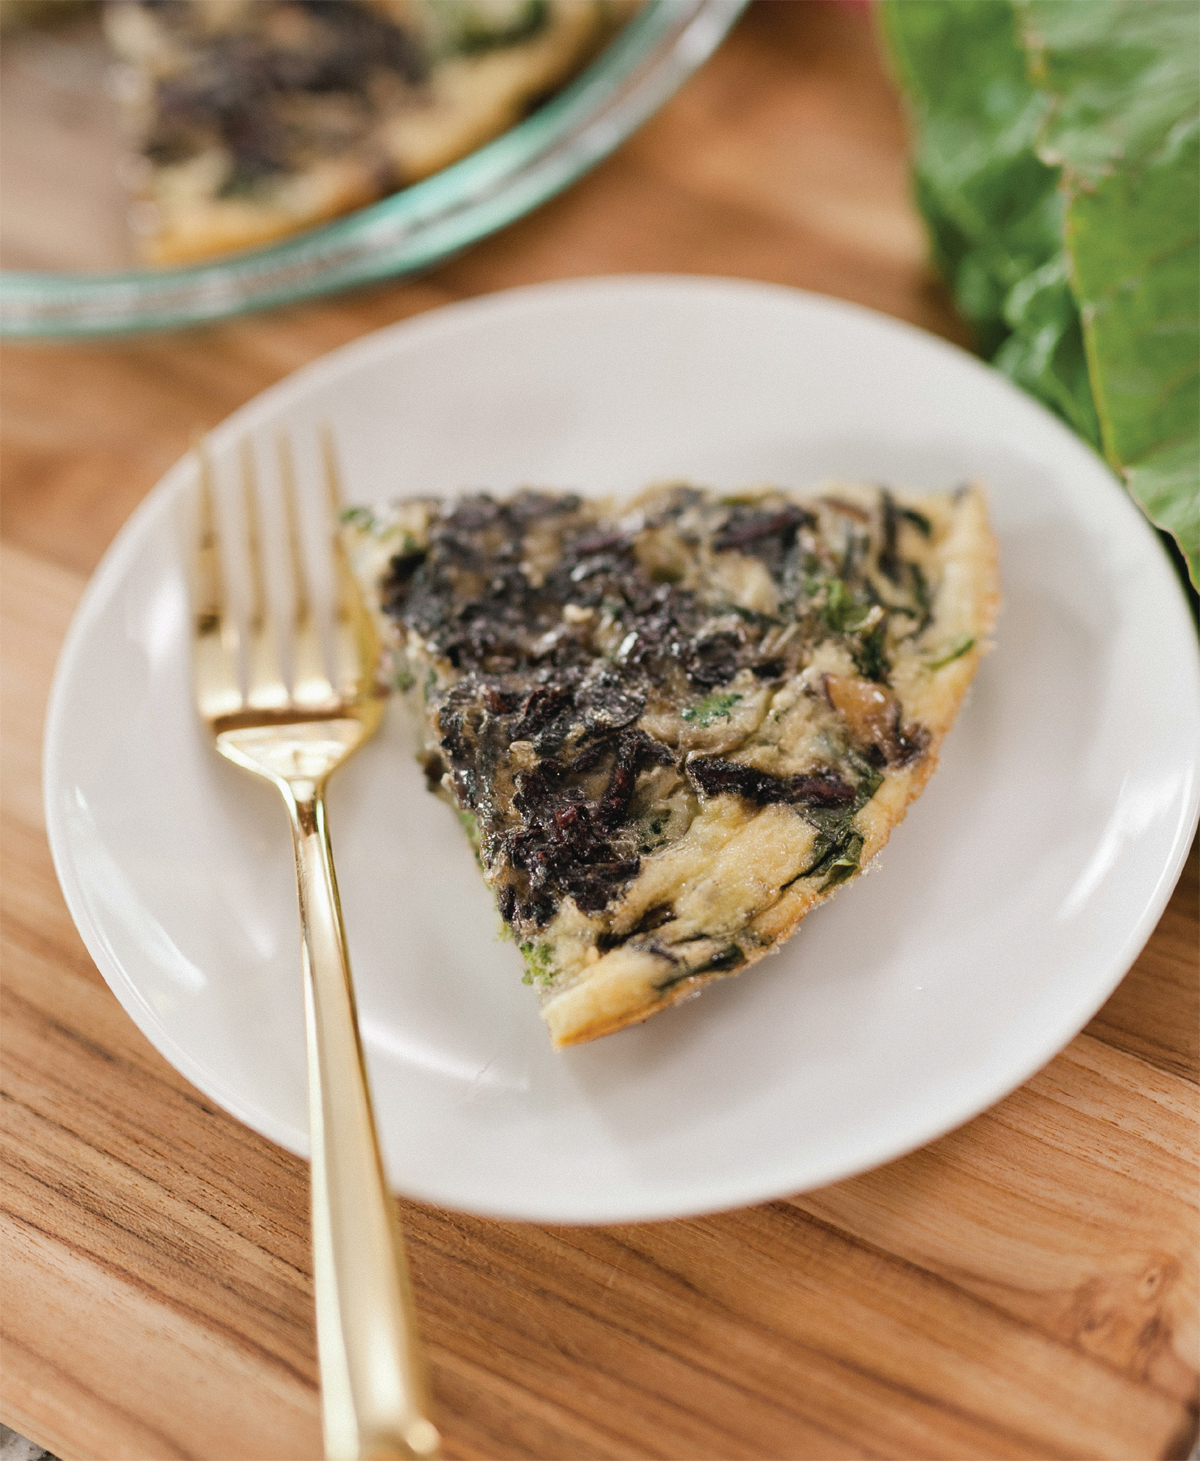
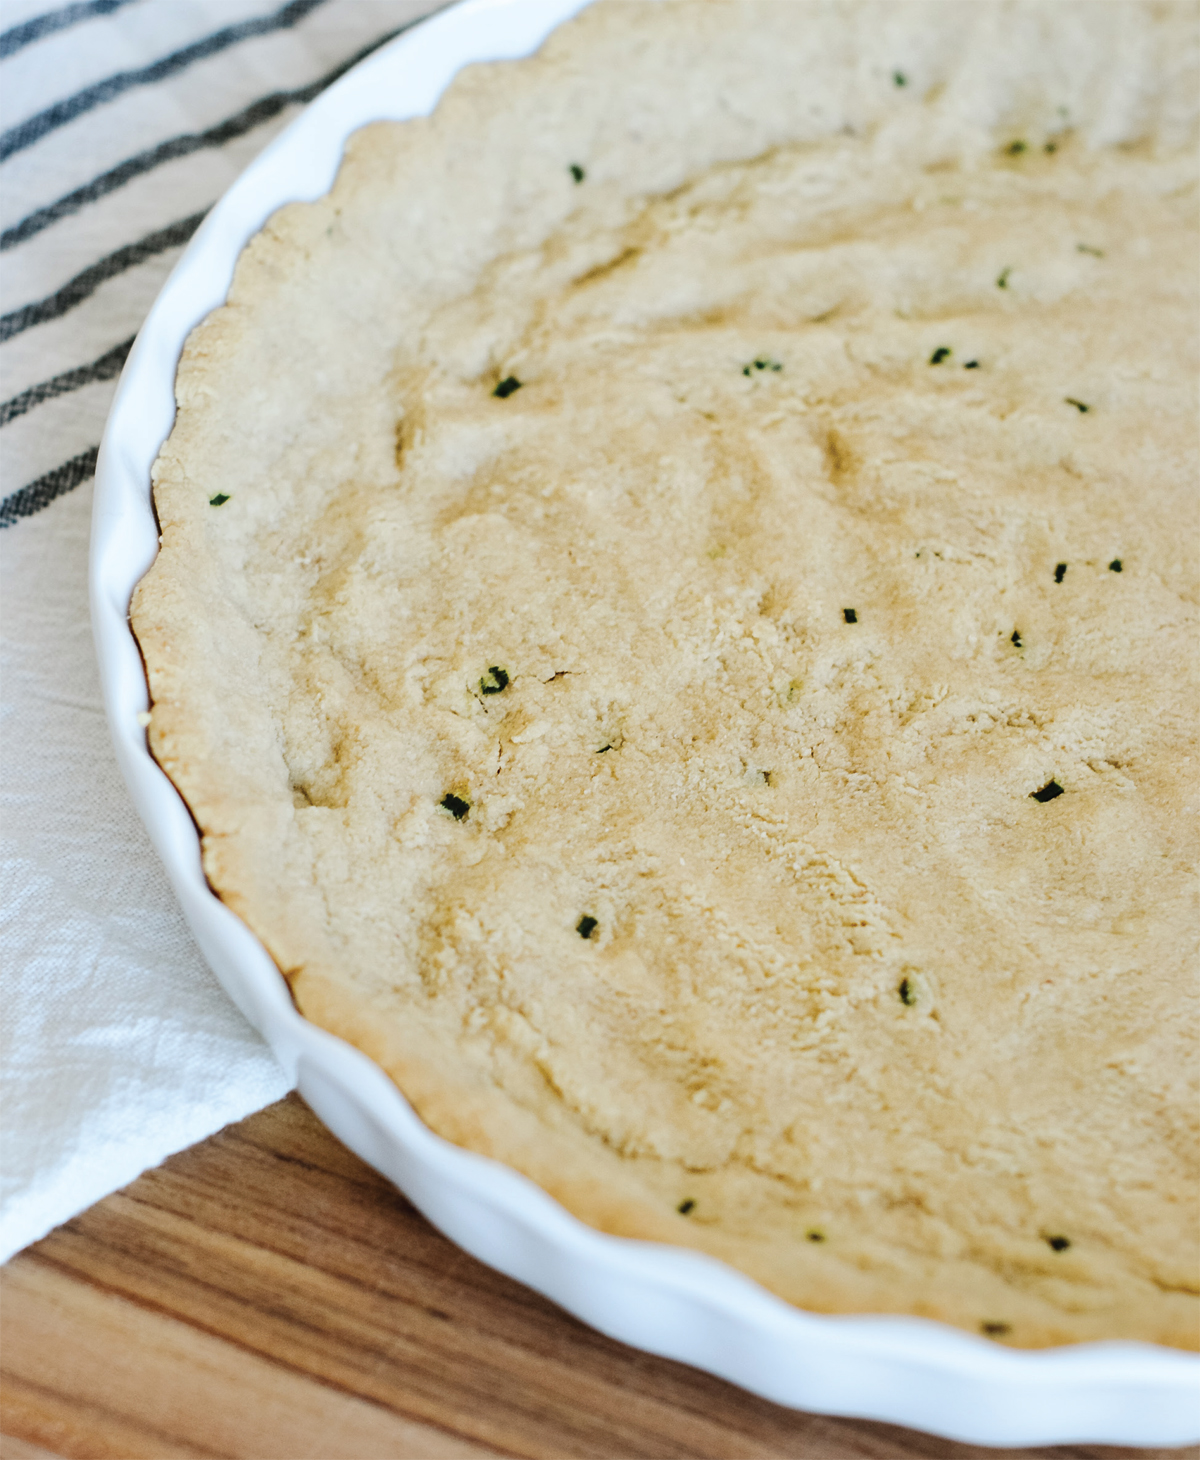
Turn any frittata into a healthy version of a traditional quiche by baking it inside this crust. Traditional quiche crust is made with highly processed white flour that has no nutritional benefits. Replacing it with this almond flour-based crust keeps it low-glycemic and adds nutrients, a little healthy fat, and fiber to your dish. This recipe makes one 10-inch quiche crust. It’s best if left in the pan you bake it in. You can make it up to one day ahead of time, then cover and store in the refrigerator until it’s time to use. This quiche crust needs to be baked before you pour the raw egg frittata mixture inside. Simply bake the crust and let it cool, then use the Flexible Veggie Frittata recipe on the previous page for the filling. This is a great way to use up any leftover sautéed or roasted veggies!
MAKES 1 10-INCH CRUST | Gluten-Free, Dairy-Free, Vegan
2 cups almond flour
½ teaspoon sea salt
½ teaspoon baking soda
¼ cup extra-virgin olive oil
2 tablespoons filtered water
1 tablespoon freshly chopped chives, optional, for an extra-savory flavor
Preheat the oven to 350°F.
Gently mix the almond flour, sea salt, and baking soda in a large mixing bowl until combined, being careful not to overpack the flour. Gently make a well in the middle of the bowl, then add the olive oil and water. Mix the ingredients with a large wooden spoon or spoon-shaped spatula until a well-combined dough forms. Transfer the mixture to a 10-inch pie pan. Using your fingers, press and shape the dough mixture about ⅛ inch thick around the pie pan and up the edges to form the crust. Bake for 12 to 15 minutes, until cooked through and set.
Let the crust cool before adding a filling such as the mixture for the Flexible Veggie Frittata. In general, most fillings will bake for 20 to 30 minutes in a pre-cooked quiche crust. Bake until the eggs are set.
If you love yogurt, you’re going to love this vegan option made from coconut milk. Loaded with probiotics, protein, and fiber, this recipe is sure to become a household favorite. Pair with your favorite fruits or vegetables, or use as dipping sauce for a tasty nutrient-packed snack.
MAKES 4 ½–CUP SERVINGS | Gluten-Free
2 cans coconut milk, separated (see note)
2 grams probiotic powder*
*Make sure to use probiotic powder that contains lactobacillus bacteria.
Flip the cans of coconut milk over from how they were stored—usually the coconut water and coconut cream will separate with the cream on top. Open the cans and pour off the coconut water. Reserve the coconut water for a smoothie or other recipe.
Combine the coconut cream and probiotic powder in a clean pint-size mason jar. Place in the oven—with the oven temperature turned off, but the oven light on—for 24 to 36 hours. The probiotics will ferment the coconut cream and turn it into yogurt in the slightly warmed oven. Again, the oven should remain off, but the oven light should be on.
After 24 to 36 hours, remove the yogurt from oven and let sit 10 minutes at room temperature to cool. Taste for tanginess, which indicates that it fermented properly. It will be a little thin and runny because it is warm but will set and thicken as it cools.
Refrigerate the yogurt after it comes to room temperature (about 1 hour after you remove it from the oven). Let chill in the refrigerator at least 2 hours before serving to allow the yogurt to thicken. It will keep for 1 to 2 weeks in the refrigerator.
NOTE: For the coconut cream, use just the cream from a can of coconut milk. Refrigerate the can overnight to ensure separation of the cream from the milk.
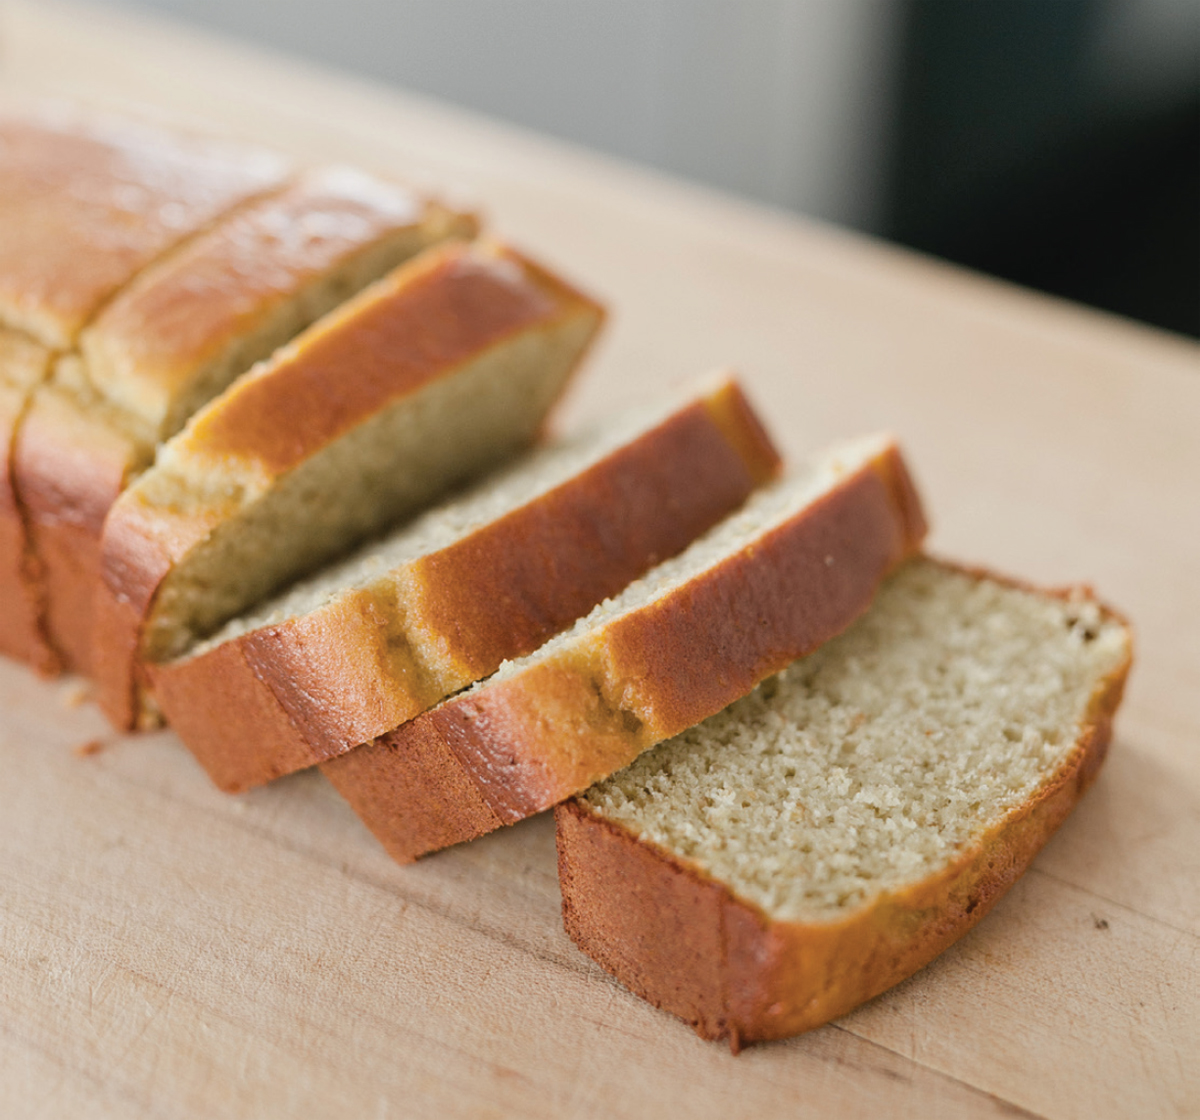
If you’ve been looking to cut down on highly processed breads and starches, then you will love this bread. I wrote this recipe a few years ago and it’s now one of the most popular almond flour bread recipes on the Internet. This version is delicious, gluten-free, and high in protein.
MAKES 10 TO 12 SERVINGS (1 TO 2 SLICES PER SERVING) | Gluten-Free, Dairy-Free
2 ¼ cups blanched almond flour
¼ cup ground flaxseed
½ teaspoon baking soda
½ teaspoon finely ground sea salt (such as Real Salt)
5 eggs
½ tablespoon honey
1 tablespoon extra-virgin olive oil
1 tablespoon apple cider vinegar
Preheat the oven to 350°F. Combine the dry ingredients in a food processor and pulse them until well combined, about 10 pulses. Add the wet ingredients and mix until well combined, about 30 seconds. Scrape down the edges.
Pour the dough (it will be like a very thick batter) into a greased 9 × 5-inch bread pan; there will be enough to fill the pan about halfway up. Bake for 30 to 35 minutes, or until a toothpick inserted into the center comes out clean. Let the bread cool in the pan for 30 minutes before serving.
Chia seed jam seems too good to be true, but it’s real! I’ve read recipes for it over the years and I can’t believe it took me this long to try it. It’s seriously so easy to make and it’s so good for you. I like it slathered on a fresh slice of almond flour bread.
MAKES ABOUT 10 OUNCES | Gluten-Free, Dairy-Free
2 cups frozen mixed berries
1 teaspoon fresh lemon juice
2 tablespoons raw honey, more or less to taste
2 tablespoons chia seeds
Place the fruit, lemon juice, and honey in a small saucepan over medium-high heat. Simmer for 15 minutes until the mixture bubbles and breaks down. Remove from the heat and stir in the chia seeds until well combined. Let the mixture sit for at least 15 minutes to allow the chia seeds to gelatinize.
The jam will keep in an airtight glass container in the refrigerator for up to 10 days.

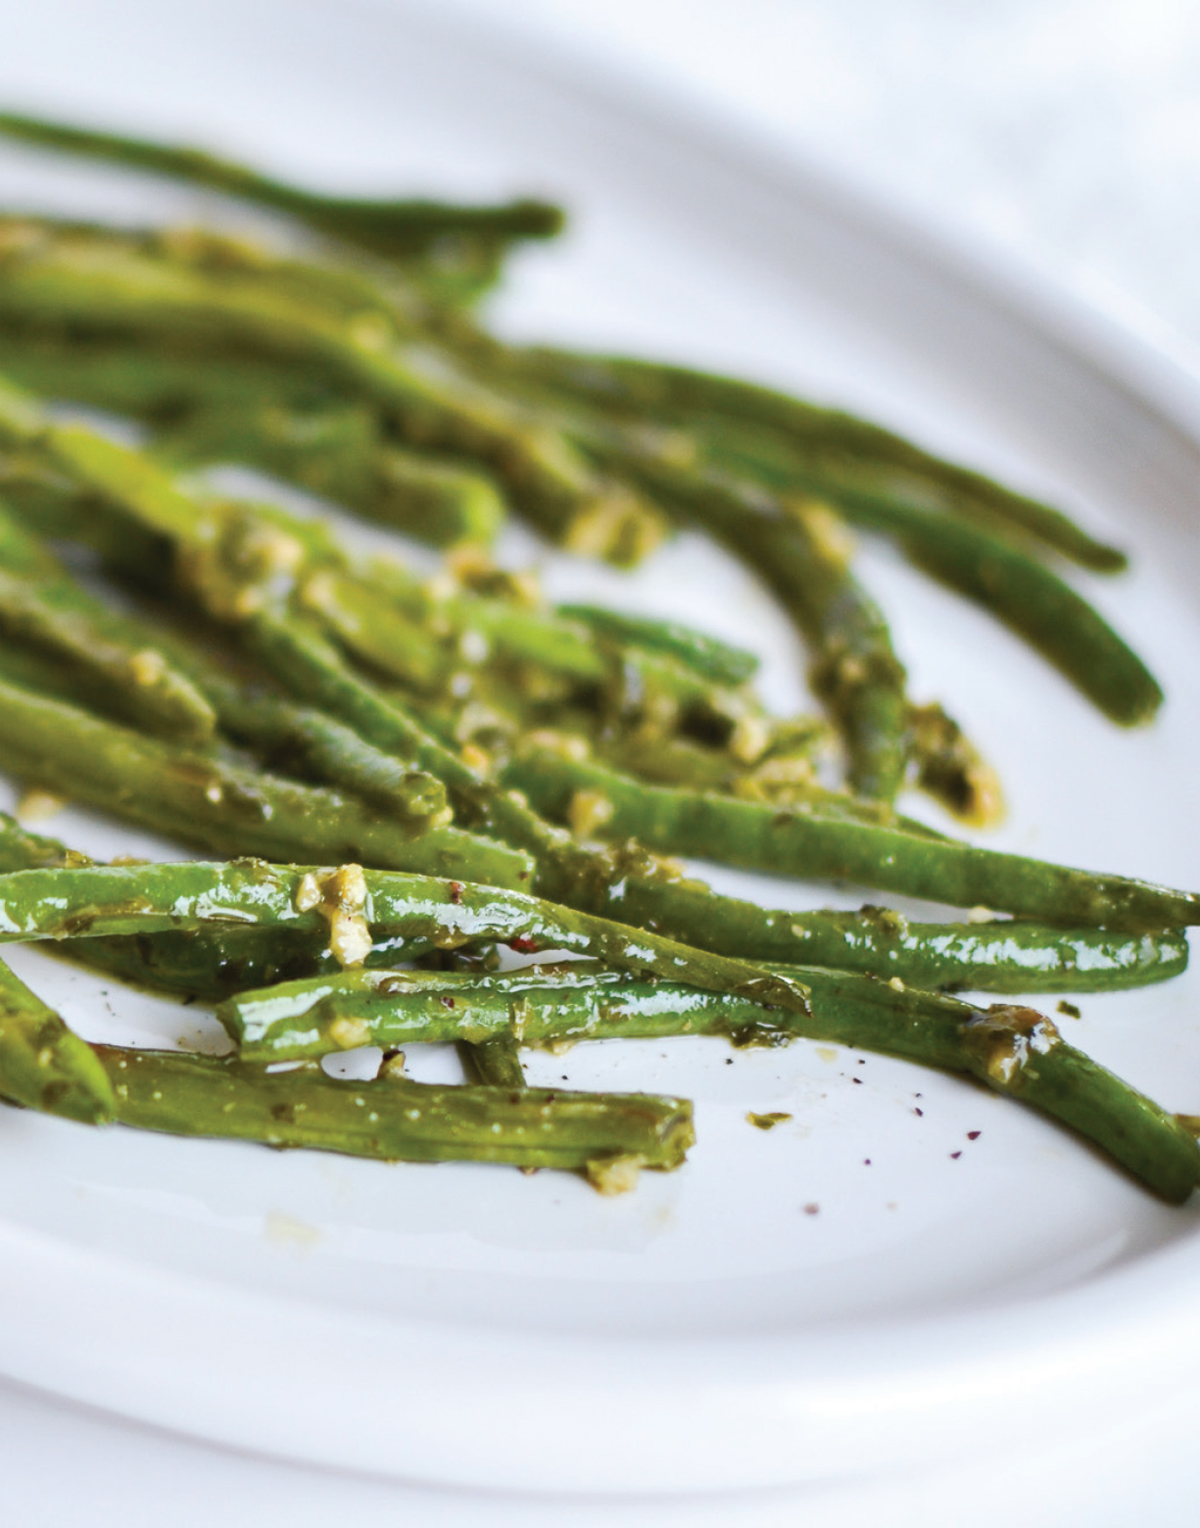
I call this Magic Sauce because it tastes good on anything and everything. Use it as a dip, spread or drizzle it over roasted meat or fish. Toss roasted veggies or potatoes in it, or mix it with spaghetti squash noodles, rice noodles, or any other noodle you can think of. It’s the one sauce that does it all. It also freezes well, so make a double batch for an easy meal later on. I make this year-round, and it’s in heavy rotation in the spring and summer when I can grab some of the fresh herbs out of my own garden. I gently cook the garlic to infuse the oil and prevent the overpowering taste of raw garlic that you can stay with you for days. Magic Sauce instantly turns just about anything into a wow dish.
MAKES ABOUT 1 CUP (8 SERVINGS) AND CAN BE DOUBLED OR TRIPLED EASILY | Gluten-Free, Dairy-Free, Vegan
⅔ cup extra-virgin olive oil
2 garlic cloves, smashed open
¼ cup fresh basil
2 tablespoons fresh mint
1 tablespoon fresh cilantro
1 tablespoon unsalted sunflower seeds
2 inches of the white part of a scallion (green onion), chopped
½ teaspoon lemon zest
1 tablespoon fresh lemon juice
1 tablespoon red wine vinegar
½ teaspoon raw honey
Pinch of red pepper flakes
¾ teaspoon sea salt
¼ teaspoon freshly ground black pepper
Gently heat the oil in a small pan with the garlic cloves to infuse the oil with flavor and gently cook the garlic (it should not brown). Do not boil or overheat the oil. Remove from the heat and let cool while you prepare the other ingredients. Place all the remaining ingredients and the cooled cooked garlic in a food processor and pulse 8 to 10 times until well chopped. Scrape down the sides, then turn the food processor on and drizzle in the oil. Mix until saucy. You can also do this in a blender, just be careful not to over-puree—it’s nice with a little bit of texture left. Use immediately or store in an airtight glass container in the refrigerator for up to 5 days. The sauce also freezes well.

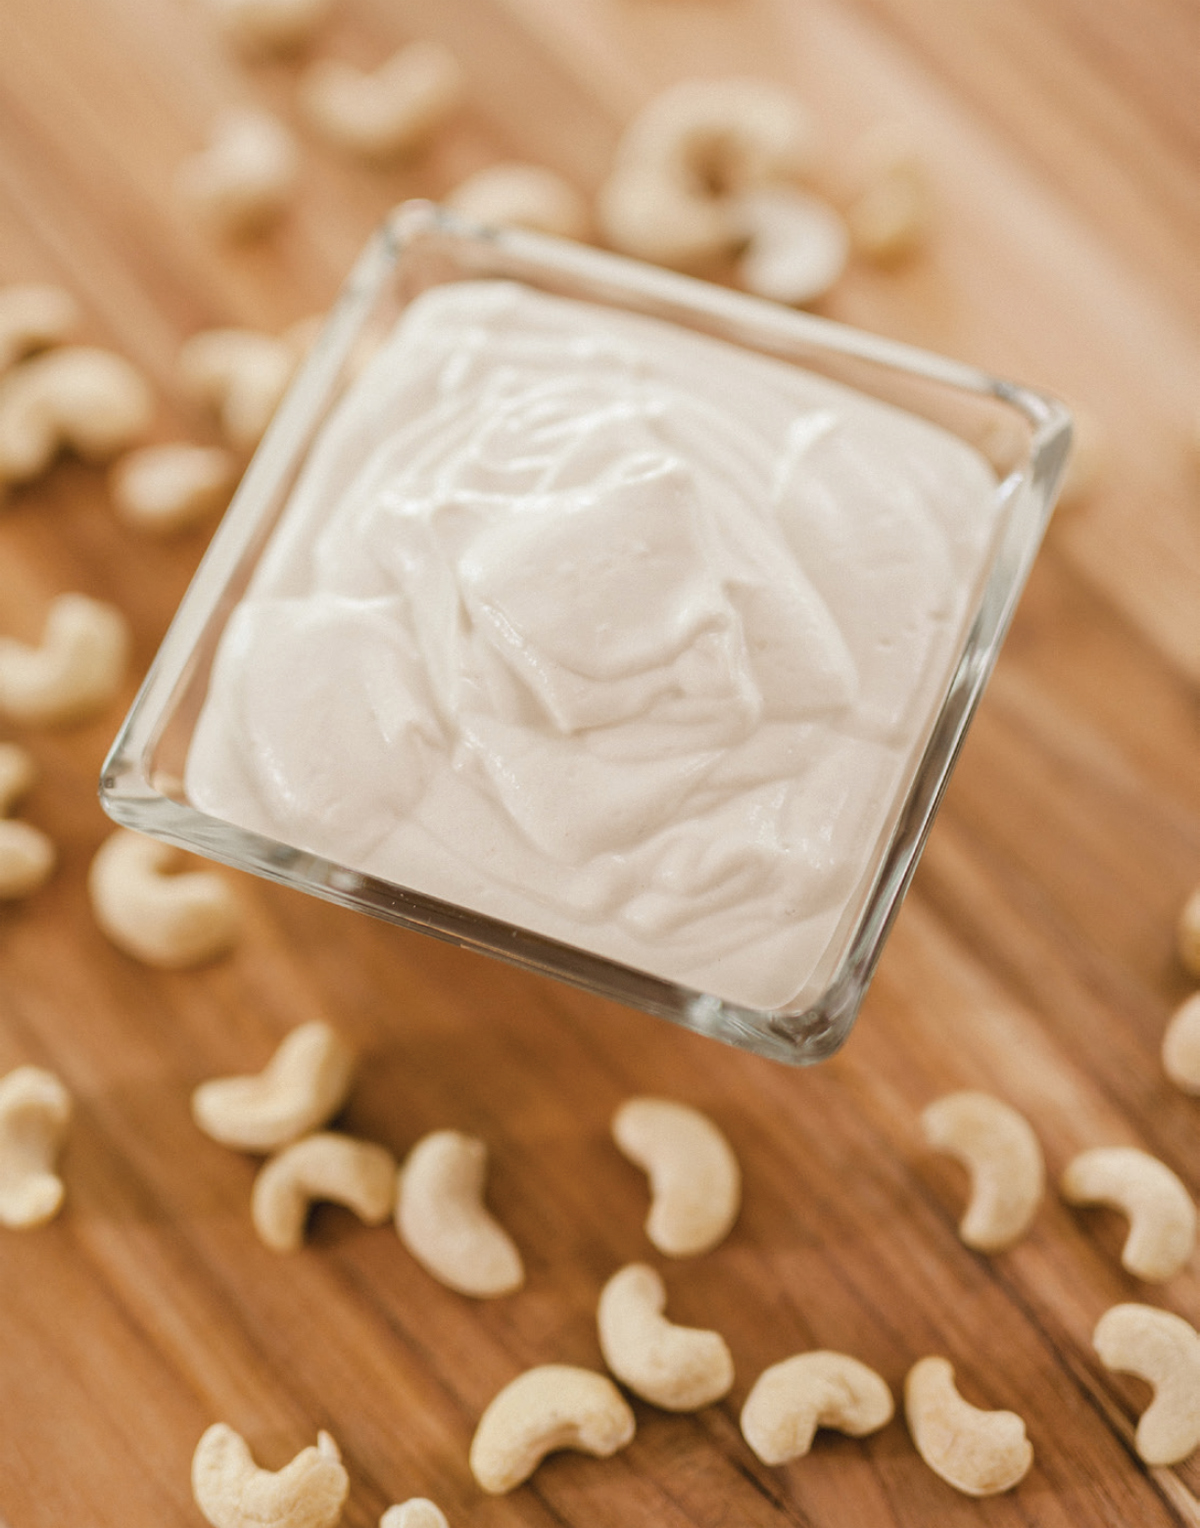
This is a great option for those who are looking for a vegan and dairy-free alternative to cream cheese. This easy-to-make cashew cream is a nourishing and delicious recipe that can be used as a base for other plant-based recipes.
MAKES 2 ½ CUPS | Gluten-Free, Dairy-Free, Vegan
2 cups cashews, soaked overnight or quick-soaked in hot water for 30 to 45 minutes
1 cup filtered water, more or less to blend
¼ teaspoon sea salt
Drain and rinse the cashews. Blend all the ingredients in a high-speed blender (I use a Vitamix) to a very smooth, creamy consistency. Refrigerate for up to 1 week, or freeze for up to 3 months.
This makes a wonderful sauce that adds a great cheesy, nutty flavor to a variety of dishes. It will quickly become a permanent addition to your family’s recipe rotation.
MAKES 2 SERVINGS | Gluten-Free, Dairy-Free, Vegan
1 large garlic clove
½ cup raw cashews
¼ cup raw pumpkin seeds
2 cups fresh basil leaves
1 teaspoon lemon zest
1 lemon, juiced
¼ teaspoon sea salt, or more to taste
1 to 2 teaspoons plus ¼ cup extra virgin olive oil
Place the garlic in a food processor and run until it is well minced. Add the cashews, pumpkin seeds, basil, lemon zest, lemon juice, and sea salt. Run the food processor continuously and slowly stream in the extra virgin olive oil through the top spout. Stop and scrape down the sides.
Continue to process until the mixture is smooth, adding a touch more olive oil as needed. You may also add up to ¼ cup of water to thin down the pesto if you will be using it as a sauce.
SERVING SUGGESTION: Gently toss with spaghetti squash noodles or brown rice noodles for a delightful vegan pesto pasta.

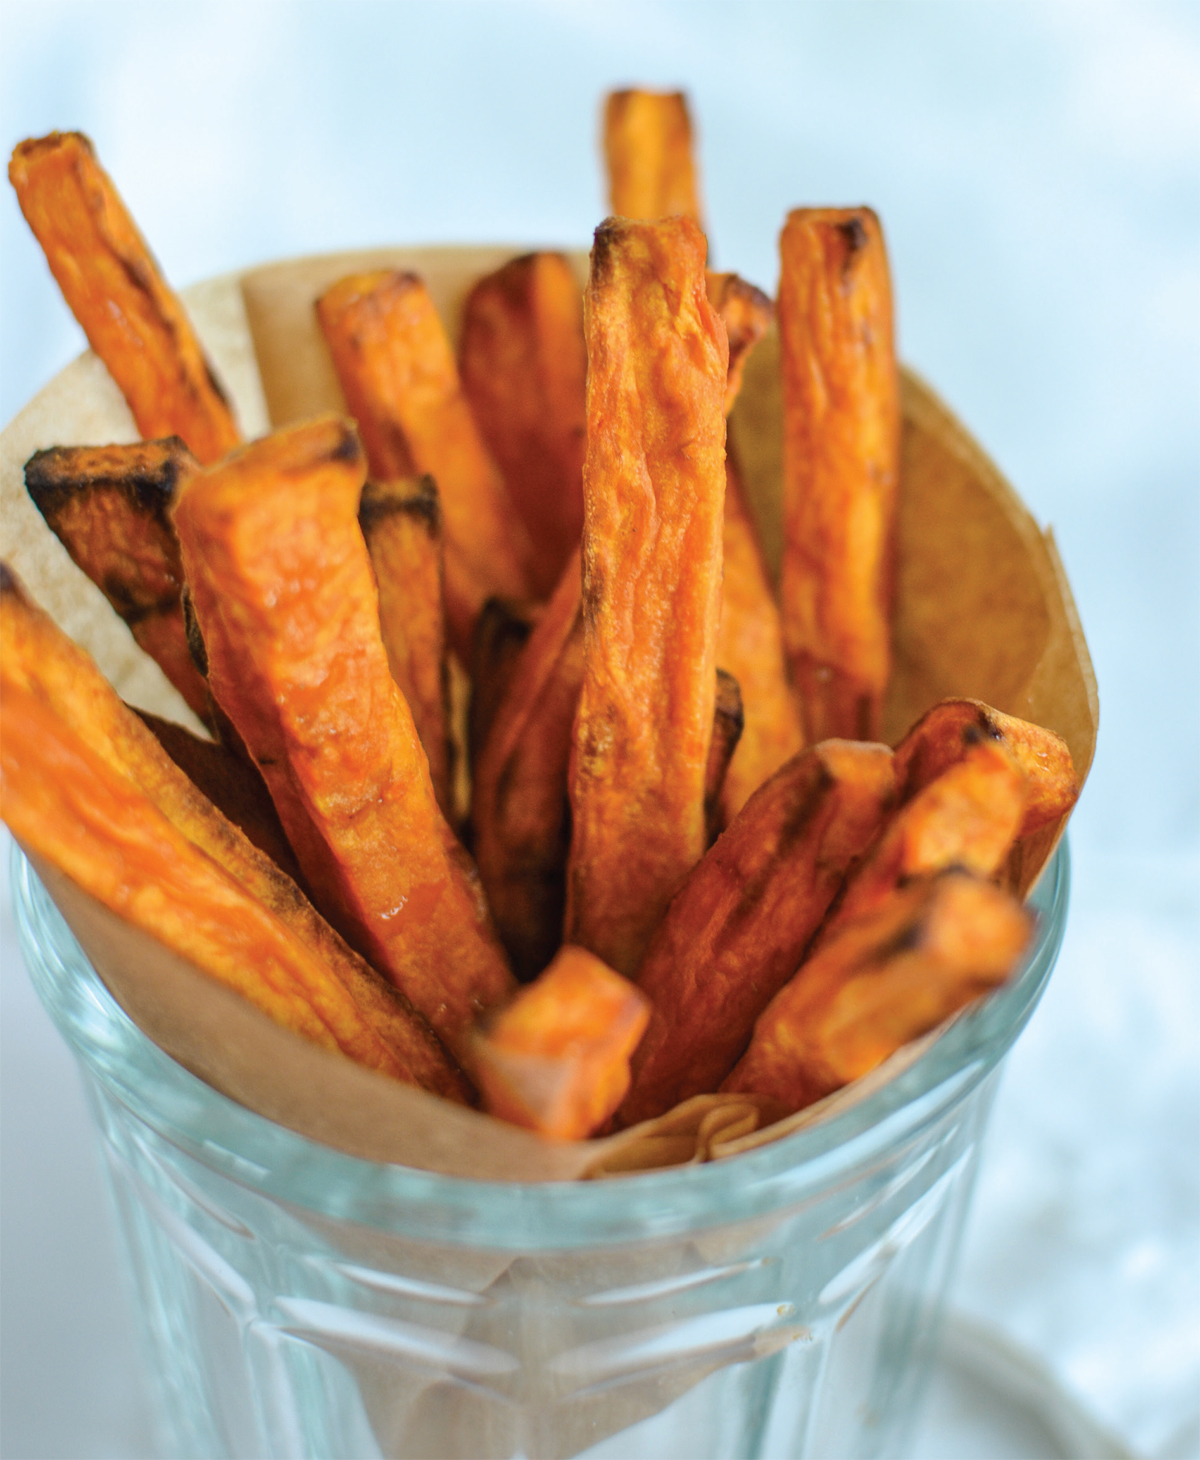
These really hit the spot when a fry craving hits. I like to leave the skins on for extra fiber and texture. Look for long-shape sweet potatoes that are evenly round if possible, as these will give you an even cut in your fries. The key is to cut all the fries into as close to the same size as possible for even cooking, and don’t put them too close together on the baking rack to prevent them from steaming.
MAKES 4 SERVINGS (THIS RECIPE CAN BE DOUBLED OR TRIPLED EASILY) | Gluten-Free, Dairy-Free, Vegan
2 medium sweet potatoes
1 ½ teaspoons extra-virgin olive oil
Sea salt
Preheat the oven to 400°F. If you have a cooling rack (the wire rack that sometimes comes with a baking sheet that you can cool cookies on), use it for even more evenly cooked fries. Line your baking sheet with parchment paper for easy cleanup. If using it, place the cooling rack over the parchment paper.
Carefully slice each cleaned and fully dried sweet potato into ¼-inch disks the long way vertically. Remove the end piece and use that as the bottom to now stack those disks and slice again the long way, leaving you with ¼-inch “fries.” Toss with a small amount of extra-virgin olive oil to coat. The potatoes should be coated but not drenched as too much oil will prevent them from getting slightly crispy. Season with a few big pinches of sea salt. Arrange the potatoes on the baking rack (or directly on the parchment paper) and cook for 20 to 30 minutes, turning each fry over once halfway through. Use a set of tongs to quickly turn each one—trust me, it’s worth the set for evenly cooked fries. Cook until the fries are just golden and let them cool before serving.
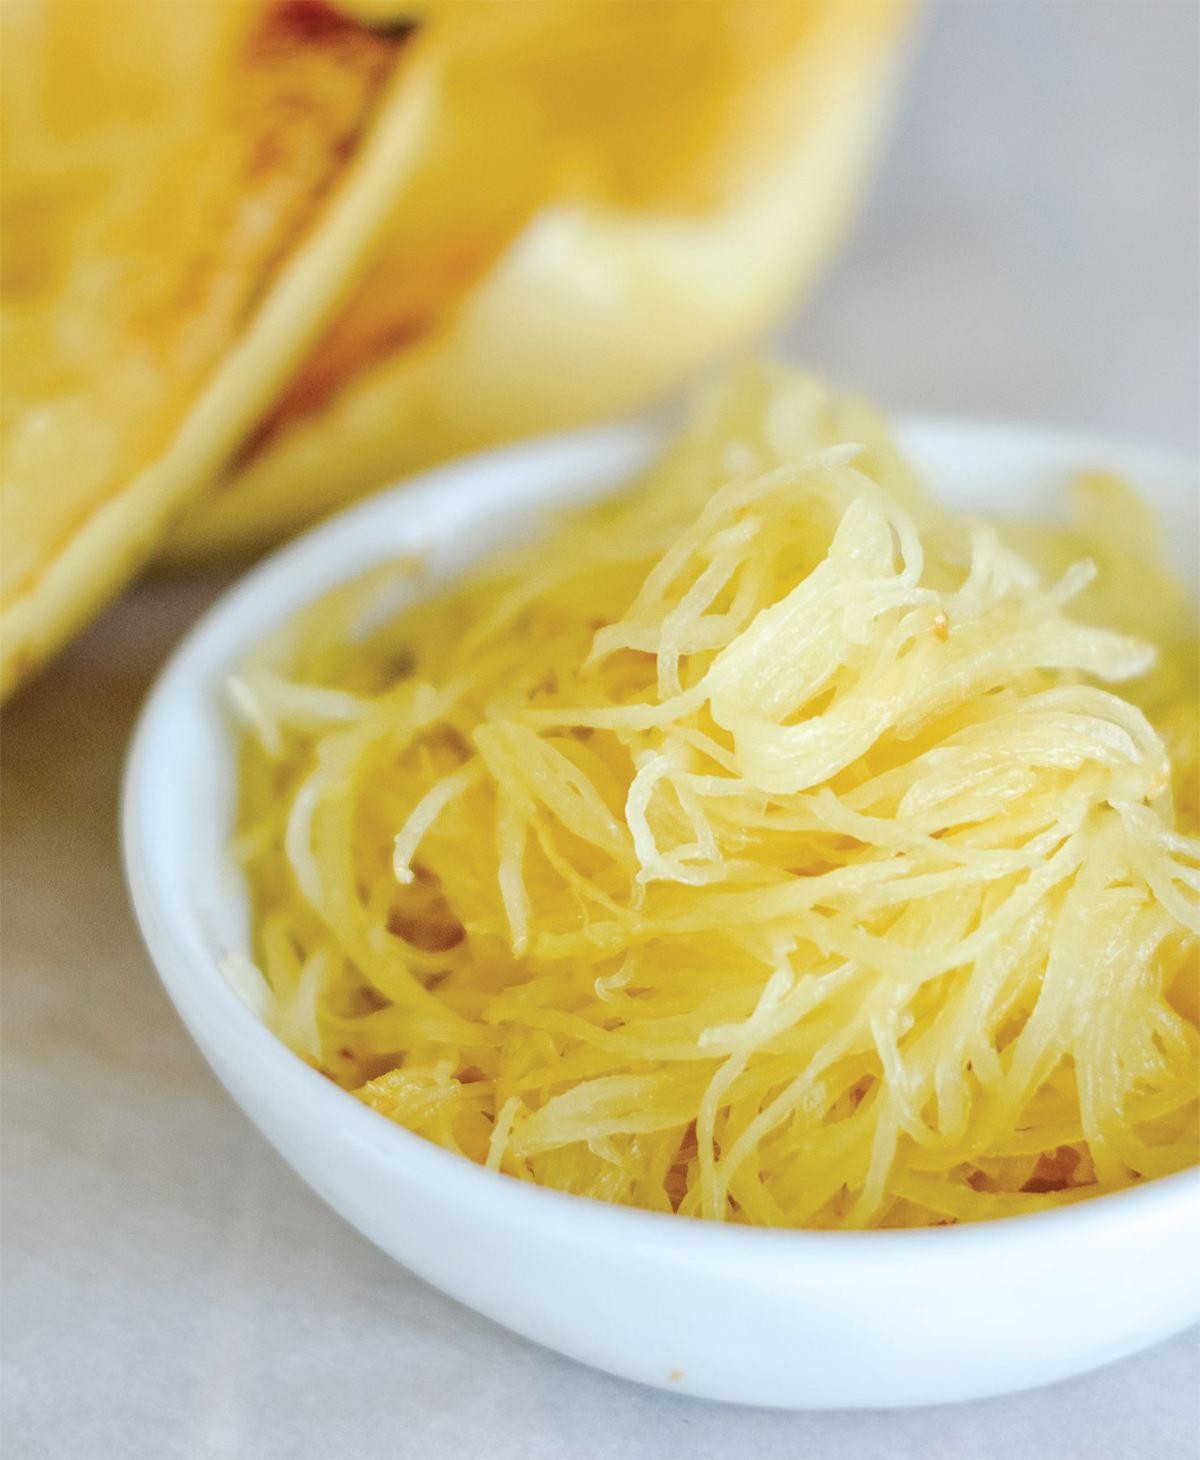
Noodles that aren’t noodles? Simply amazing. I love spaghetti squash because it has great flavor, and when it’s prepared correctly, it really does have the texture of noodles. (Win.) It’s also loaded with vitamins, minerals, antioxidants, and fiber. (Double win.) I like to serve this with my Cashew Basil Mint Pesto or marinara sauce.
MAKES 8 SERVINGS | Gluten-Free, Dairy-Free, Vegan
1 spaghetti squash
1 teaspoon extra-virgin olive oil
Sea salt and pepper to taste, optional
Preheat the oven to 400°F. If desired, line a baking sheet with parchment paper for easy cleanup.
Slice the top and bottom inch off the spaghetti squash. Some people prefer to leave the top on, but at least slice off the bottom to make it stable when you cut it lengthwise. Next, slice the squash in half lengthwise. Use the largest knife you have and go slow; it might take a few minutes.
Scrape out all the seeds and stringy flesh using a spoon. Brush the cut flesh of the spaghetti squash with a little extra-virgin olive oil and place it cut side down on the parchment-lined baking sheet. In very dry climates, you can add 1 or more tablespoons to the baking sheet if needed to retain moisture. I typically don’t do this because I find it can make the noodles too wet, but in a very dry climate, this might help if your noodles seem too dry.
Roast the squash for 30 to 40 minutes, until the flesh is fork tender and completely cooked through. Let it rest for at least 15 minutes, or until it’s cool enough to handle. Using a fork, start at one end and scrape the “noodles” out lengthwise. Voilá! You’ve got “noodles.”
Toss with any sauce, or just a dash of extra-virgin olive oil and salt and pepper to taste. Serve hot, warm, or even chilled. Store in an airtight glass container in the refrigerator for up to 2 days.
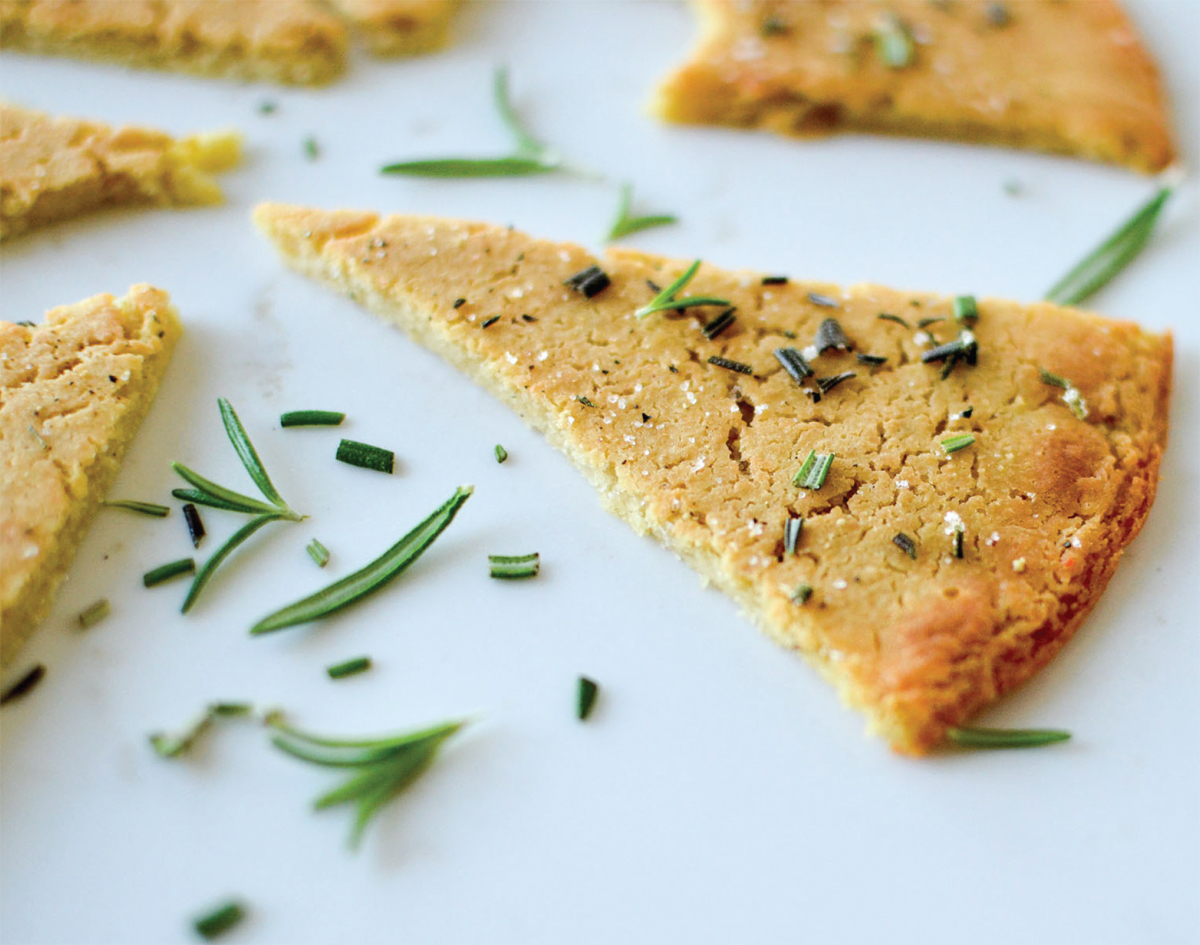
If you’re like I was and not familiar with socca, it’s basically a hybrid between a chickpea flour pancake and flatbread. It’s originally from the south of France and north of Italy (where it’s called farinata) and served warm with herbs and often paired with a glass of rosé wine. On the health side, socca makes a fantastic naturally gluten-free flatbread, pizza crust, or bread-like snack. This recipe is written specifically for a 12-inch cast-iron skillet, which is critical to the success of this method.
MAKES 4 SERVINGS | Gluten-Free, Dairy-Free, Vegan
1 cup chickpea flour (aka garbanzo bean flour)
1 cup filtered water, room temperature
3 tablespoons extra-virgin olive oil, divided
½ teaspoon fine sea salt (I use Real Salt)
2 tablespoons chopped rosemary or other herbs of choice for garnish
Preheat the oven to 425°F. Allow it to come up to temperature before heating your 12-inch cast iron skillet in the oven (see below).
Prepare the socca batter: Combine the chickpea flour and salt in a medium mixing bowl. Using a whisk, stir in the water until a smooth batter forms. Using the whisk, stir in 2 tablespoons extra-virgin olive oil until the batter is well combined and smooth. You don’t need to whip air into the batter, the whisk just helps make it smooth.
Allow the batter to rest at least 30 minutes and up to 2 hours. This is an important step, so don’t skip it; 30 minutes is just enough time to allow your oven to come up to temperature and preheat the cast-iron skillet.
Place your empty cast-iron skillet in the preheated oven (after the oven reaches 425°F) and let it heat in the oven for 15 minutes. This gets the skillet nice and hot and allows for even cooking.
Carefully remove the heated skillet from the oven with oven mitts. Swirl 1 tablespoon of extra-virgin olive oil around the hot skillet, then pour in your batter. Return the skillet to the oven and turn the oven to broil. Bake under the broiler for 7 to 10 minutes until the socca is cooked through and set. The socca is done once it pulls away slightly from the sides of the skillet and the edges are brown.
Once the socca is prepared, add your favorite toppings. I like to sprinkle mine with freshly chopped rosemary and an additional small sprinkle of sea salt.
MAKES 1 CUP | Gluten-Free, Dairy-Free, Vegan
½ cup balsamic vinegar
½ cup extra-virgin olive oil
1 teaspoon
whole-grain mustard
¼ teaspoon sea salt
⅛ teaspoon freshly ground black pepper
Place all the ingredients in a container with a tight-fitting lid (a mason jar works great). Shake vigorously for 30 seconds until emulsified. You can also emulsify your vinaigrette in a blender or food processor (work on low, increasing the speed as you stream in the oil last). I only use a blender when working in extra-large quantities. Up to about a cup, shaking it like crazy in a mason jar works great (and there’s way less cleanup).
Alternatively, you can whisk all the ingredients except the olive oil in a small bowl, then stream in the olive oil while you continue to whisk until the dressing has emulsified.
For a single serving, use 1 tablespoon each of vinegar and oil, a small dab of mustard (about ⅛ teaspoon), and just a small pinch of salt and pepper.
MAKES 1 CUP | Gluten-Free, Dairy-Free
¼ cup raw honey
¼ cup Dijon mustard (I prefer Sir Kensington’s)
¼ cup apple cider vinegar
¼ cup extra-virgin olive oil
1 pinch of fine sea salt
A few turns of freshly ground black pepper
Whisk all the ingredients together. Alternatively, combine all the ingredients in a mason jar and shake until emulsified. Store in an airtight glass container in the refrigerator for up to 5 days.
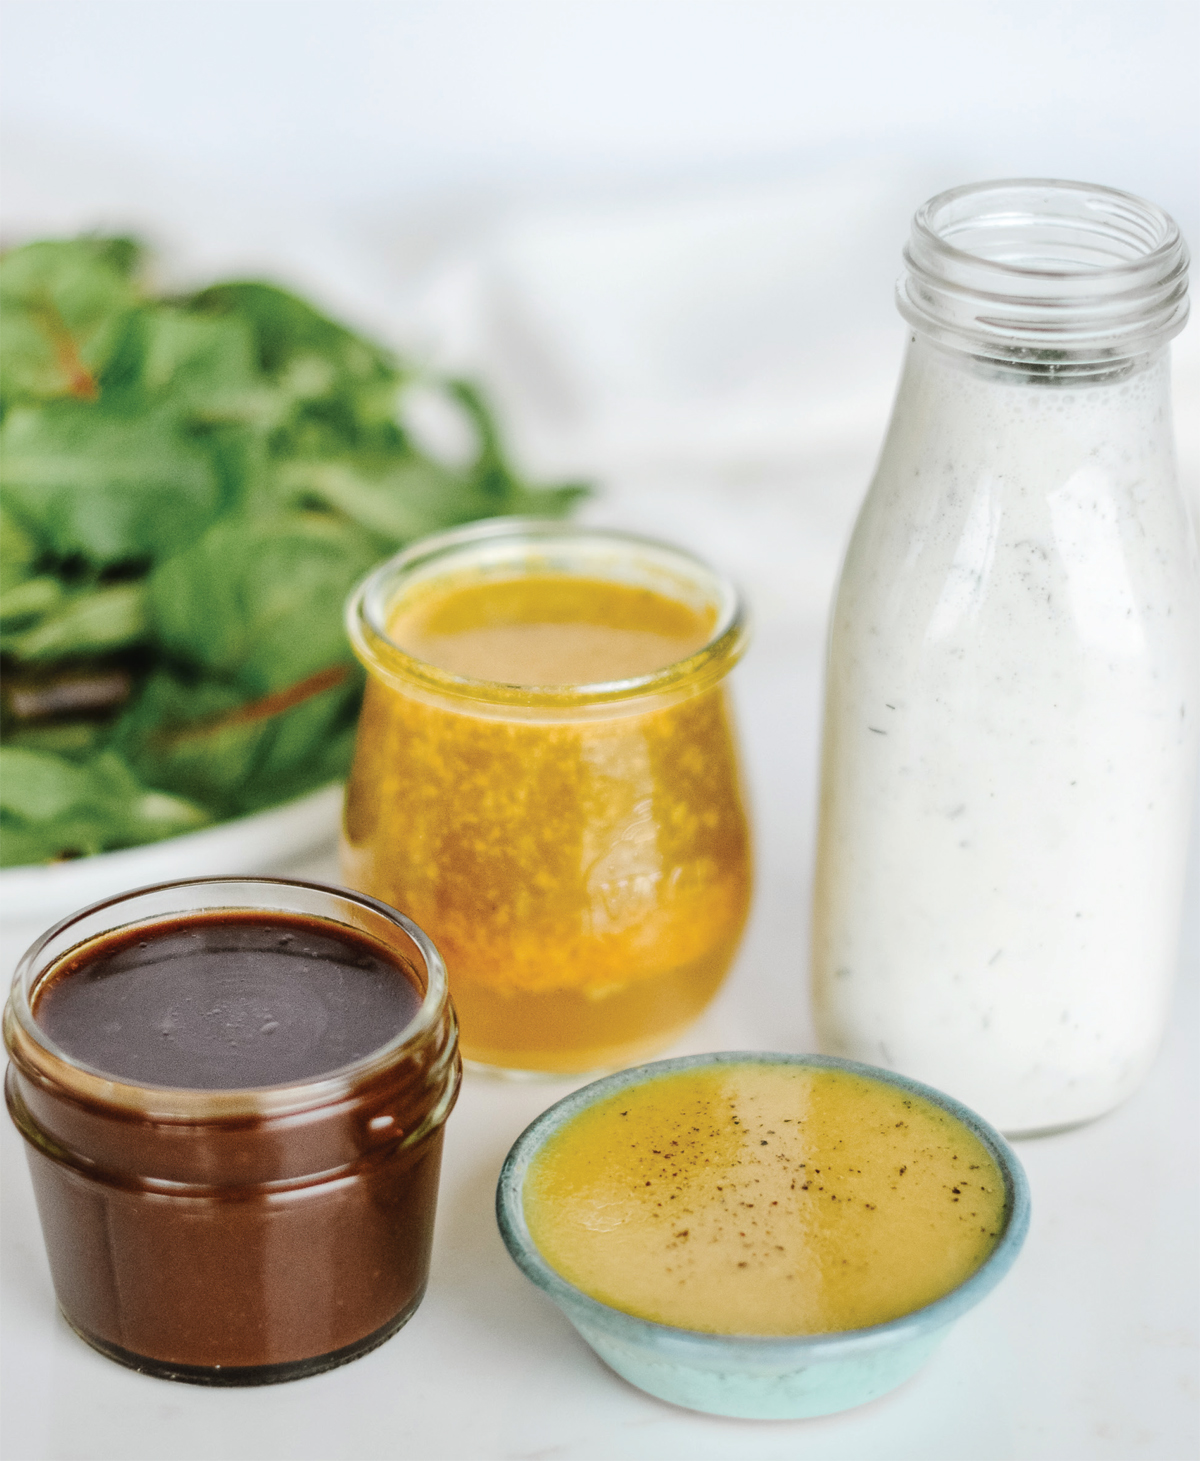
(Clockwise, from left): Perfect Homemade Balsamic Dressing, Self-Care Salad Dressing, Better-Than-a-Bottle Homemade Ranch Dressing, Healthy Honey Mustard Dressing
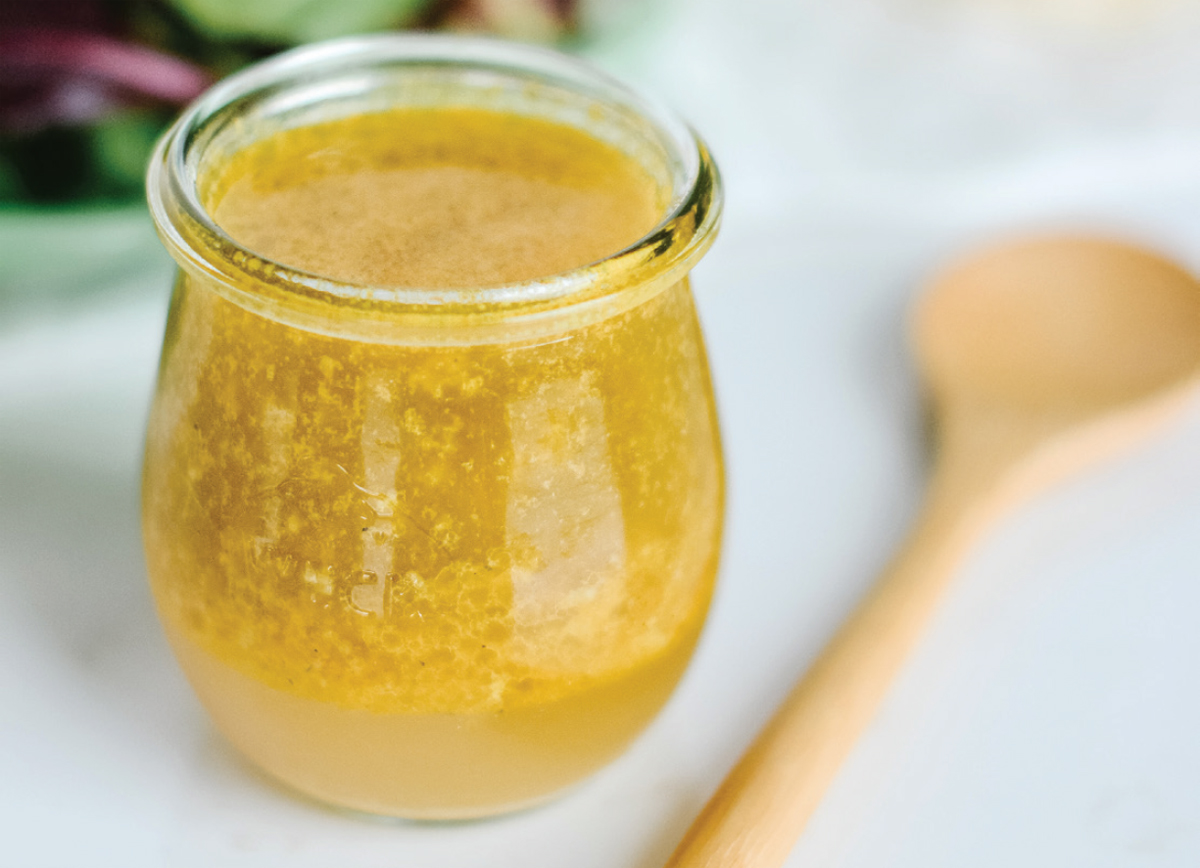
Want to give your body a little extra love? Try this anti-inflammatory, super-nutritious salad dressing. Not only is it packed with good-for-you ingredients, it’s absolutely delicious, too. I like it tossed with a big handful of mixed baby greens (chopped) plus a big handful of arugula (chopped). I mix a tablespoon or two with the greens, and top it with a quarter of an avocado (sliced) and a few tablespoons of chopped raw nuts or seeds. It’s the ultimate nourishing salad that you’ll start to crave every day.
MAKES 1 CUP | Gluten-Free, Dairy-Free, Vegan
½ cup extra-virgin olive oil
¼ cup raw apple cider vinegar
1 tablespoon freshly squeezed lemon juice
¼ teaspoon freshly grated garlic
¼ teaspoon freshly grated ginger
¼ teaspoon turmeric powder
¼ teaspoon whole-grain Dijon mustard (optional and recommended)
¼ teaspoon sea salt
⅛ teaspoon freshly ground black pepper
Place all the ingredients in a container with a tight-fitting lid (a mason jar works great). Shake vigorously for 30 seconds until emulsified. You can also emulsify your vinaigrette in a blender or food processor (work on low, increasing the speed as you stream in the oil last). I only use a blender when working in extra-large quantities. Up to about a cup, shaking it like crazy in a mason jar works great (and there’s way less cleanup).
Alternatively, you can whisk all the ingredients except the olive oil in a small bowl, then stream in the olive oil while you continue to whisk until the dressing has emulsified. This dressing keeps in the refrigerator in an airtight glass container for up to a week.
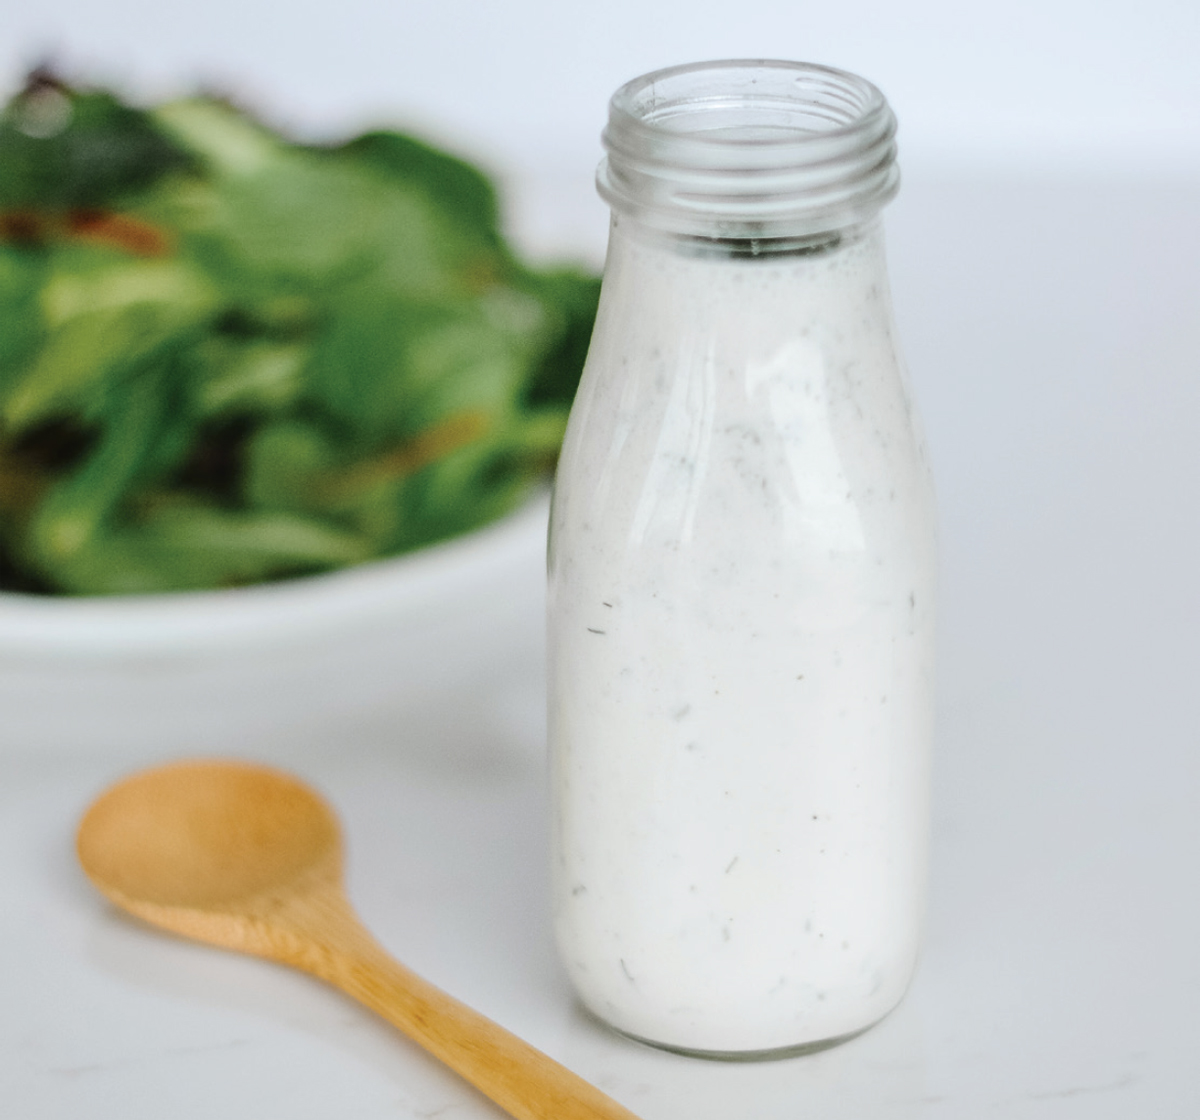
Once you try homemade ranch dressing, you’ll never go back to the stuff in the plastic squeeze bottle again. Not only does the homemade version taste better, but it’s also free of the preservatives and plastic chemicals found in the commercial stuff. Enjoy it as a salad dressing, dip, or spread.
MAKES 1 ½ CUPS | Gluten-Free, Dairy-Free, Vegan
1 cup vegan mayonnaise
1 tablespoon raw apple cider vinegar
1 tablespoon unsweetened plain nut milk or water
1 small garlic clove, finely minced or pressed, or ¾ teaspoon granulated garlic powder
1 teaspoon onion powder
2 teaspoons dried parsley
2 teaspoons fresh chopped dill
2 teaspoons fresh chopped chives
¼ teaspoon sea salt
Dash of fresh ground black pepper, to taste
Whisk all the ingredients together then transfer to an airtight glass container to store in the refrigerator—a mason jar works perfectly. Add more or less unsweetened plain nut milk or water to reach your desired consistency.
Let the dressing sit for at least 30 minutes for the flavors to develop—it’s even better the next day. It will keep for about a week in the refrigerator, so halve or double the recipe as needed.
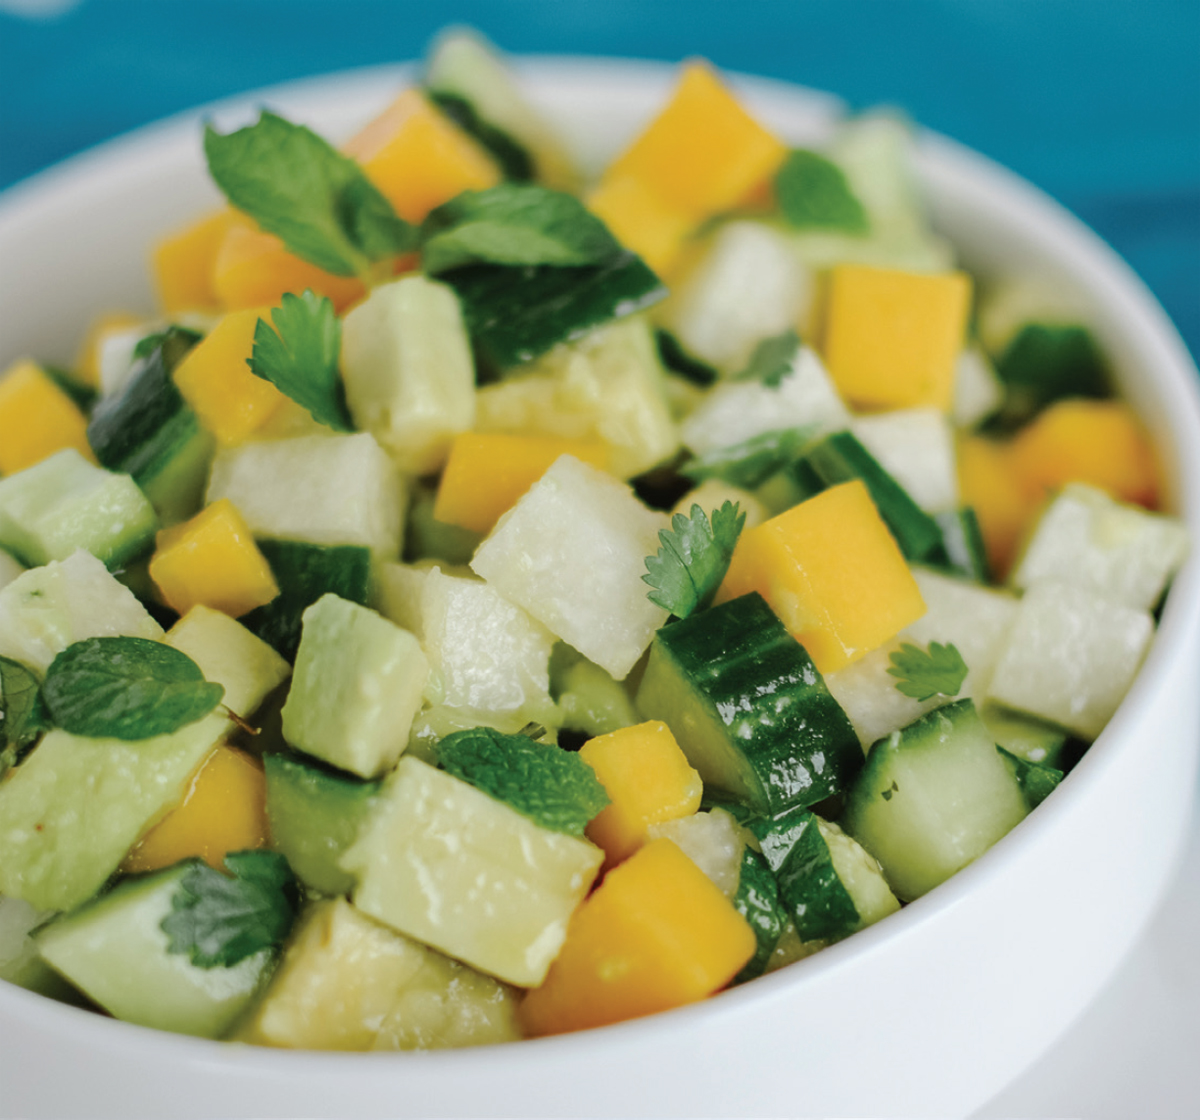
The flavors and textures in this salad are perfectly balanced, which is pretty exciting because it’s as good for you as it is delicious. I love it as a snack, or a fresh summer side dish.
MAKES 5 CUPS | Gluten-Free, Dairy-Free
DRESSING
3 tablespoons fresh lime juice
3 tablespoons extra-virgin olive oil
1 tablespoon honey
¼ teaspoon fine sea salt
SALAD
1 ripe mango, peeled and chopped (about 1 ½ cups chopped)
1 avocado, chopped
1 large cucumber, halved, peeled, seeded, and chopped (about 2 ½ cups chopped)
3 tablespoons chopped cilantro
1 tablespoon chopped mint
FOR THE DRESSING: Whisk all the ingredients together in a large bowl until emulsified. (Tip: Use the same tablespoon for all measurements—if you pour the honey in the tablespoon after you’ve used it for the oil, it will slide out perfectly instead of sticking to the spoon.)
FOR THE SALAD: Chop all the ingredients, transfer to the bowl with the dressing, and toss gently. Store in an airtight glass container in the refrigerator for up to 3 days.
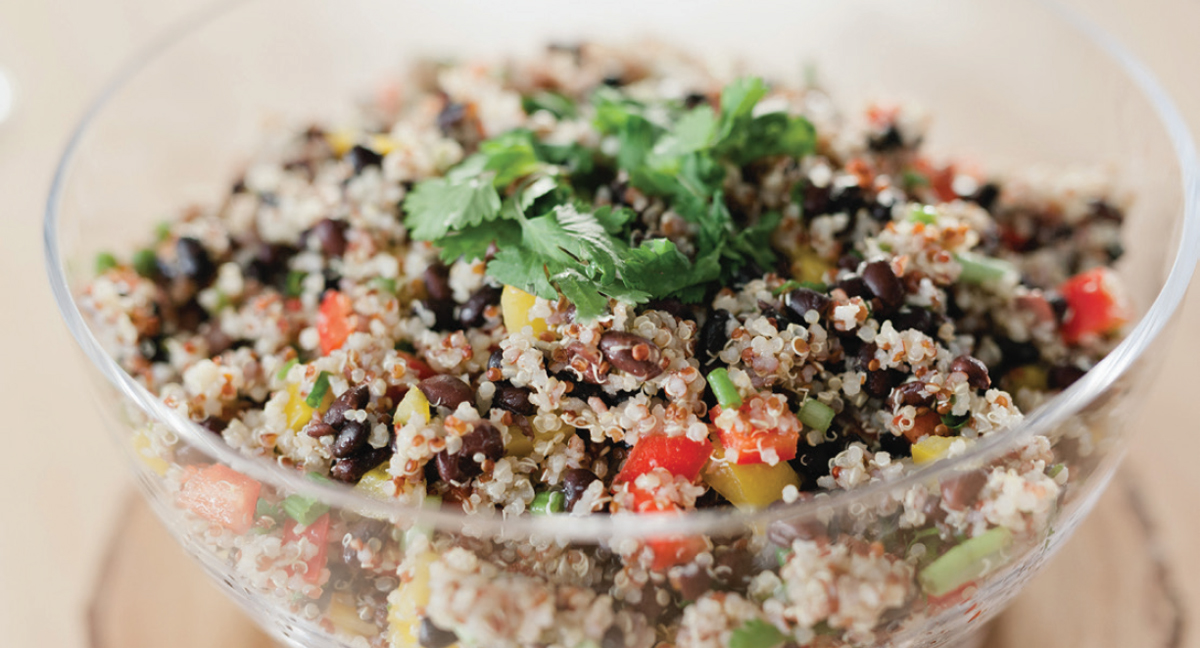
This easy, delicious, and healthy dish will quickly become a new family favorite. Use it as a side dish for just about anything, or serve it up as the main event. This recipe will also show you how to make perfectly cooked, great-tasting quinoa every time. It’s a great pasta replacement for gluten-conscious eaters.
MAKES 4 SERVINGS | Gluten-Free, Dairy-Free, Vegan
2 cups cooked quinoa
¼ cup extra-virgin olive oil
1 garlic clove, pressed, grated, or finely chopped
1 lime, juiced
1 teaspoon ground cumin
1 teaspoon fine sea salt
¼ teaspoon cayenne pepper, optional
Two 15-ounce cans black beans, rinsed and drained well
1 red bell pepper, chopped
6 green onions, root removed, white and part of the greens chopped
1 handful of cilantro, roughly chopped
To prepare the quinoa, rinse it well in a fine mesh colander and let all the water drain. Place the rinsed quinoa in a pot and add filtered water or vegetable stock. The ratio of liquid to quinoa is 2:1, but for the perfect fluffy quinoa, add just a tad less water. (For example, 1 cup dry quinoa needs 2 cups minus 2 tablespoons of liquid.) Bring the pot to a boil, then cover, reduce the heat to low, and simmer for about 12 to 15 minutes, or until all the liquid is absorbed and the little “tail” of the quinoa has sprouted out.
While the quinoa is cooking, whisk the olive oil, garlic, lime, cumin, and salt in a large bowl. Add the cayenne, if using. Rinse and drain the black beans, then chop the veggies.
Once the quinoa is done cooking, fluff with a fork. Add the cooked quinoa, beans, and veggies to the bowl with the dressing and gently fold it all together. Let the salad chill in the refrigerator for at least 30 minutes for the flavors to come together.
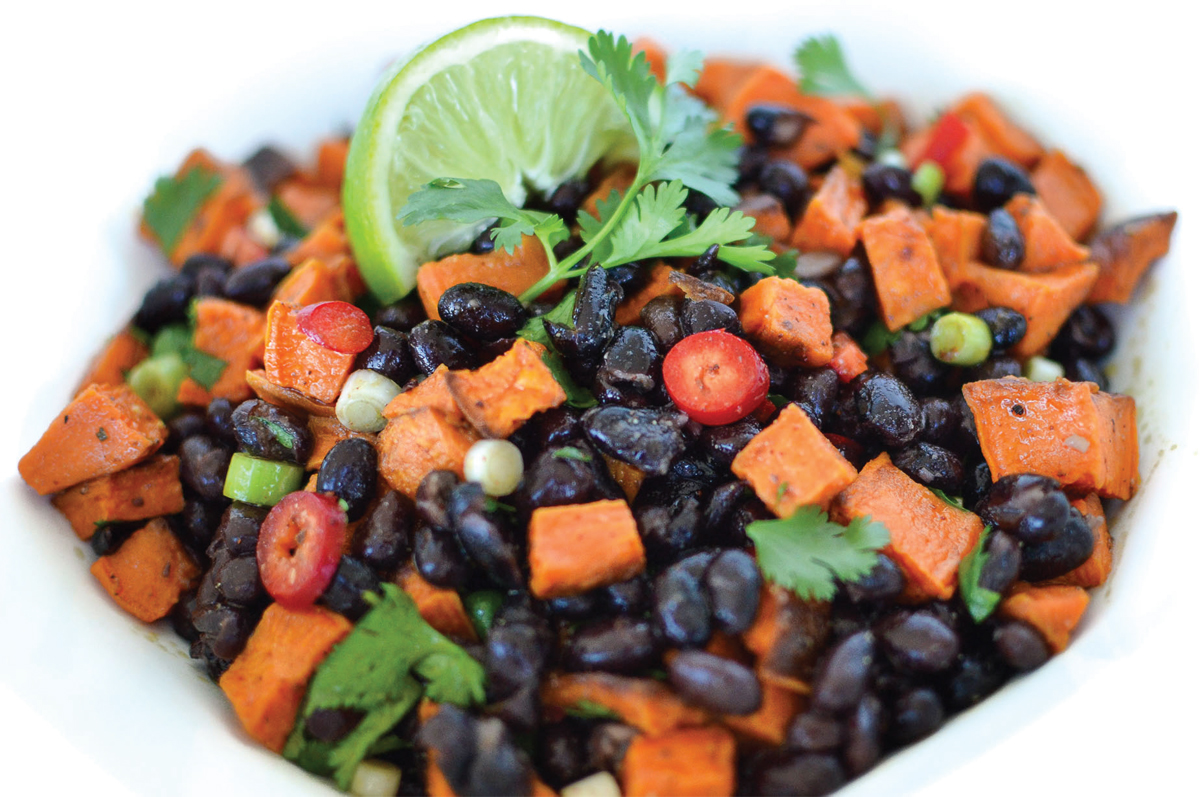
I’ve been drooling over this salad for the past two weeks, and I don’t intend to stop anytime soon! Every ingredient in this dish is not only delicious, but also supports digestive and overall health. It’s loaded with healthy complex carbohydrates that are naturally balanced with protein, healthy fats, and fiber to give you the fuel you need to get through the day.
MAKES 8 SERVINGS | Gluten-Free, Dairy-Free, Vegan
1 sweet potato (either a garnet yam or white sweet potato), about ¾ to 1 pound in weight
1 ½ tablespoons extra-virgin olive oil, plus a little more for drizzling
¼ teaspoon fine sea salt, plus more to taste
A few turns of freshly ground black pepper
1 ½ tablespoons fresh lime juice (from about 1 lime)
¼ teaspoon ground cumin
¼ teaspoon ground chili powder (your choice of mild, medium, or hot)
1 garlic clove, smashed open but left whole
4 green onions, roots removed, white and green parts finely chopped (about 3 tablespoons total)
1 mild red Fresno chili pepper*
¼ cup cilantro, roughly chopped
One 15-ounce can black beans, drained and rinsed
Preheat the oven to 375°F.
Peel and chop the sweet potato into ½-inch cubes. Try to get all the pieces the same size so they roast evenly. Toss the chopped sweet potatoes with a drizzle (about 1 teaspoon) of extra-virgin olive oil, a sprinkle of sea salt, and a few turns of black pepper and place on a parchment-lined baking sheet. Spread the pieces out so they roast and don’t steam. Roast for 40 minutes, or until the potatoes are soft and very slightly caramelized.
While the sweet potatoes roast, combine 1 ½ tablespoons extra-virgin olive oil, lime juice, cumin, chili powder, ¼ teaspoon sea salt, and more pepper to taste in a large bowl. Whisk to combine. Add the smashed open garlic clove and allow it to marinate in the dressing while the potatoes roast. Discard the smashed clove before combining the salad. This will infuse the dressing with garlic without overpowering the salad. For an extra-strong garlic taste, finely chop the garlic and do not remove it before tossing.
While the sweet potatoes finish roasting and the dressing marinates, chop the green onions and Fresno pepper. Roughly chop the cilantro. Drain and rinse the black beans. Reserve the ingredients in the refrigerator if not combining the salad within 20 minutes.
When the sweet potatoes are done, discard the garlic clove and add the hot sweet potatoes and black beans to the dressing first so they can soak in all the flavor. Gently toss with a large spoon. Add the chopped green onions, Fresno chili, and cilantro, and gently toss to combine.
The salad is ready to serve immediately, but I like it best if it sits in the refrigerator for at least 30 minutes for the flavors to combine. Serve as is, or over a big handful of mixed greens for a bigger meal. Store in an airtight glass container in the refrigerator for up to 4 days.
NOTES: Fresno chilis are a milder cousin of jalapeños. If you can’t find a Fresno, substitute a jalapeño or a few tablespoons of finely chopped red pepper. If you’re avoiding peppers or nightshades, omit the Fresno chili and chili powder altogether. Add grilled or shredded chicken breast for more protein, if desired.
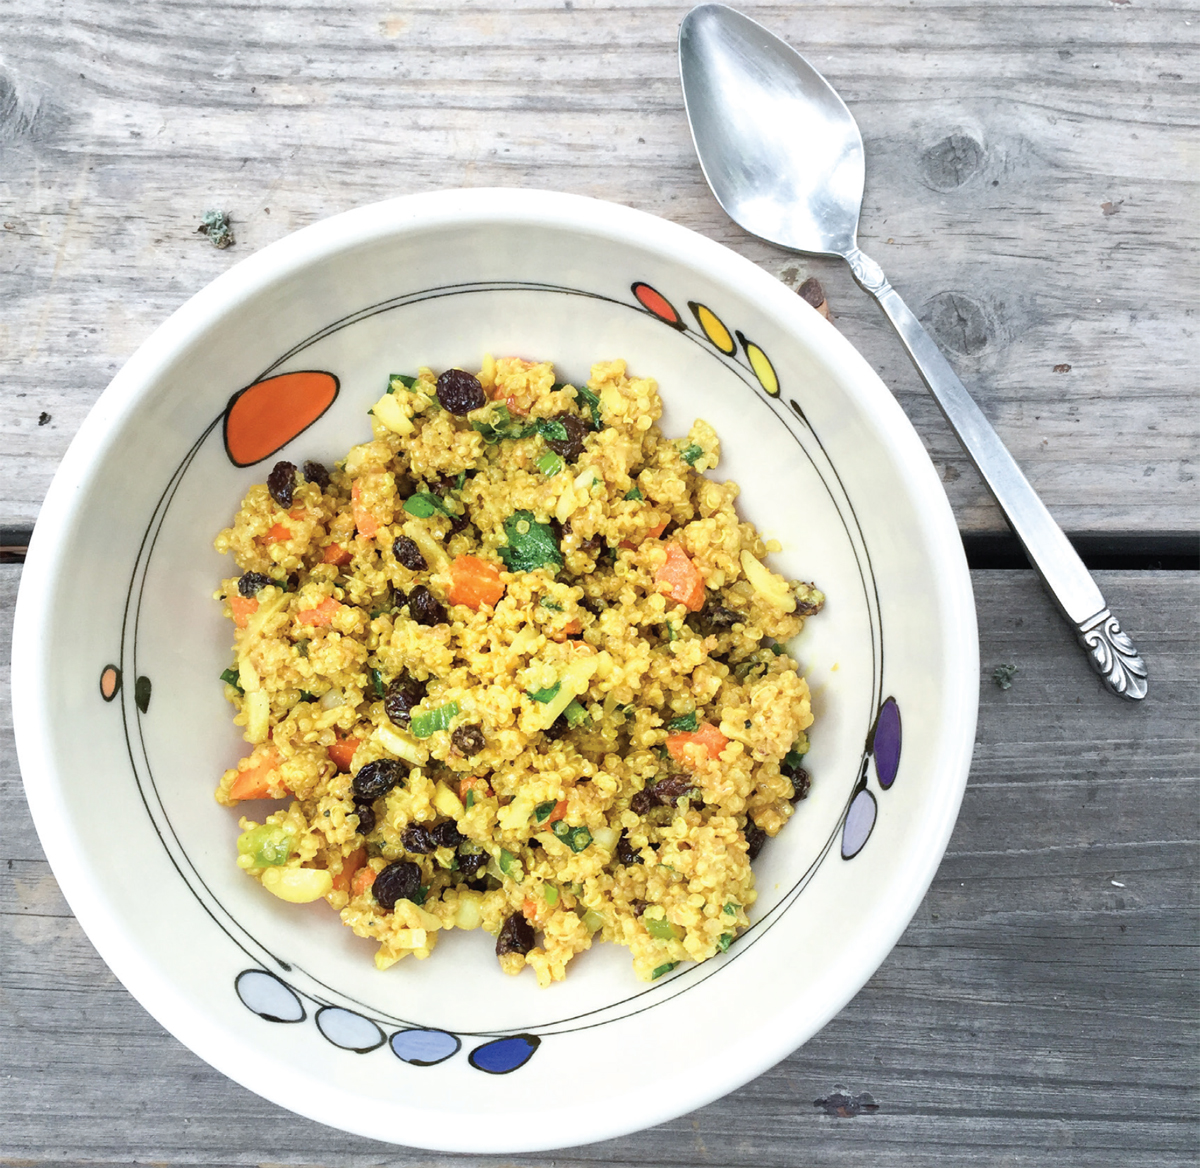
I get a lot of requests from blog readers asking how to jazz up quinoa, and this recipe really gets the job done. It actually gets better the longer it sits; I always love it on day two. Make a big batch, and you’ll have something delicious and healthy to eat all week. I adapted this recipe from Ina Garten’s famous couscous salad.
MAKES 8 SERVINGS | Gluten-Free, option for Dairy-Free and Vegan
SALAD
¾ cup dried quinoa, rinsed well
½ teaspoon sea salt
½ teaspoon mild yellow curry powder
1 ¼ cups filtered water
DRESSING
¼ cup plain unsweetened Greek yogurt*
¼ cup extra-virgin olive oil
1 teaspoon apple cider vinegar
¾ teaspoon mild yellow curry powder
¼ teaspoon turmeric
½ teaspoon sea salt
¼ teaspoon freshly ground black pepper
VEGGIES & NUTS
½ cup diced carrots (from about 2 small or 1 large carrot)
¼ cup thinly sliced scallions, white and green parts
⅓ cup dried currants or raisins
⅓ cup slivered almonds or roasted cashews
2 tablespoons chopped cilantro
*Use nondairy yogurt if you want to make this recipe dairy-free and vegan.
Place the quinoa in a fine mesh strainer or colander and rinse well until the water runs clear, about 30 seconds. Drain. Place the rinsed quinoa, salt, curry powder, and water in a medium saucepan. Bring it to a boil, then cover and reduce to a simmer. Set a timer for 12 minutes. Check the quinoa at 11 minutes—it will be done once all the water is absorbed. Be careful not to let it go too long and burn to the pan. Once all the water is absorbed, turn the heat off and fluff the quinoa with a fork. (Note: ¾ cup dried quinoa will yield 1 ½ cups cooked.)
While the quinoa cooks, whisk all the dressing ingredients in the bottom of a large mixing bowl big enough to hold the entire salad, then prepare the veggies. I find making the dressing and prepping the veggies is about the perfect amount of time to let the quinoa cook.
Once the quinoa is cooked, add it to the dressing while it’s hot, then add the veggies and fold it all together. Let the salad sit for at least 30 minutes in the refrigerator to cool. This dish will keep in an airtight glass container in the refrigerator for up to 4 days.
NOTE: If you already have 1 ½ cups of prepared quinoa, just add the extra ½ teaspoon of salt and curry powder to the dressing. This salad is delicious if you can prepare the quinoa from scratch and flavor it as it cooks, but it will come together super quick and easy if you already have quinoa prepared.
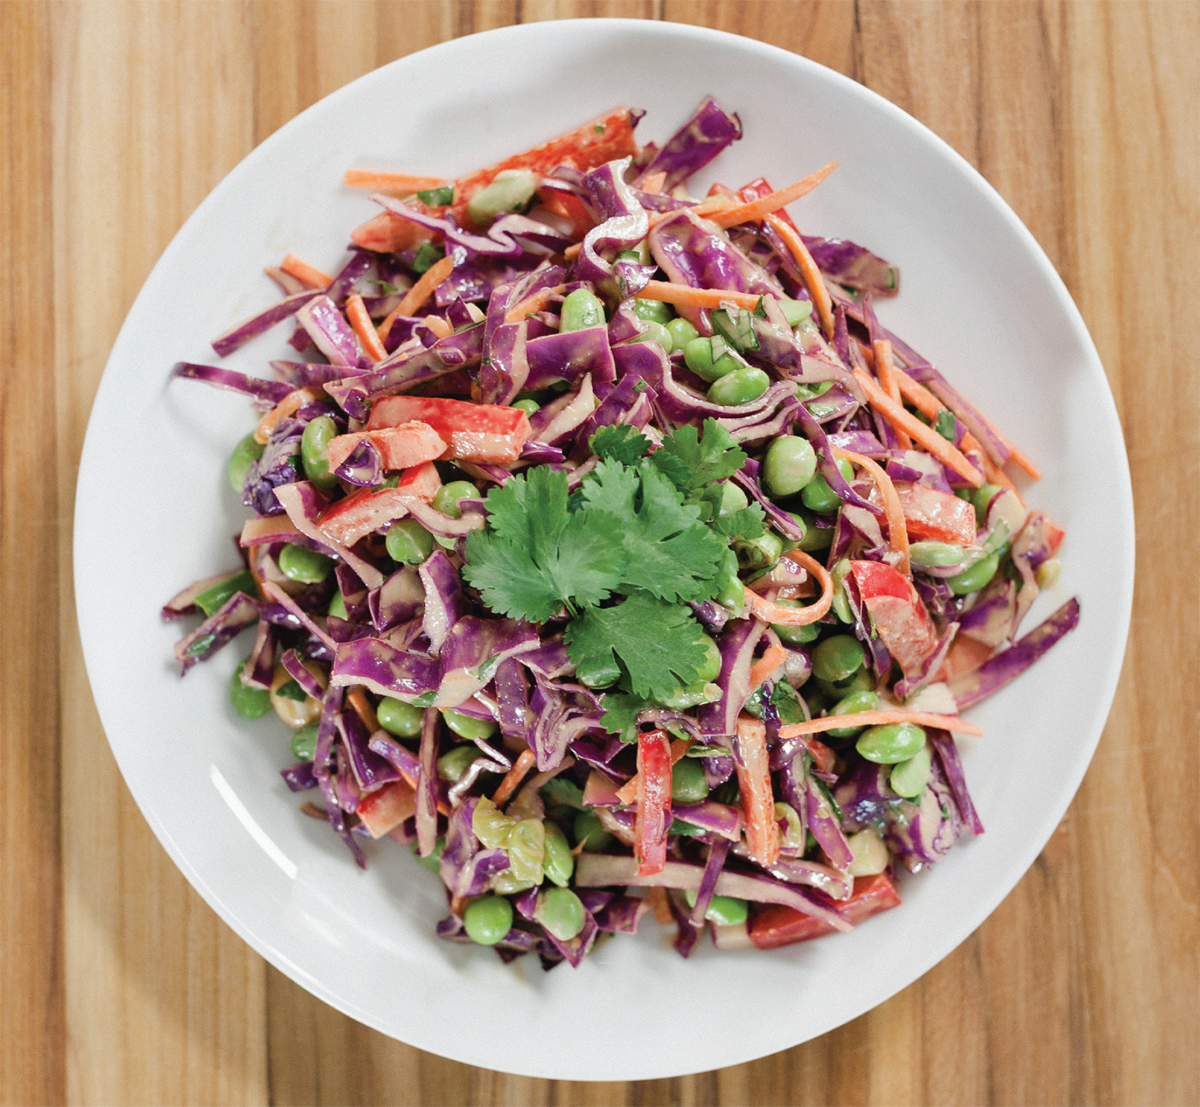
This slaw is a stunner. It’s also simple to make. The eye-catching colors will impress the party, and the explosion of flavors will make it a memorable dish. It’s loaded with fiber and antioxidants, making it a guilt-free favorite that you can eat as often as you’d like.
The recipe will feed an army! Make it for your next gathering or as a simple make-ahead meal for your weekly meal plan.
MAKES 4 SERVINGS | Gluten-Free, Dairy-Free, Vegan option
SLAW
One 10-ounce bag frozen, shelled organic edamame
4 cups shredded cabbage (any variety you like)
2 carrots, peeled and julienned or shredded (about 1 cup)
1 red bell pepper, thinly sliced (about ½ cup)
6 to 8 scallions (aka green onions), root end and 2 inches of green top removed, finely chopped
½ cup peas (fresh or frozen, defrosted in room-temperature water)
¼ to ½ cup roughly chopped fresh cilantro, to taste
SAUCE
2 tablespoons extra-virgin olive oil
2 tablespoons organic tamari (wheat-free soy sauce)
2 tablespoons raw apple cider vinegar
2 tablespoons raw honey (not vegan), maple syrup (vegan), or sweetener of choice
1 teaspoon toasted sesame oil
¼ cup creamy organic peanut (or almond) butter
1 garlic clove, peeled
1-inch piece of fresh ginger, peeled and roughly chopped
Hot sauce or a small fresh jalapeño for heat, optional
FOR THE SLAW: Soak frozen edamame in hot water to defrost. Set aside while you prepare the rest of your salad ingredients.
Wash and prepare all the produce. You can shred by hand with a sharp knife or mandoline slicer (always use the guard with a mandoline slicer to protect your hand), or use the shredding blade in a food processor.
FOR THE SAUCE: Put all the sauce ingredients in a high-speed blender and blend until smooth, about 30 seconds.
Add all slaw ingredients to a large mixing bowl. Pour the sauce on top and toss well to combine.
NOTE: The cabbage may give off water the longer it’s stored. It will keep in the refrigerator for up to 3 days, and you can drain off any water as necessary.
Lentil soup is a nutritional powerhouse. It also feeds a crowd on a tight budget. This soup combines the nutrients, protein, good carbs, and fiber in lentils with the antioxidant power of veggies, herbs, and spices. Adding a little good fat from the extra-virgin olive oil rounds it out into a perfectly balanced meal.
MAKES 8 SERVINGS | Gluten-free, dairy-free, vegan option
1 ½ cups lentils, soaked and rinsed
3 tablespoons extra-virgin olive oil
1 small yellow onion, finely chopped
2 celery ribs, finely chopped
1 large carrot, finely chopped or grated
3 to 4 garlic cloves, finely chopped
1 teaspoon ground cumin
½ teaspoon dried oregano
1 teaspoon sea salt, divided
½ teaspoon coarse black pepper, divided
1 bay leaf
1 quart vegetable stock (vegan) or chicken stock (not vegan)
2 cups filtered water
2 tomatoes, seeded and chopped, or one 12-ounce can organic diced tomatoes, optional
1 tablespoon red wine vinegar (aged balsamic also works)
Any greens you’d like to add, optional (see note below)
Spread the lentils out on a large sheet tray and pick out any debris (i.e., anything that doesn’t look like a lentil). Legumes are harvested and stored in large quantities, and sometimes little rocks or other things make their way into the bag.
Presoaking really depends on personal preference; it helps to soften the lentils faster but is not always necessary. I typically do not presoak my lentils. If you want to soak them, pour the lentils into a large bowl and cover with filtered water so that they’re submerged with an extra 2 inches on top. If you’ve thought ahead enough, cover the bowl with a kitchen towel and leave it on the counter for 8 to 12 hours. Drain the lentils and rinse them well before using.
While the lentils soak, heat the olive oil over medium heat in a large soup pot. Add the chopped onion, celery, and carrot and cook until tender, about 5 minutes. Add the garlic, cumin, oregano, and a pinch of both salt and black pepper to the pot. Stir and let cook for another 3 to 5 minutes, until the mixture is well combined and very fragrant. Be careful not to burn the garlic—turn the heat down if necessary, as garlic burns easily.
Add the bay leaf, the rest of the salt and pepper, the stock, water, and the soaked, rinsed lentils to the pot and bring to a full boil, then reduce the heat to a simmer. The amount of salt you need will depend on what type of stock you use—start with 1 teaspoon and add more to taste if desired.
Add the tomatoes, if using, and let the soup simmer for about 40 to 50 minutes, until the lentils are soft. Turn off the heat and stir in the vinegar.
Discard the bay leaf before pureeing and serving. Be very careful when blending hot mixtures, and never fill the blender/food processor more than ¼ of the way full, as hot liquids expand when blending. Depending on how you like the texture, use a handheld immersion blender to blend ⅓ to ½ of the soup. Or skip the blending if you like a firmer soup texture. If you don’t have an immersion blender, puree 2 cups of the soup in a regular blender or food processor; include some of the soup’s broth to blend smoothly.
If waiting longer than 1 hour to serve, leave the soup pot on the stove, but turn the burner to the lowest setting. You can leave it on the stove for 2 to 4 hours. If it gets too thick, just add another 1 to 2 cups water.
NOTE: If desired, add one handful per person of chopped greens—like spinach or kale—to the piping-hot soup a few minutes before serving for even more flavor, nutrients, and fiber. Add the greens last—once you’ve turned off the heat—so you don’t kill all their nutrients. The greens will wilt from the heat of the soup in just a few minutes.
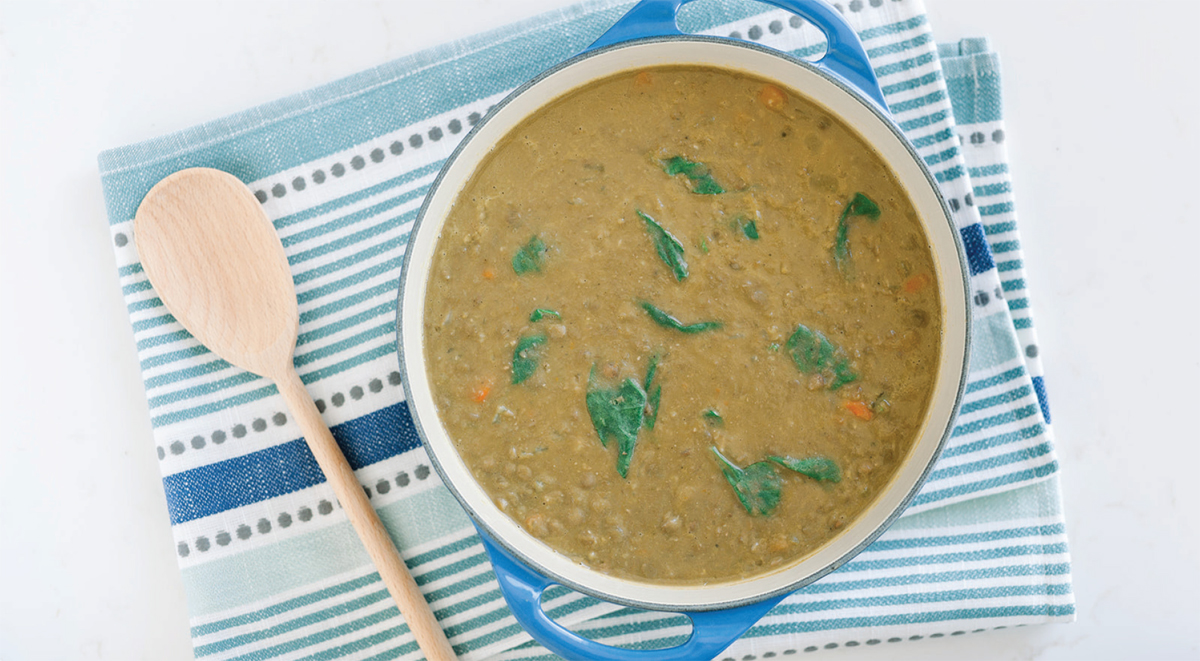
This soup is the perfect meal on a chilly day; it’s healthy, warm, hearty, and delicious. I used to think that all the flavor in split pea soup came from the ham, but once I made it vegan, I didn’t even miss the meat. I think you’ll be pleasantly surprised, too.
MAKES 4 TO 6 SERVINGS | Gluten-Free, Dairy-Free, Vegan
2 tablespoons olive oil
1 medium white or yellow onion, finely chopped
1 tablespoon sea salt (more or less to taste), divided
1 medium carrot, peeled and shredded
3 garlic cloves, pressed or finely chopped
4 cups (1 quart) vegetable stock
2 cups filtered water
2 teaspoons granulated onion
1 bay leaf (fresh or dried)
2 cups dried split peas, sorted, rinsed, and soaked for 2 hours
2 teaspoons freshly ground black pepper
Heat the olive oil over medium heat in a large soup pot. Add the chopped onion and 1 teaspoon sea salt and sauté until translucent, about 5 minutes. Add the carrot and garlic and sauté another few minutes, until very fragrant.
Add the stock, water, granulated onion, remaining 2 teaspoons sea salt, pepper, and bay leaf to the pot and bring to a boil. Add the rinsed and soaked split peas and reduce the heat to medium-low. Simmer for at least 2 hours, until the peas are cooked through.
Once the peas are cooked through, remove the bay leaf and use an immersion blender to blend the soup to your desired consistency. I blend about half and leave the other half whole for a chunky texture. For a smoother texture, let the soup simmer for 4 to 5 hours and then blend until smooth.
NOTE: This soup will keep in the refrigerator for up to 3 days in a sealed glass container, or up to 3 months in the freezer.

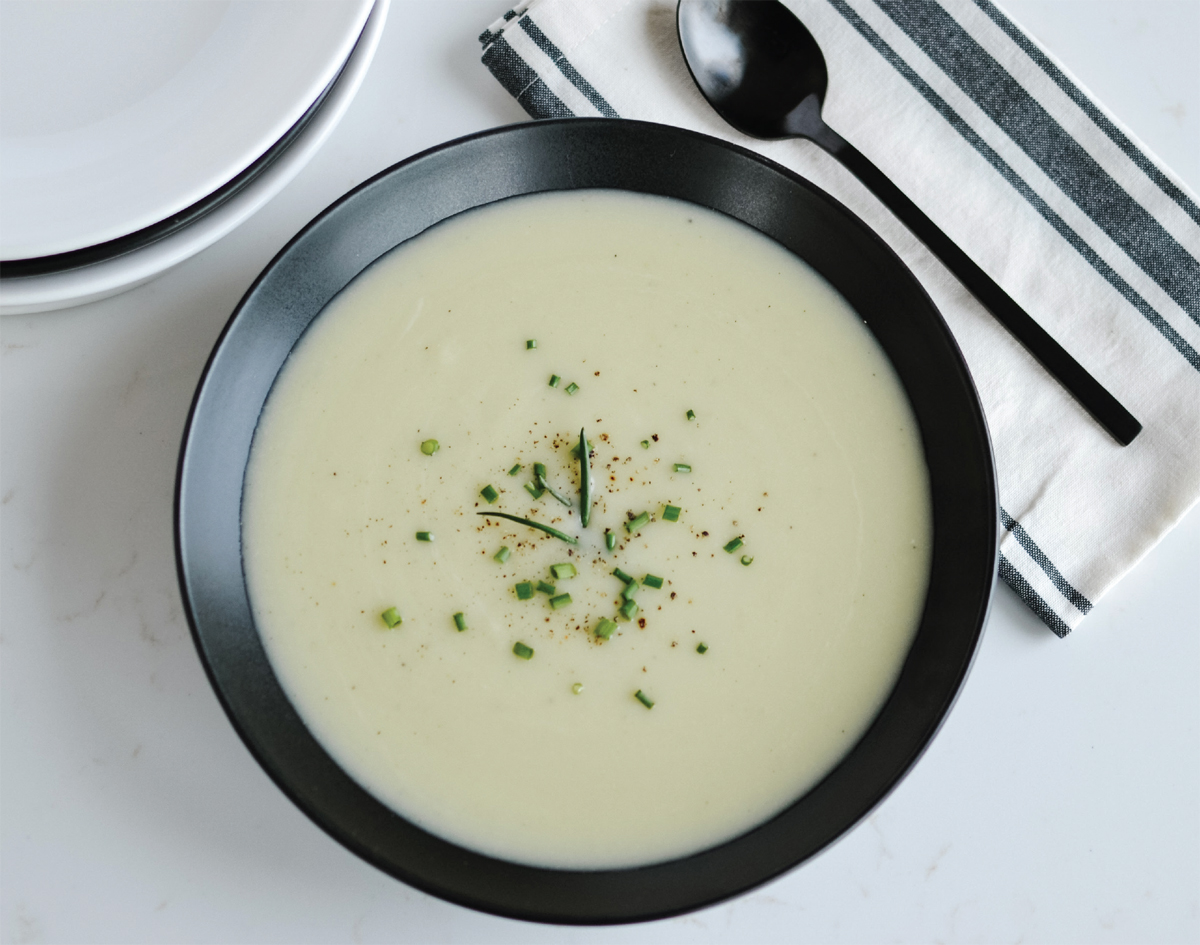
If you’re craving warm comfort food that’s delicious but still healthy, then this one’s for you. This soup tastes a lot like baked potato soup, but instead of being high-glycemic and loaded with dairy like most creamy soups, it’s actually low-glycemic and totally dairy-free!
MAKES 8 SERVINGS | Gluten-Free, Dairy-Free, Vegan option
3 tablespoons extra-virgin olive oil
1 large head of cauliflower, cleaned, green stem and leaves removed, and cut into 2-inch florets
2 large leeks (root and tough dark green tops removed), medium-chopped and cleaned
2 celery stalks, cleaned and medium-chopped
1 tablespoon fine sea salt (more or less to taste), divided
3 garlic cloves, finely chopped
1 quart vegetable stock (vegan) or low-sodium chicken stock (not vegan)
3 cups filtered water or more stock, more or less as needed
1 teaspoon coarse black pepper (more or less to taste), divided
1 bay leaf
1 ½ teaspoons red wine vinegar
Finely chopped chives, for garnish
Heat the olive oil over medium-high heat in a large soup pot or Dutch oven.
To prepare the cauliflower, cut away the leaves and green part of the cauliflower stem, but use the white part of the stem—it’s just as good as the florets.
To prepare the leeks, first chop, then clean them. Leeks tend to have a lot of dirt inside, so this is one veggie that you first chop, then clean. Be sure to rinse them well so you don’t end up with dirt at the bottom of your soup.
Once prepared, add the leeks and celery, plus a big pinch of salt, and sauté until soft, about 5 to 6 minutes. Add the garlic, stir, and cook another minute until very fragrant, being careful not to burn the garlic. Add the stock, 2 cups water, the remaining sea salt, ½ teaspoon pepper, and bay leaf and bring to a boil. Add the cauliflower florets and reduce the heat to medium; simmer for 30 minutes, or until the cauliflower is fork-tender.
Discard the bay leaf, then puree the soup with a hand blender, or in small batches in a high-speed blender or food processor, until very smooth. A Vitamix or other high-speed blender will turn this into a very smooth soup, but a food processor or hand blender will work too, just be patient. Be very careful when pureeing hot liquid in a blender or food processor, as hot liquid expands. Never fill the blender or food processor more than ¼ full with a hot mixture. Work in very small batches until all the soup is pureed.
Transfer the pureed soup back to the pot and stir in the vinegar and ½ to 1 cup more stock or filtered water, depending on your desired texture. Garnish with fresh chopped chives and a few dashes of hot sauce, if desired (Cholula is my favorite). The chives really make the soup amazing. Chopped parsley or raw pumpkin seeds are also great additions.
This soup can be stored in the refrigerator in an airtight glass container for up to 3 days. It also freezes well.
NOTE: You’ll need about 7 to 8 cups of liquid to make this soup and you can use all stock or a combination of stock and water. If you use water, consider adding a vegetable bouillon cube to the simmering soup.
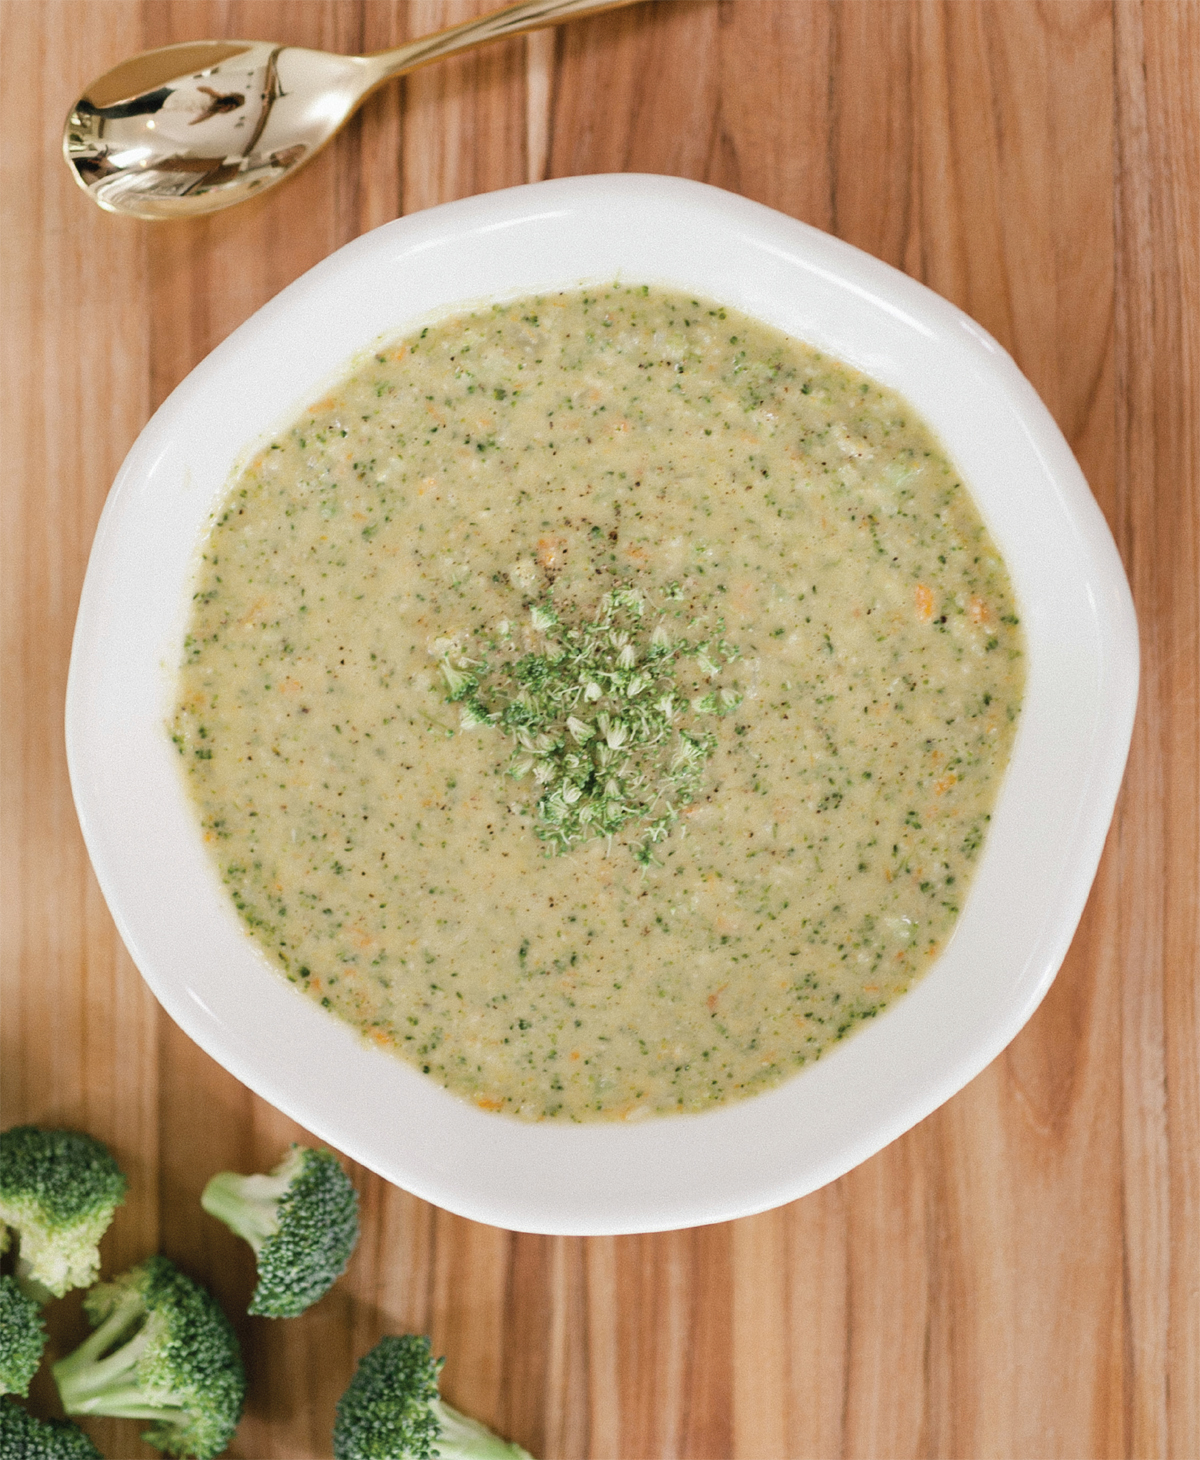
Broccoli has never tasted so good! I promise you this creamy soup will be a hit with the kids, too. You don’t need dairy to make soups creamy. With this recipe, you can make a hearty broccoli soup full of flavor with aromatic spices and homemade cashew cream.
MAKES 8 SERVINGS | Gluten-Free, Dairy-Free, Vegan option
SOUP
2 tablespoons extra-virgin olive oil
1 medium brown or white onion
Large pinch of sea salt, plus more to taste
1 medium carrot, grated or finely chopped
2 garlic cloves, pressed, grated, or finely chopped
3 cups broccoli florets
2 cups cauliflower florets
Freshly ground black pepper
3 cups unsalted bone broth (not vegan), chicken stock (not vegan), or vegetable stock (vegan), divided, plus 1 cup for the cashew cream below
CASHEW CREAM
½ cup cashews, soaked
1 cup bone broth (not vegan) or vegetable stock (vegan)
2 tablespoons nutritional yeast
½ teaspoon sea salt
FOR THE SOUP: Preheat the olive oil in a large Dutch oven over medium heat. Sauté the onion with a large pinch of sea salt until soft and fragrant. Add the carrots and cook until soft. Add the garlic and cook another minute. Add the broccoli, cauliflower, more sea salt to taste, and black pepper and cook for 2 to 3 more minutes. Add 3 cups broth to the mixture and bring to a simmer. Simmer for 20 to 25 minutes, until the broccoli and cauliflower florets are tender and can be pierced with a fork.
FOR THE CASHEW CREAM: Puree the cashews in a high-speed blender with 1 cup broth, nutritional yeast, and sea salt until the cashews are emulsified into a cream. Leave the cashew cream in the blender and pick out the cooked cauliflower florets (it’s okay if some broccoli comes along), adding to cream. Puree until smooth.
Reserve the cream and cauliflower mixture in another bowl, then add the cooked broccoli, veggies, and broth to the blender. Pulse a few times until coarsely pureed. Add the broccoli mixture and the cream mixture back to the pot and stir together until heated through. Serve the soup hot, or store in the refrigerator for up to 5 days. It also freezes well.
NOTE: You can choose to soak your cashew nuts overnight, otherwise you can do a quick soak, where you use hot water and soak for 1 hour.
This dish is a one-pot wonder. It’s filling, satisfying, and healthy. I love making this on Sunday for dinner, then storing the rest in the refrigerator for lunch on Tuesday or Wednesday (if it lasts that long).
MAKES 8-PLUS SERVINGS | Gluten-Free, Dairy-Free, Vegan option
1 large poblano pepper
2 tablespoons extra-virgin olive oil
1 small white or yellow onion, chopped
3 garlic cloves, pressed, grated, or finely chopped
1 ½ teaspoons ground cumin
1 teaspoon chili powder of your choice
Large pinch of sea salt, plus more to taste
Small pinch of freshly ground black pepper, plus more to taste
1 quart organic chicken stock (not vegan) or vegetable stock (vegan)
2 cups filtered water
Two 15-ounce cans cannellini beans, drained and rinsed well
1 pound boneless skinless chicken breasts (about 2 breasts; omit if making this recipe vegan)
Avocado, fresh cilantro, and fresh organic corn for garnish, optional
Roast the poblano pepper either over the flame on your gas burner or under the broiler, turning every few minutes until it’s charred all the way around, about 5 minutes total. Place the hot charred pepper in a glass bowl and cover the bowl (plastic wrap works great) to trap the steam for at least 15 minutes but up to 1 day ahead. Once steamed, peel the charred skin off and discard. Remove and discard the stem and seeds.
Heat 2 tablespoons extra-virgin olive oil in a large soup pot over medium heat. Add the onion and sauté for 3 to 4 minutes, or until soft. Reduce the heat and add the garlic, cumin, chili powder, large pinch of sea salt, and small pinch of freshly ground black pepper. Cook the garlic and spices with the onions for 2 to 3 minutes, then add the stock, water, and beans. Bring to a boil, then reduce to a low simmer.
Once at a low simmer, add the chicken breasts, if using, to the pot and poach them gently. Always poach at a low simmer to prevent the meat from becoming tough. Check at 30 minutes. Once the chicken is cooked through, remove it from the pot and shred with two forks. Set aside until after the poblano is pureed.
Place the roasted poblano in a blender with 3 large ladles full of the soup mixture (stock, beans, onions, and spices, but none of the chicken). Leave at least half of the beans in the pot to leave them whole. Puree the poblano with the beans and soup mixture to create a thick and creamy base. Add the shredded chicken and pureed mixture back into the pot and stir. Add more salt and pepper to taste. Garnish with avocado, fresh cilantro, and fresh organic corn if desired.

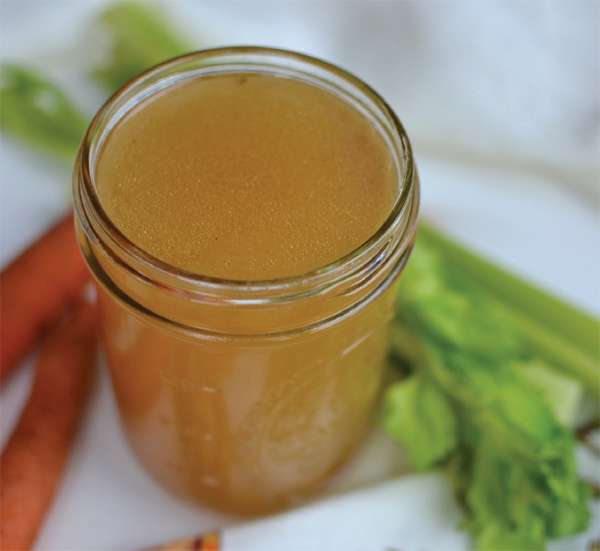
Once you learn how to make this chicken stock, you’ll be hooked for life. There’s a reason that chicken stock is used as the base for so many soups and sauces; it has a delicious flavor and is wonderfully nutritious.
MAKES ABOUT 4 QUARTS | Gluten-Free, Dairy-Free
1 whole chicken (about 4 to 5 pounds), any paper inside removed
1 white or yellow onion, quartered
2 carrots, scrubbed or peeled and cut in half
2 celery stalks (with leaves if possible), cut in half
4 to 5 garlic cloves, smashed open or cut in half
1 large bay leaf
3 to 5 sprigs fresh thyme
5 stems fresh parsley (about 1 small handful)
2 teaspoons sea salt
½ teaspoon whole black peppercorns
1 tablespoon apple cider vinegar
2 lemon slices, optional
Enough filtered water to fill the pot
You’ll need a 6- to 8-quart pot with a tight-fitting lid—I use a 6-quart pot for a 4- or 5-pound chicken. Be sure to check the inside of the chicken and remove the paper pouch that contains the organs. Discard the paper and the organs if desired. Alternatively, you can add the organs to the pot. If you’re new to stock, this might sound strange, but there is a lot of great nutrition in there.
This recipe uses a whole chicken so that you can use the meat in soup or another recipe, but you can also use this recipe with any bones that you have, like from a leftover roasted chicken or turkey. Just use whatever is left from the whole chicken or turkey after you’ve removed the meat. If you don’t have access to fresh herbs, you can use a large pinch of dried herbs instead. Get creative if you want! Use whatever root veggies or herbs that you have on hand or like the flavor of.
Add all ingredients to the pot and cover with filtered water to about an inch below the top of the pot. Put a tight-fitting lid on the pot, set it on the stove, and bring to a boil (this takes about 10 to 20 minutes), then reduce it to a simmer. Simmer for at least 4—and up to 24—hours. If you use a whole chicken, be sure to remove the meat from the chicken about 2 hours in to prevent it from overcooking, then put the bones back in the pot to continue cooking.
To remove the meat, carefully remove the whole chicken from the pot and set it on a large cutting board. It will be very hot, so let it cool a bit so that you can handle it. Use 2 forks or a knife to remove as much meat as possible. The meat will be nicely poached, and you can shred it or just cut it up. Put the meat in an airtight glass container, then let it come to room temperature before you store it in the refrigerator where you can keep it for up to 3 days. Or, use it immediately.
Then put all the bones and skin and the whole body back into the pot and let it simmer for at least another 2 hours. You can simmer your stock for 4 to 24 hours. The longer you simmer it, the more flavorful and nutritious it will be. Keep the pot covered to prevent your stock from evaporating; if you notice the liquid reducing too much you can add a few more cups of water at any time during the process.
After simmering the stock for at least 4 hours, strain it through a fine mesh colander or cheesecloth into a large bowl or pot. Discard everything that was in the pot except the liquid you just strained—it’s all served a very useful purpose, and by now, the veggies have been boiled to the point that they will fall apart.
Follow the above directions but use a slow cooker instead.
Add all the ingredients and water to your slow cooker and put it on high until it comes to a simmer, about 2 hours. It will take a while to simmer as the slow cooker heats at a slower pace than your stove top.
Remove the meat once it’s cooked through, about 2 to 3 hours in. Add everything back in just like the method above, and let it all simmer on low for 4 to 24 hours. You may want to add another cup or 2 of filtered water if you let it simmer overnight and too much liquid evaporates. Just keep it covered and let it simmer as long as you’d like. All slow cookers (aka Crock-Pots) are different—you may want to leave it on high if it’s not gently simmering on low. I leave mine on low overnight after being on high for about 3 hours, and it simmers all night.
Use your stock right away to make homemade chicken soup. To store, let it come to room temperature and then transfer it to quart-size containers. It will keep in the refrigerator for up to 3 days, or in the freezer for up to 6 months. If freezing, it’s best to freeze in portions that will be convenient to use in recipes, like 2-cup or 4-cup/1-quart containers.
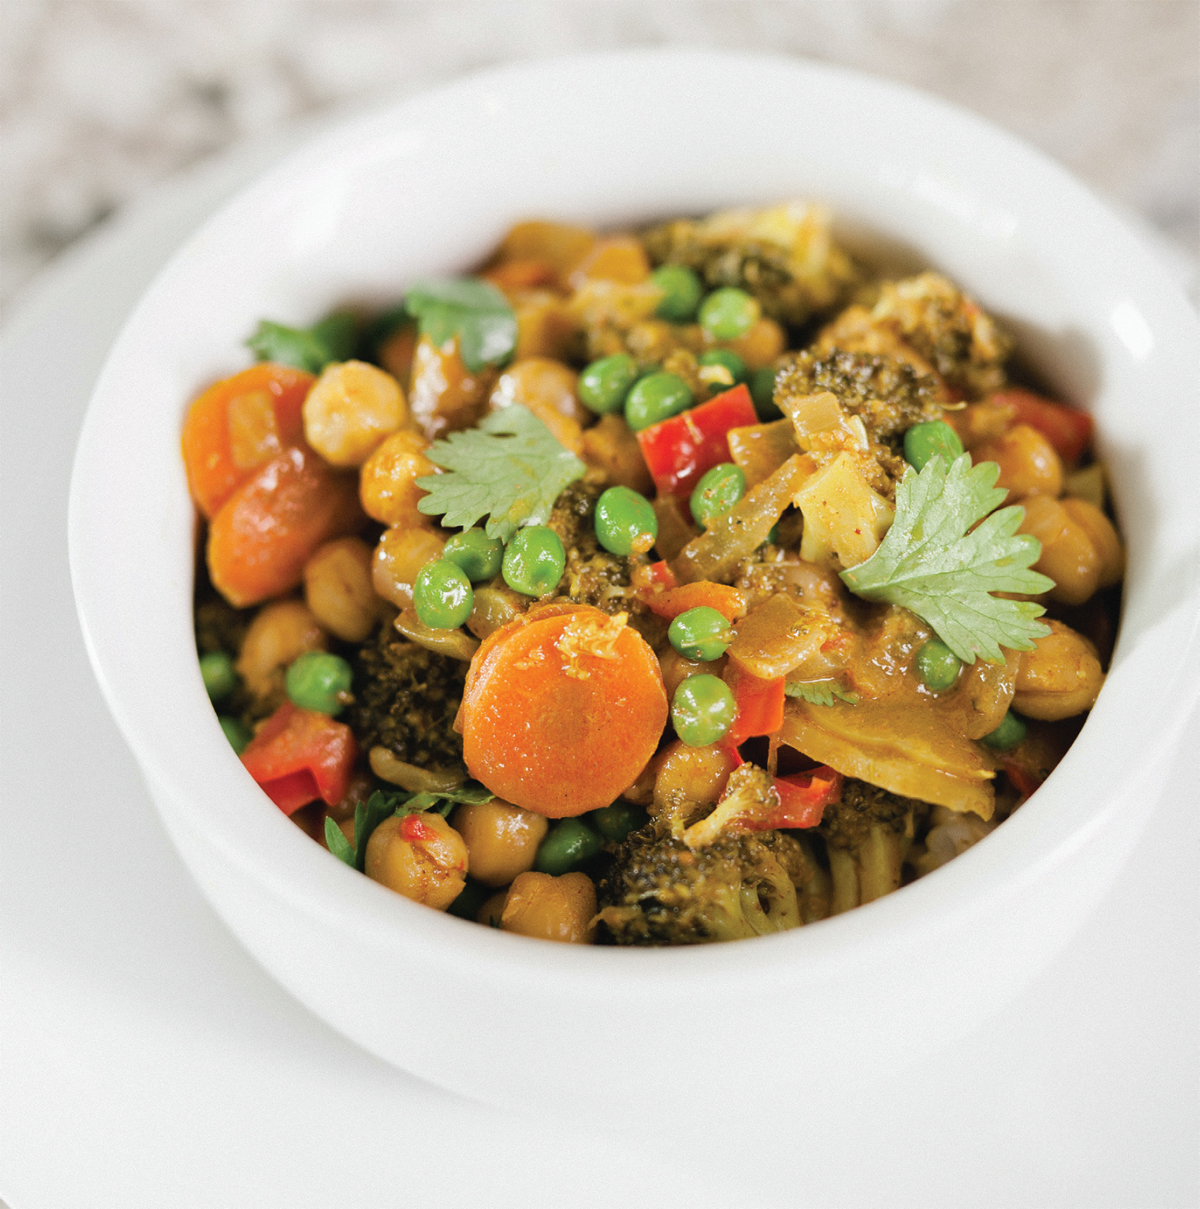
Move over take-out. Grab a can of organic coconut milk and prepare to be amazed: I’ll show you how to make decadent (yet healthy!) homemade curry loaded with veggies and chickpeas.
MAKES 4 SERVINGS | Gluten-Free, Dairy-Free, Vegan option
1 red bell pepper, diced
1 head of broccoli, florets cut and stalk cut into thin coins
2 large carrots, cut into thin coins
½ large onion
1 tablespoon dry red curry powder or 1 ½ tablespoons curry paste
1 cup brown rice
1 tablespoon coconut oil
2 teaspoons sea salt, more or less to taste
2 garlic cloves, or more to taste
1-inch piece of ginger, skin removed
One 14-ounce can of full-fat coconut milk
½ cup plus one tablespoon filtered water, divided
1 tablespoon raw honey (not vegan), maple syrup (vegan), or sweetener of choice
½ teaspoon turmeric powder
One 15-ounce can of chickpeas, drained and rinsed
½ cup frozen sweet peas
Fresh cilantro, for garnish
Dice the bell pepper into approximately ½-inch pieces. Cut florets from the broccoli. Remove the thick skin from the outside of the stalk with a knife or vegetable peeler, then thinly slice the stalk on an angle with a mandolin or a sharp knife. Next, peel the carrots and slice thinly on an angle with a knife or mandolin. Dice the onion into approximately ½-inch pieces.
Mix the dry curry powder and water until it forms a paste. Use a one to one ratio of powder to water to mix the paste.
Prepare the rice in a pot or a rice cooker.
Melt 1 tablespoon coconut oil in a large sauté pan over medium heat. Add the onions and a pinch of sea salt and sauté until the onions are soft and slightly translucent, about 3 minutes. Turn the heat to medium-low, then grate the garlic and ginger directly into the pan. Stir to combine and let the mixture sit for approximately 1 minute, then add the curry paste and another pinch of sea salt. Sauté for an additional 1 minute to let the spices toast.
Add 1 can of coconut milk and ½ cup water to the pan. Once the coconut milk has melted, add the honey and turmeric powder; let this mixture come to a gentle simmer. Add the chickpeas, carrots, bell pepper, and broccoli, along with another pinch of sea salt, and stir to combine. Cook for approximately 20 minutes for an al dente texture on the vegetables. Add the frozen peas and let them warm through before serving. Add more salt to taste.
Serve the curry over brown rice (or cauliflower rice or quinoa) and top with fresh cilantro.
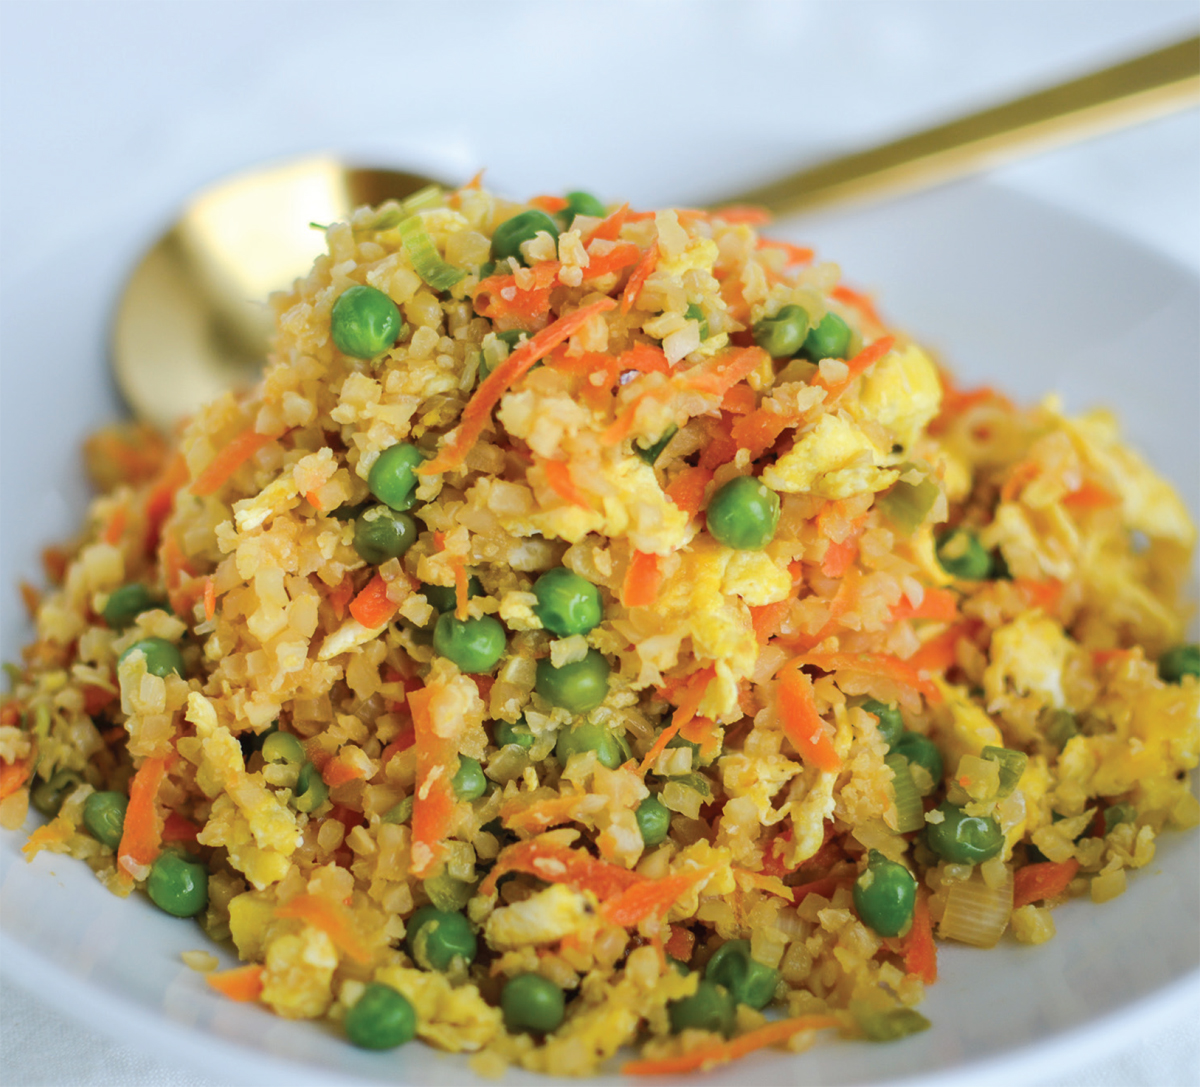
Craving take-out but want to stay on track? This one really hits the spot for Chinese take-out but without the crazy amounts of sugar, sodium, processed carbs, or MSG. This extra-light recipe is made with cauliflower rice, but check out my website for the brown rice version if you want another variation.
MAKES 4 SERVINGS | Gluten-Free, Dairy-Free, Vegetarian
1 tablespoon macadamia nut oil or avocado oil (or other healthy cooking oil), divided
2 large eggs
Sea salt
Freshly ground black pepper
5 scallions (aka green onions), root and 2 inches of green tops removed, chopped (about ½ cup)
1 large carrot, shredded or julienned (about 1 cup)
½ cup frozen peas
½ teaspoon freshly grated ginger
½ teaspoon freshly grated garlic
3 tablespoons organic tamari (see Notes) or low-sodium soy sauce
1 teaspoon apple cider vinegar
1 teaspoon toasted sesame oil
3 cups cooked cauliflower rice (fresh or frozen)
Heat ½ tablespoon oil over medium heat in a medium sided skillet.
Whisk the eggs in a mixing bowl until well combined and season to taste with a pinch each of salt and pepper. Add the eggs to the pan and scramble. Once cooked remove the scrambled eggs from the pan to a plate and reserve.
Add the remaining ½ tablespoon oil to the pan over medium heat; add the scallions and carrot and sauté 3 to 4 minutes until softened. Add the frozen peas, ginger, and garlic to the pan. Sauté 1 to 2 minutes, until fragrant. Add the tamari, apple cider vinegar, and toasted sesame oil. Stir well to combine once, then add the cauliflower rice. Cook about 5 minutes until the rice has absorbed all the liquid. Turn off the heat and stir in the scrambled eggs until well combined.
NOTES: Tamari is gluten-free soy sauce that tastes just like regular soy sauce. You can find it in the ethnic food aisle of most grocery stores or at an Asian market. You can also substitute coconut aminos for a completely soy-free version.
I’ve made this with both frozen cauliflower rice (found in the freezer section) and fresh cauliflower rice (often labeled “riced cauliflower,” found in the fresh produce section). I prefer the texture of this dish with the fresh (not frozen) version, but frozen works well, too. You can also buy a whole head of cauliflower and grate it with a cheese grater to make your own cauliflower rice, but the packages are fresh and much easier. One 12-ounce bag of cauliflower rice is generally 3 cups.
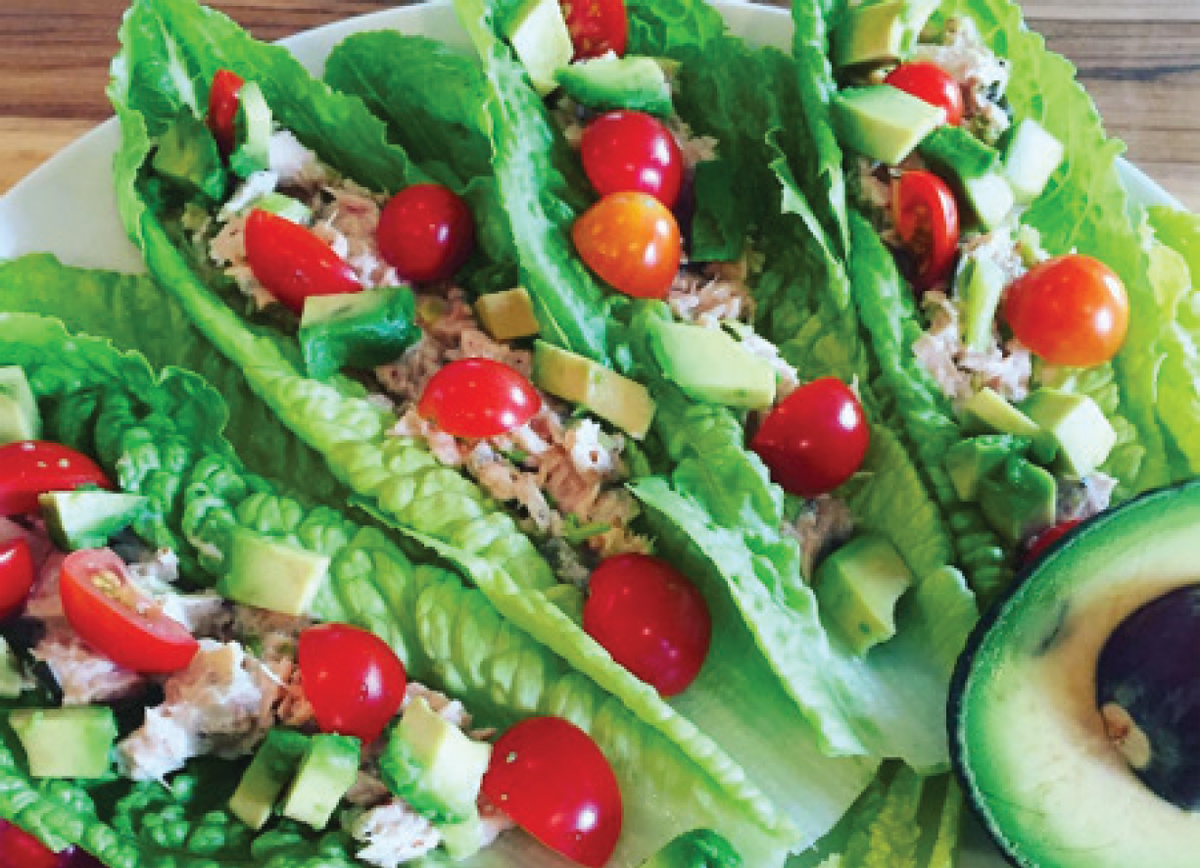
No time to cook? No problem. This is an easy-to-assemble dish that doesn’t require any cooking. It can be made ahead of time and it’s a recipe that’s easy to double. The secret ingredient, fermented pickle relish, adds an extra dose of gut-healthy probiotics to this seemingly simple dish.
MAKES 3 TO 4 SERVINGS | Gluten-Free, Dairy-Free
6 to 8 romaine leaves, rinsed and dried
2 cans albacore tuna, drained
2 tablespoons finely chopped celery
3 tablespoons healthy mayonnaise (I prefer Vegenaise)
1 ½ tablespoons unsweetened fermented pickle relish
¼ to ½ teaspoon sea salt
Pinch of black pepper
1 teaspoon raw local honey
TOPPINGS
8 grape tomatoes, halved
1 avocado, diced
Rinse the romaine leaves, and spin-dry in a salad spinner or pat dry with paper towel.
Drain the liquid from the tuna cans and add the tuna to a mixing bowl. Break up the larger chunks with a fork until the tuna is evenly flaky. Add the celery, mayonnaise, fermented pickle relish (our secret ingredient!), salt, and pepper to the tuna and mix well.
To assemble, lay out your individual leaves of romaine lettuce and add a scoop of tuna to each. Top with tomatoes and avocado. Store any leftover tuna for up to 2 days in the refrigerator.
NOTE: The dressing will keep for about a week in the refrigerator, so halve or double the recipe as needed.
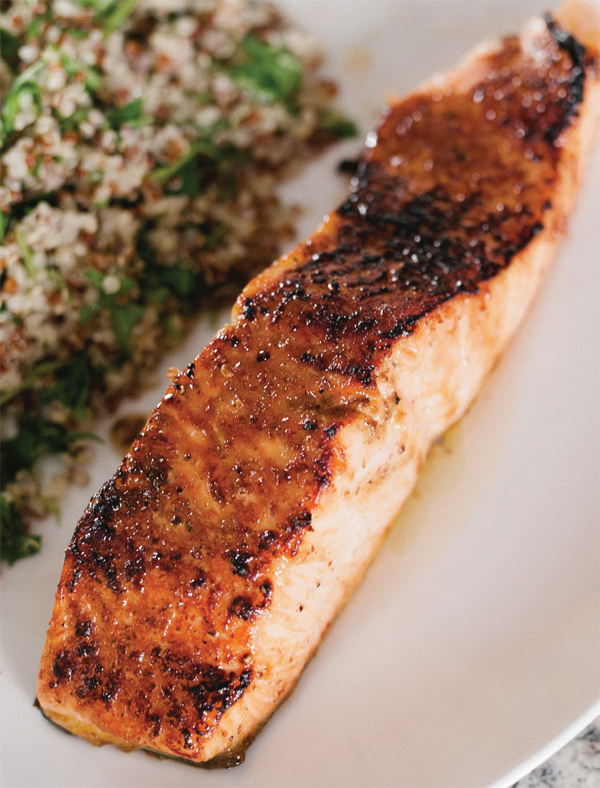
With three simple ingredients you probably already have in your refrigerator you can make restaurant-worthy salmon in less than 20 minutes.
MAKES 2 SERVINGS | Gluten-Free, Dairy-Free
Two 6- to 8-ounce salmon fillets
Sea salt
Freshly ground black pepper
2 teaspoons real maple syrup
2 teaspoons organic tamari (wheat-free soy sauce)
2 teaspoons Dijon or wholegrain mustard
Position your oven rack approximately 6 inches below the broiler. Preheat the oven to 300°F. Once the oven is preheated, turn it off and turn the broiler on. Line a baking pan with a sheet of parchment paper (optional). Place the salmon fillets on the baking pan skin-side down. Lightly coat the fillets with sea salt and freshly ground black pepper.
Whisk the maple syrup, tamari, and mustard in a small mixing bowl for the marinade. Coat the salmon with the marinade, then place in the oven and broil for 6 minutes, or until cooked through. Let the salmon cool for 5 to 10 minutes before serving.
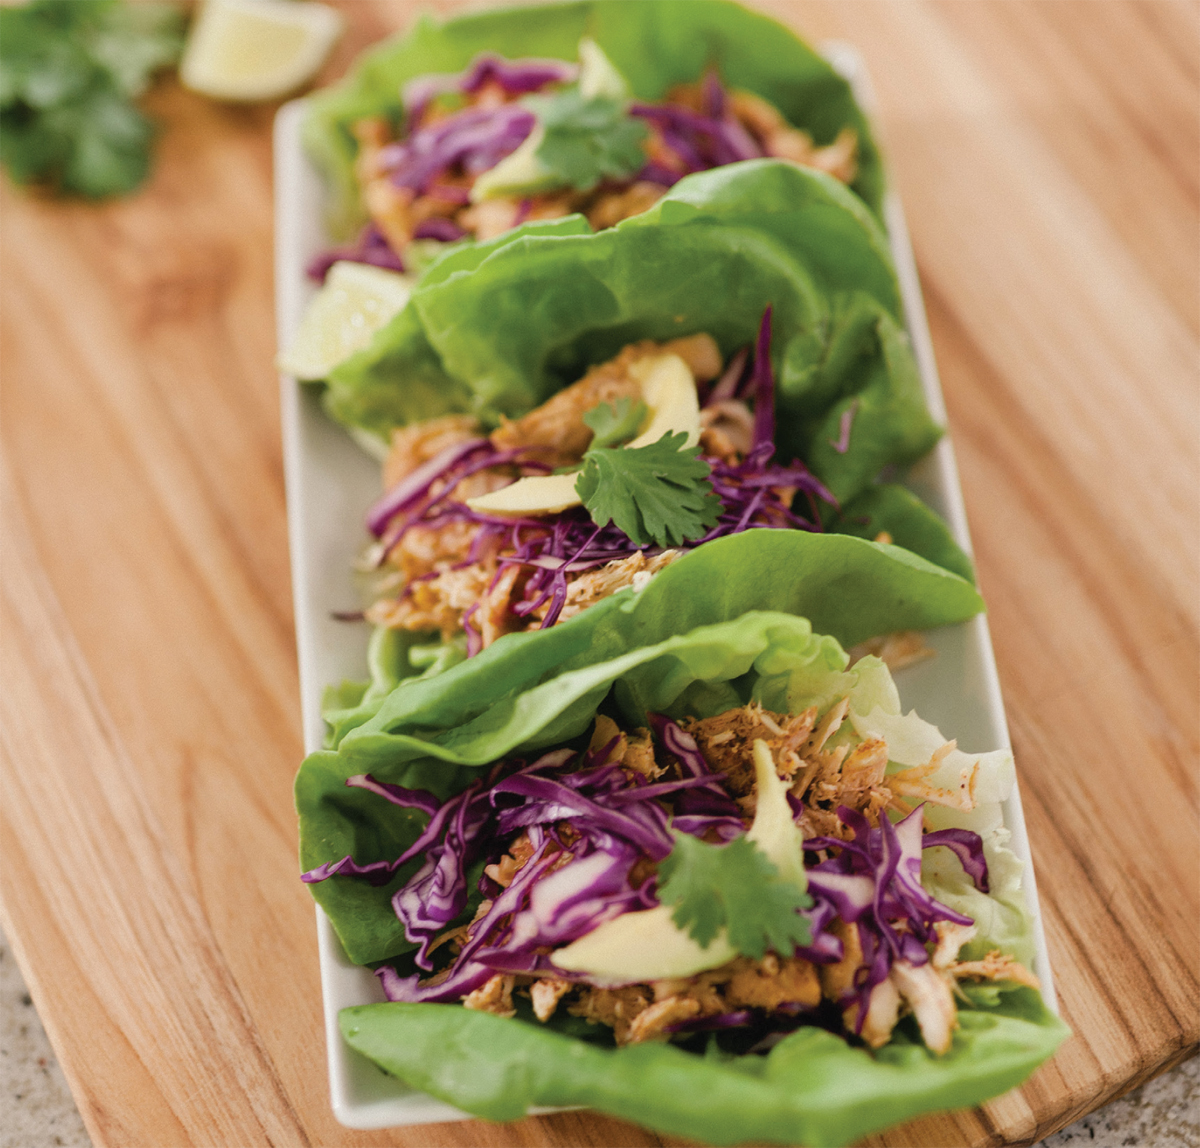
Insanely delicious healthy chicken tacos in less than 25 minutes of hands-on time? Count me in. This no-fuss recipe will be your new #TacoTuesday go-to for sure, and no one even has to know that you prepared it on Sunday.
MAKES 8 SERVINGS (CAN BE SCALED UP OR DOWN EASILY) | Gluten-Free, Dairy-Free
1 cup filtered water or chicken stock
3 garlic cloves, smashed
2 tablespoons mild or medium chili powder
1 tablespoon plus 1 teaspoon ground cumin
2 teaspoons sea salt
4 to 5 turns of freshly ground black pepper
1 medium onion, cut into quarters
2 pounds boneless skinless chicken breasts, preferably organic (that’s about 4 to 5 chicken breasts)
1 to 2 limes, juiced for garnish
SERVE WITH
Butter lettuce or romaine lettuce leaves, or your favorite healthy tortillas
Fermented salsa or pico de gallo
Shredded cabbage
Avocado
Cilantro
Mix the water, garlic, chili, cumin, salt, and pepper in a medium bowl. Place the chicken breasts in a slow cooker (aka Crock-Pot). Pour the liquid mixture over the chicken and top with the onion. Cook for 2 to 3 hours on high, or 4 to 5 hours on low, until the internal temperature of each breast reaches 165°F.
Shred the chicken with 2 forks. Squeeze the lime juice over the meat before serving. Serve in lettuce cups or your favorite tortillas with salsa, shredded cabbage, avocado, and cilantro.
This is my easy go-to healthy game-day chili recipe. I usually have most of the ingredients on hand, and it’s a cinch to pull together. It also feeds an army, so make it for a party or as a make-ahead meal for a few nights that week.
MAKES 10 SERVINGS | Gluten-Free, Dairy-Free
1 pound organic grass-fed ground beef (85 or 90% lean), optional
Sea salt (about 2 to 3 teaspoons total for the whole pot)
Freshly ground coarse black pepper
1 yellow or white onion, chopped
1 carrot, grated or finely chopped
2 to 3 garlic cloves, pressed or grated
2 tablespoons chili powder
2 teaspoons ground cumin
1 bay leaf
2 15-ounce cans tomato sauce
2 15-ounce cans diced San Marzano tomatoes (or 4 large fresh tomatoes, diced)
1 15-ounce can black beans, drained and rinsed
1 15-ounce can kidney beans, drained and rinsed
1 15-ounce can pinto beans, drained and rinsed
1 red bell pepper, chopped
1 jalapeño, chopped (optional, for heat)
⅛ teaspoon ground cinnamon, optional (it’s delicious, I promise!)
GARNISHES
Sliced avocado
Chopped cilantro
Finely diced red onion
A few organic corn tortilla chips (I like the extra-thin ones)
Preheat a large Dutch oven to high heat. Brown the meat, if using, for 2 to 3 minutes until slightly caramelized. Add a healthy pinch of sea salt and a sprinkle of black pepper and stir. Reduce the heat to medium. (If you’re making this chili vegan, place about 1 tablespoon olive oil in the pot then proceed to the next step.)
Add the onion and carrot. Stir and cook until soft, 3 to 4 minutes. Add the garlic, chili powder, cumin, bay leaf, cinnamon (if using), and a pinch of sea salt and stir for about 1 minute to cook the garlic and toast the spice. Reduce the heat while cooking the garlic if needed so it doesn’t burn.
Bring the pot back to medium heat; add the tomato sauce and diced tomatoes (the acid from the tomatoes will deglaze the bottom of the pot). Stir well, scraping the bottom of the pot.
Add the beans and peppers, plus 1 teaspoon salt and ½ teaspoon pepper. Stir well and cook for at least 5 minutes, then taste to see if you need more salt. I usually end up adding another teaspoon of sea salt, but depending on how much you used earlier and the other ingredients, you may not need it. Don’t be afraid to salt your food! Salt brings out the flavor of all foods, and cooking from scratch won’t even come close to the sodium levels in processed foods. Add 1 cup of filtered water to thin out your chili if it is too thick.
Let the chili simmer on low (stirring about every 15 minutes) for at least an hour to let the flavors come together. The longer it sits, the better the flavor will be. If you make it a few hours ahead, you can turn the heat on a covered Dutch oven off for a few hours and it will stay hot. Just turn the heat back on a few minutes before you’re ready to serve. Or, keep it in a Crock-Pot on the warm setting on your counter or transport to the tailgate. There are tons of options here.
Store any leftovers in an airtight glass container for up to 3 days in the refrigerator or up to 3 months in the freezer.
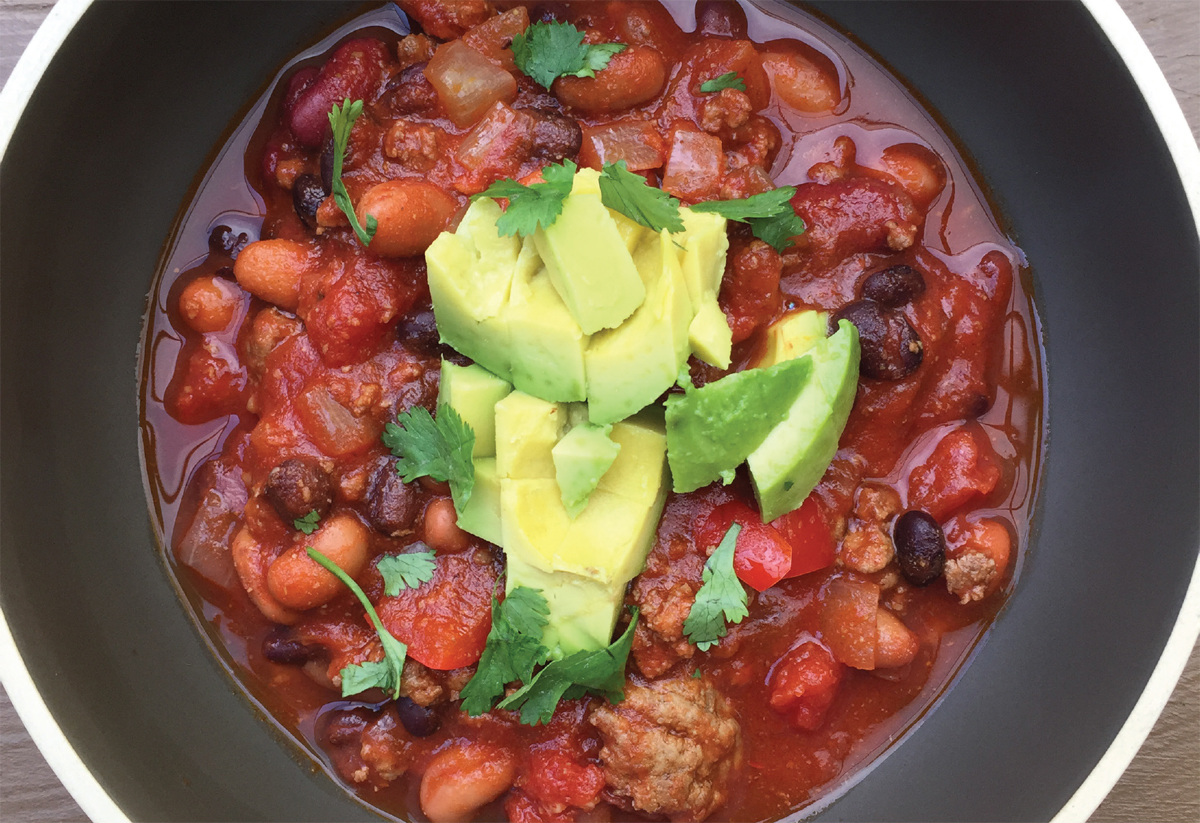
This recipe proves that avocados are a miracle food. The mousse is so decadent and smooth that it’s hard to believe that it’s vegan, let alone good for you. A small serving is a great after-dinner treat that not only satisfies your chocolate craving, but beautifies your skin while you sleep.
MAKES 6 TO 8 SERVINGS | Gluten-Free, Dairy-Free, Grain-Free, Nut-Free, Vegan
2 ripe avocados, peeled and pitted
2 tablespoons coconut cream
1 frozen banana
⅓ cup raw cacao
⅓ cup 100 percent pure maple syrup (substitute with another frozen banana for no sugar added)
2 teaspoons high-quality vanilla extract
Big pinch of fine sea salt
Blend all the ingredients on high in a food processor or high-speed blender until smooth. Top with strawberries, or eat it as is. The mousse will keep in the refrigerator for up to 4 days, or in the freezer for up to 4 months.
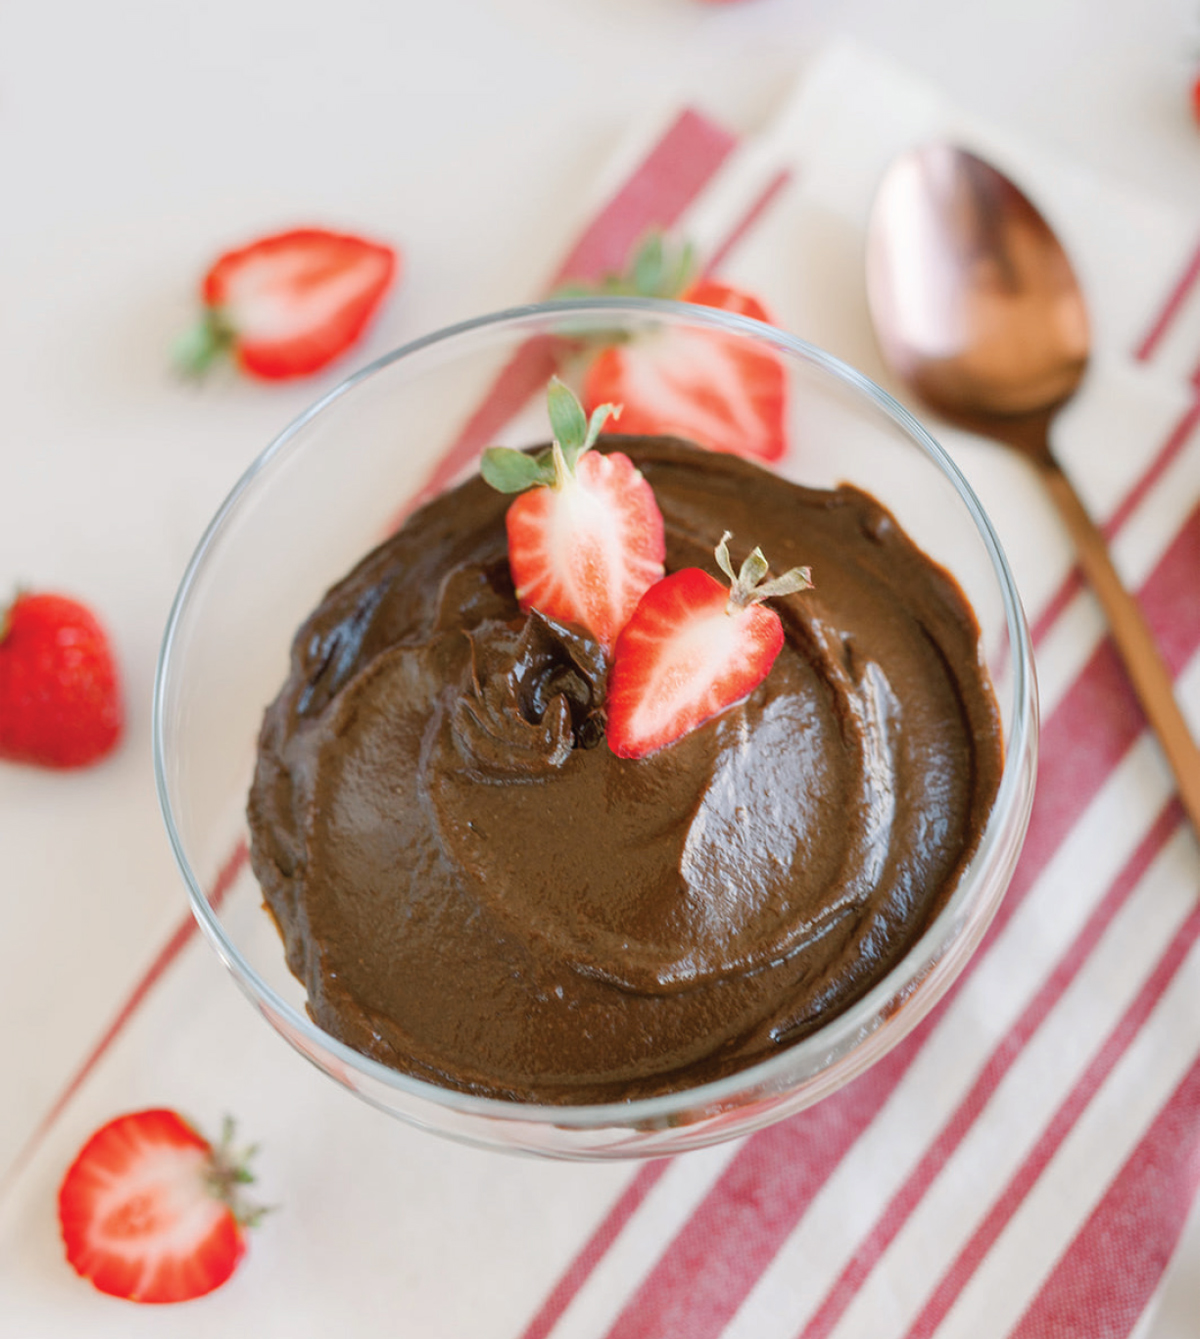
Light and fluffy, just the way a mousse should be, you’ll never believe how healthy this version is!
MAKES 8 SERVINGS | Gluten-Free, Dairy-Free, Vegan option
1 cup cashews, soaked overnight or quick-soaked
2 large avocados
¼ cup raw honey (not vegan) or maple syrup (vegan)
1 teaspoon lime zest
⅓ cup lime juice
¼ teaspoon sea salt
½ cup filtered water
Ginger, optional
Blend all the ingredients in a high-speed blender until smooth. Serve immediately or refrigerate. The mousse will keep in the refrigerator for up to 24 hours and freezes well.
NOTE: You can choose to soak your cashew nuts overnight, otherwise you can do a quick soak, where you use hot water and soak for 1 hour.
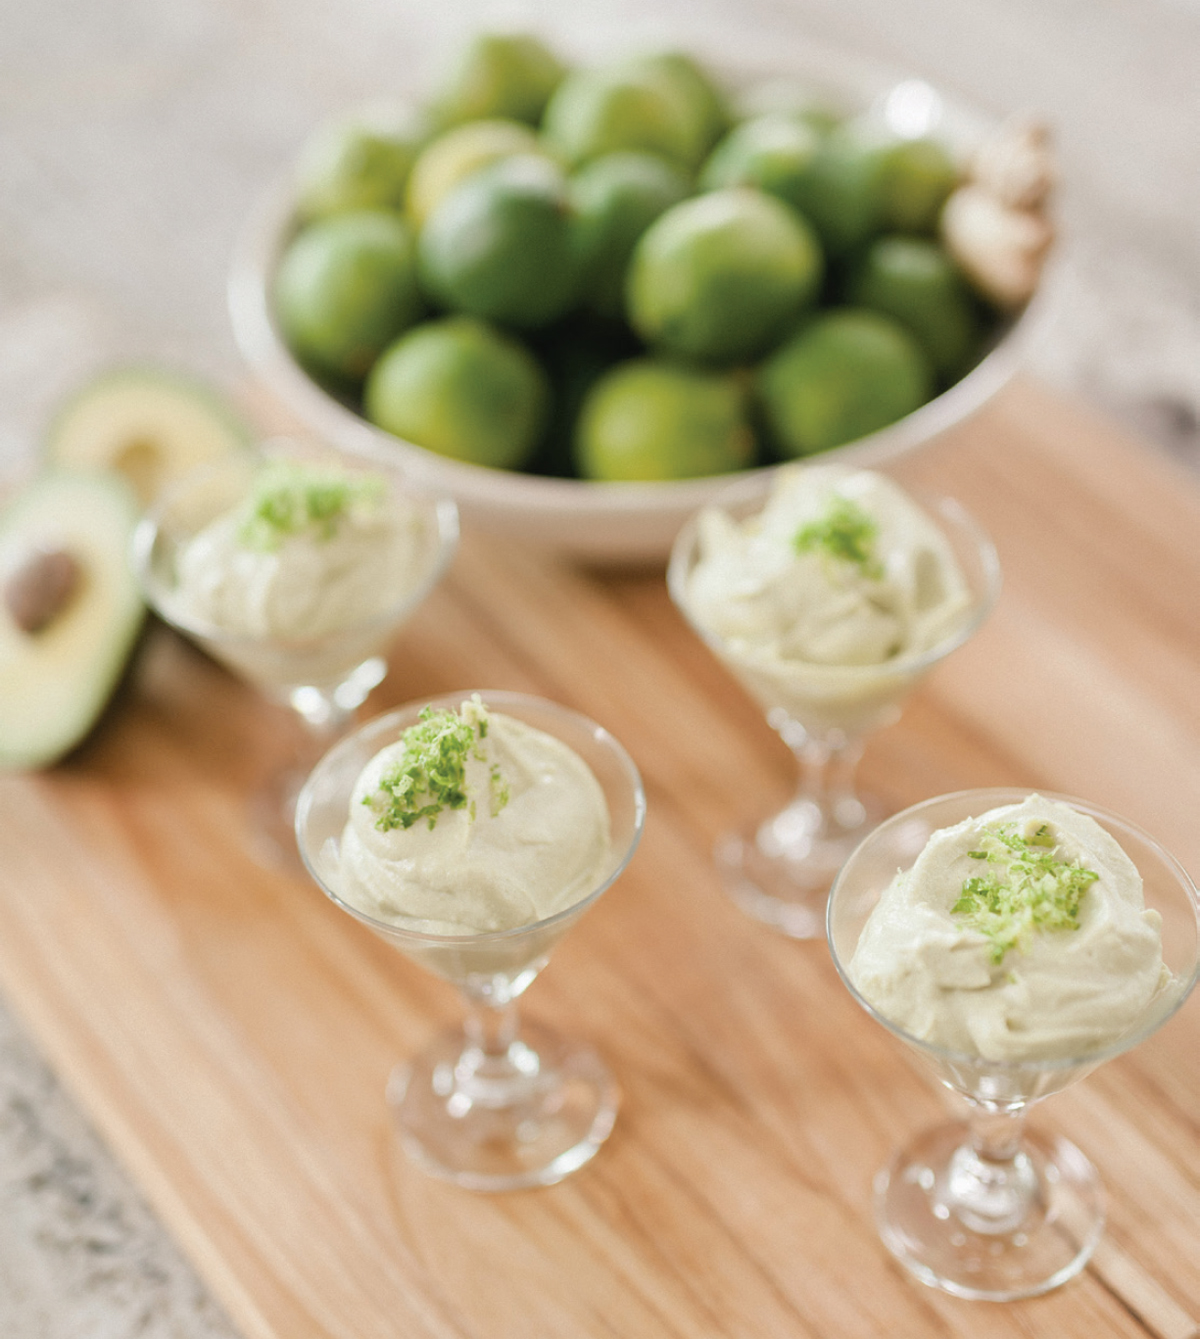
Tired of boring health food snacks? Try these easy, addictive, on-the-go energy bites; they’re like a party in your mouth. Using fiber- and mineral-rich dates as a base, this chocolatey snack satisfies your sweet tooth and provides extra energy for your busy lifestyle.
MAKES 24 BALLS | Gluten-Free, Dairy-Free, Vegan
¼ cup hazelnuts
15 dates, pitted
2 tablespoons cacao (raw chocolate) powder or unsweetened cocoa powder*
¼ cup unsweetened almond butter
2 tablespoons chia seeds
1 tablespoon coconut oil
½ teaspoon pure vanilla extract
Sea salt
*Make sure the cocoa does not contain any milk ingredients to make this recipe dairy-free and vegan.
Blend the hazelnuts into a medium-fine powder in a food processor. Overall, it should be an even grind. Remove the blade from the food processor and transfer the ground hazelnuts to a plate, where the energy bites will be rolled out.
Put the blade back in your food processor and the add dates, cacao, almond butter, chia seeds, coconut oil, vanilla, and salt. Run the food processor for 1 minute, then stop and scrape down the sides; this may be repeated once or twice. Once the mixture forms a ball, it should be done.
Transfer the mixture to a cutting board. Roll the mixture into balls with the palms of your hands, then roll the balls in the ground hazelnuts until evenly coated. Place all the energy bites on a baking sheet lined with parchment paper and refrigerate for 1 hour. Serve or store in a glass container in the refrigerator for up to 1 week.
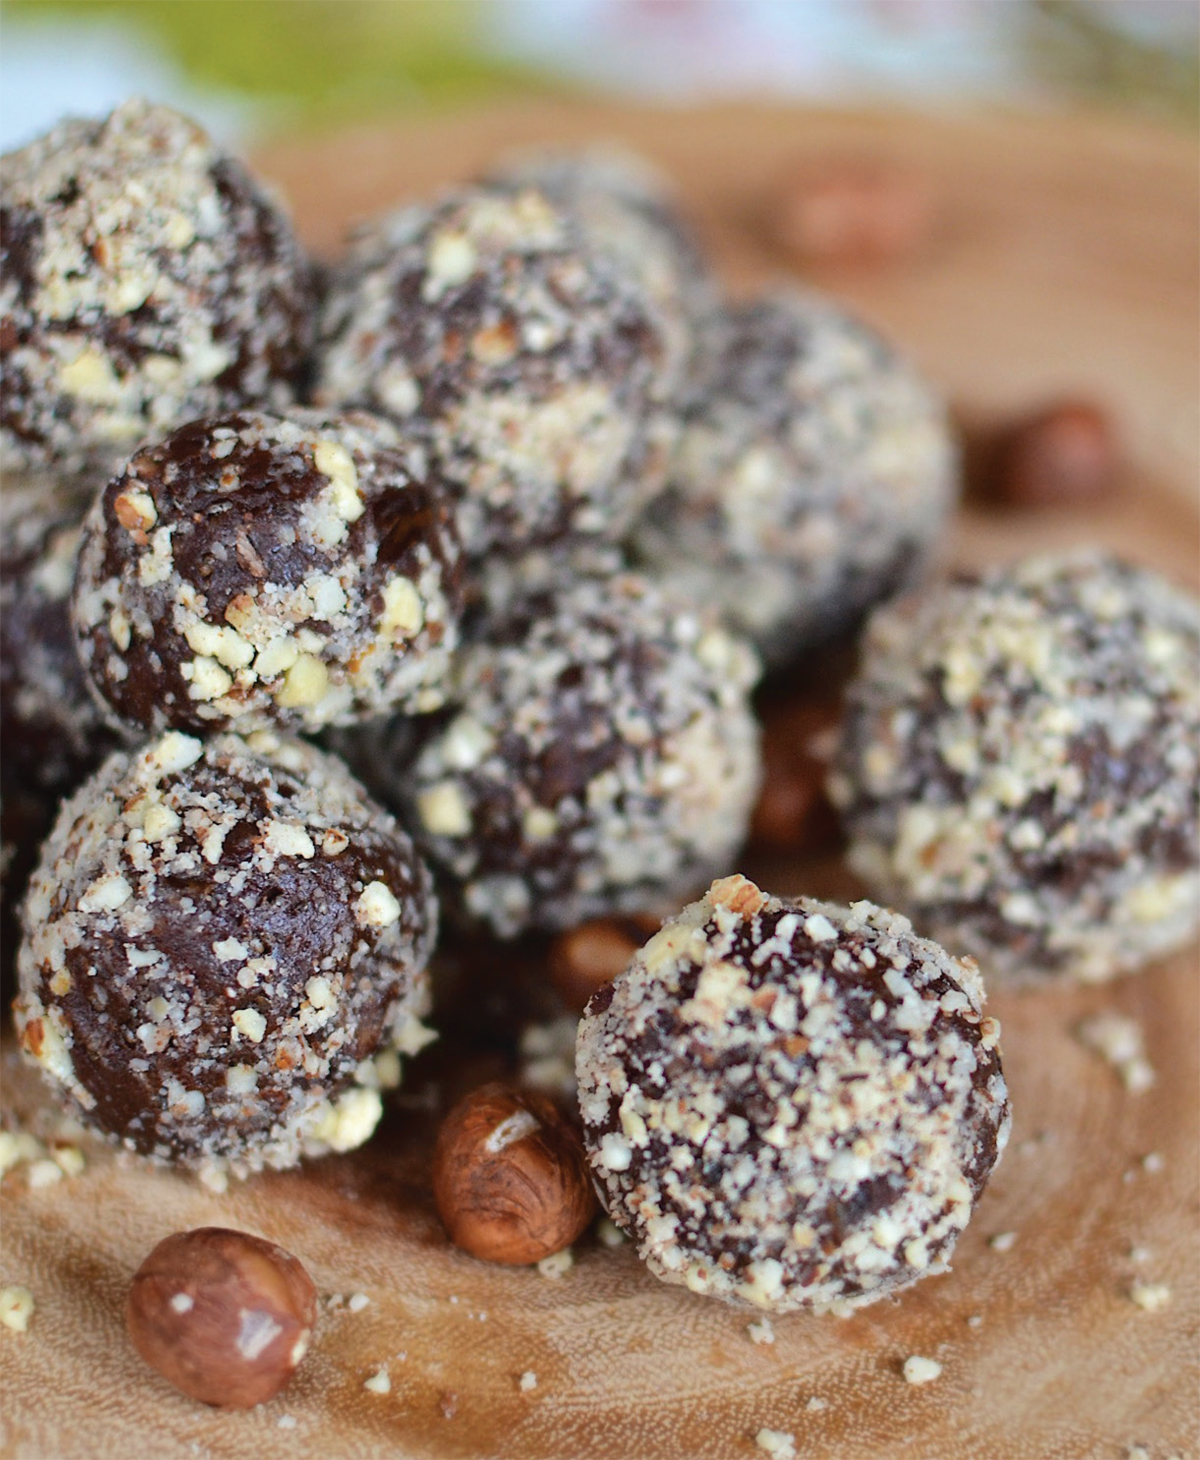
This recipe proves that healthy eating requires no sacrifice. One blog reader commented, “This recipe is amazing! I am not gluten-free but have two close friends who are, so I made this for them and tried it myself—somewhat skeptically—and it blew me away! My husband even loved it too!”
MAKES 8 SERVINGS | Gluten-Free, Dairy-Free, Vegan options
FILLING
4 firm, tart apples (about 1 ½ pounds), such as McIntosh, Granny Smith, or Pink Lady, peeled* and sliced thin
½ teaspoon grated orange zest (optional but recommended)
1 teaspoon grated lemon zest
2 tablespoons freshly squeezed lemon juice (zest the lemon first)
2 tablespoons filtered water (or bourbon or brandy for an adult twist)
2 teaspoons arrowroot starch or 1 tablespoon gluten-free flour mix
½ teaspoon ground cinnamon
½ teaspoon ground nutmeg or pumpkin pie spice
½ teaspoon high-quality vanilla extract, optional (use Madagascar vanilla for the best flavor)
1 big pinch of fine sea salt
½ cup real maple syrup (vegan) or honey (not vegan)
TOPPING
1 cup almond flour
1 cup whole rolled oats (use certified gluten-free oats if gluten-free is desired)
½ cup chopped pecans
⅓ cup real maple syrup (vegan) or honey (not vegan)
⅓ cup coconut crystals (aka coconut sugar)
½ teaspoon cinnamon
½ teaspoon fine sea salt
3 tablespoons cold unsalted grass-fed butter (not vegan) or vegan butter (like Earth Balance), diced, or ½ cup coconut oil (vegan)
*You can peel the apples or not. I like to peel half and leave the skin on the other half; the skin is full of fiber and adds nice texture.
Preheat the oven to 350°F.
Peel the apples if desired. I like to peel 2 apples and leave the skin on the other 2. Slice the apples into thin (about ⅛ inch) slices. Place the apples in a large mixing bowl. Add the rest of the ingredients for the filling and toss to coat all the apple slices. Pour the apples into an 8×8-inch (or 8-inch round) baking dish. Put the apples—uncovered—in the oven for 15 minutes while you make the topping to allow them to start releasing their juices.
For the topping, combine all the ingredients except the butter, and mix well until large crumbles form. Use your fingers or a knife to sprinkle chunks of the butter into the mixture; it should still resemble large crumbles.
Carefully remove the apples from the oven. Sprinkle the topping mixture evenly over the apples, covering the fruit completely. Place the dish back in the oven. Bake for 40 more minutes to 1 hour, until the top is golden brown and the fruit is bubbly. Check the topping 30 minutes after putting it in the oven. The topping should be crispy and lightly golden. If the topping is getting too dark or crispy, cover it with foil for the rest of the baking time. The apples will continue to release juice and soften, so bake no less than 50 minutes total for the best texture.
Serve warm with coconut whipped cream or vegan vanilla ice cream of your choice.
NOTES: To make this recipe no-sugar-added, eliminate the maple syrup and coconut crystals. It will be different and not as sweet, but still delicious.
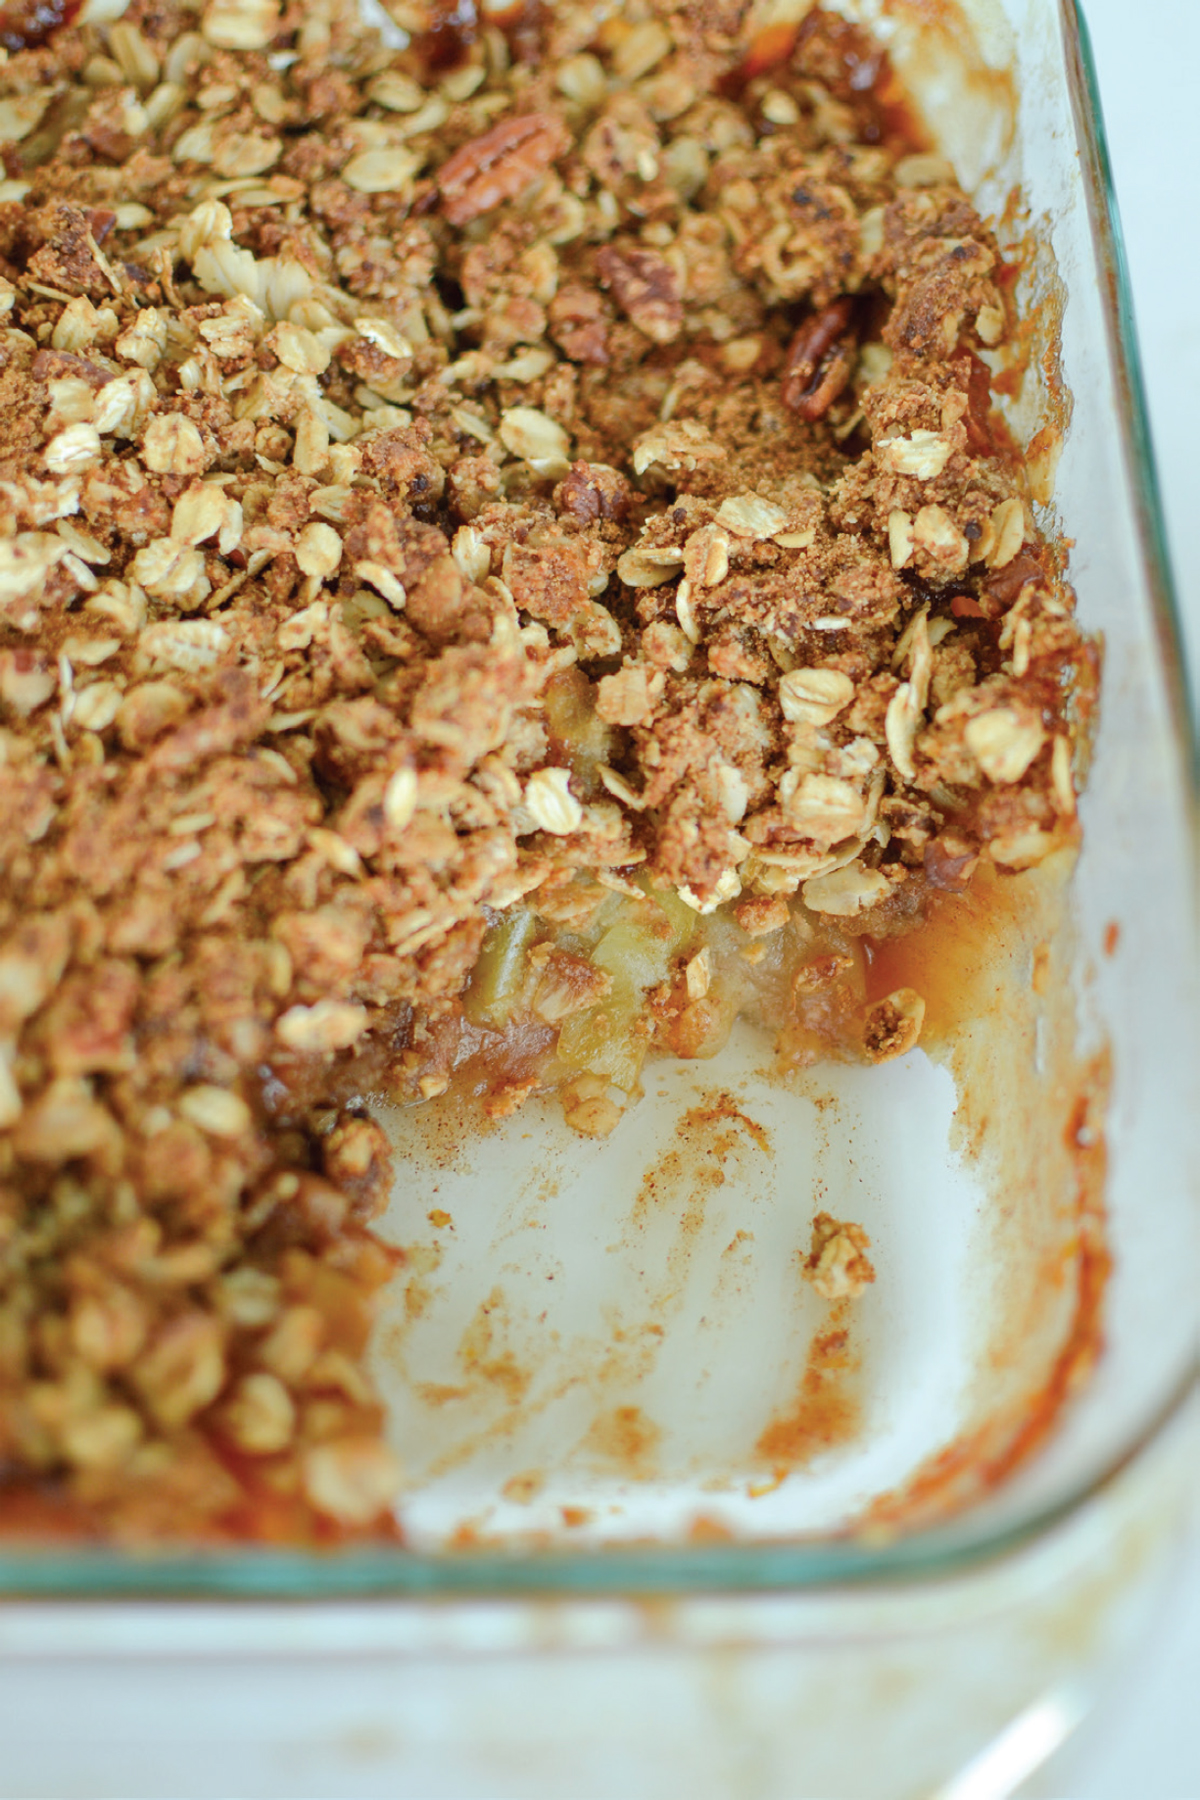
I’m in love with this healthy dessert! I’m calling it a cheesecake because it looks like one, but it doesn’t contain any dairy or processed ingredients. It’s a no-bake treat that’s full of healthy ingredients and comes together in less than 15 minutes of hands-on time.
MAKES 8 SERVINGS | Gluten-Free, Dairy-Free, Vegan
CRUST
½ teaspoon virgin coconut oil to grease the pan (grapeseed oil or almond oil will work, too)
¾ cup whole raw almonds
3 Medjool dates, pitted
½ teaspoon vanilla extract
Pinch of sea salt (about ⅛ teaspoon)
FILLING
Coconut cream from 1 can of organic coconut milk*
½ cup raspberries, fresh or frozen, plus ⅓ cup fresh berries for garnish
6 Medjool dates, pitted
2 teaspoons fresh lemon juice
1 teaspoon vanilla extract
Pinch of sea salt (a scant ⅛ teaspoon)
½ teaspoon lemon zest for garnish, optional
*For the coconut cream, you’ll want to use a can of full-fat coconut milk and let the coconut water separate from the cream in the can. To ensure that this happens, place the can in the refrigerator overnight. If the contents don’t separate, you can use the unseparated milk, the filling just won’t be as thick.
Grease a 7-inch tart pan with ½ teaspoon virgin coconut oil. An 8-inch pan will work, too; the cheesecake will just be a little thinner.
Pulse all the crust ingredients in the food processor until the almonds are very finely chopped—about 20 pulses, or 45 seconds. Be careful not to turn the mixture into almond butter; it should still have a texture to it. Press the crust into the tart pan with your fingers. Freeze for 30 minutes, or up to 24 hours, before you fill it. Cover the crust with plastic wrap if you plan to freeze it longer than an hour before filling.
Open the can of coconut milk upside down and pour the coconut water into a separate container so you can use just the cream. (Reserve the coconut water for a smoothie or another recipe.)
Place all the filling ingredients in a blender and blend until smooth, about 60 to 90 seconds. Pour the filling into the frozen crust, cover with plastic (a gallon-size plastic freezer bag works great), and freeze for at least 2 hours. Eat the cheesecake within 3 days of making it, letting the cheesecake sit at room temperature for about 10 minutes to soften slightly before serving, garnishing the edges with fresh raspberries and lemon zest, if desired. It won’t melt as fast as ice cream, but the dessert will eventually melt, so store it back in the fridge or freezer as needed.