Blazor is a .NET framework you use for building Single-Page Applications(SPA), just like you can use popular JavaScript frameworks, such as Angular, React, and Vue.js. But what is a SPA? In this chapter, you will use routing to jump between different sections of a SPA and send data between different components.
What Is a Single-Page Application?
At the beginning of the Web, there were only static pages. A static page is an HTML file somewhere on the server that gets sent back to the browser upon request. Here, the server is really nothing but a file server, returning HTML pages to the browser. The browser renders the HTML. The only interaction with the browser then was that you could click a link (the anchor <a> HTML element) to get another page from the server.
Later came the rise of dynamic pages. When a browser requests a dynamic page, the server runs a program to build the HTML in memory and sends the HTML back to the browser (this HTML never gets stored to disk; of course, the server can store the generated HTML in its cache for fast retrieval later, also known as output caching). Dynamic pages are flexible in the way that the same code can generate thousands of different pages by retrieving data from a database and using it to construct the page. Lots of commercial websites like amazon.com use this. But there is still a usability problem. Every time your user clicks a link, the server must generate the next page from scratch and send it to the browser for rendering. This results in a noticeable wait period, and of course, the browser re-renders the whole page.
In 1995, Brendan Eich invented JavaScript (today known as ECMAScript) to allow simple interactions in the browser. Web pages started to use JavaScript to retrieve parts of the page when the user interacts with the UI. One of the first examples of this technique was Microsoft’s Outlook Web Application. This web application looks and feels like Outlook, a desktop application, with support for all user interactions you expect from a desktop application. Google’s Gmail is another example. They are now known as Single-Page Applications. SPAs contain sections of the web page that are replaced at runtime depending on the user’s interaction. If you click an email, the main section of the page is replaced by the email’s view. If you click your inbox, the main section gets replaced by a list of emails; etc.
Single-Page Applications
A SPA is a web application that replaces certain parts of the UI without reloading the complete page. SPAs use JavaScript to implement this manipulation of the browser’s control tree, also known as the Document Object Model (DOM), and most of them consist of a fixed UI and a placeholder element where the contents are overwritten depending on where the user clicks. One of the main advantages of using a SPA is that you can make a SPA stateful. This means that you can keep information loaded by the application in memory, just like when you build a desktop application. You will look at an example of a SPA, built with Blazor, in this chapter.
Layout Components
Let’s start with the fixed part of a SPA. Every web application contains UI elements that you can find on every page, such as a header, footer, copyright, menu, etc. Copy-pasting these elements to every page would be a lot of work and would require updating every page if one of these elements needed to change. Developers don’t like to do that, so every framework for building websites has had a solution for this. For example, ASP.NET WebForms uses master pages, and ASP.NET MVC has layout pages. Blazor also has a mechanism for this called layout components.
Using Blazor Layout Components
Layout components are Blazor components. Anything you can do with a regular component you can do with a layout component, like dependency injection, data binding, and nesting other components. The only difference is that they must inherit from the LayoutComponentBase class.
The LayoutComponentBase class adds a Body property to ComponentBase as in Listing 9-1.
namespace Microsoft.AspNetCore.Components
{ public abstract class LayoutComponentBase : ComponentBase
{
[Parameter]
public RenderFragment? Body { get; set; }
}
}
Listing 9-1
The LayoutComponentBase Class (Simplified)
As you can see from Listing 9-1, the LayoutComponentBase class inherits from the ComponentBase class. This is why you can do the same thing as with normal components.
Let’s look at an example of a layout component. Open the SinglePageApplications solution from the code provided with this chapter. Now, look at the MainLayout.razor component in the SPA.Client’s Shared folder, which you’ll find in Listing 9-2. Since layout components are used by more than one component, it makes sense to place your layout components in the Shared folder, although there is not technical requirement to do so.
@inherits LayoutComponentBase
<div class="page">
<div class="sidebar">
<NavMenu />
</div>
<div class="main">
<div class="top-row px-4">
<a href="http://blazor.net" target="_blank"
class="ml-md-auto">About</a>
</div>
<div class="content px-4">
@Body
</div>
</div>
</div>
Listing 9-2
MainLayout.razor from the Template
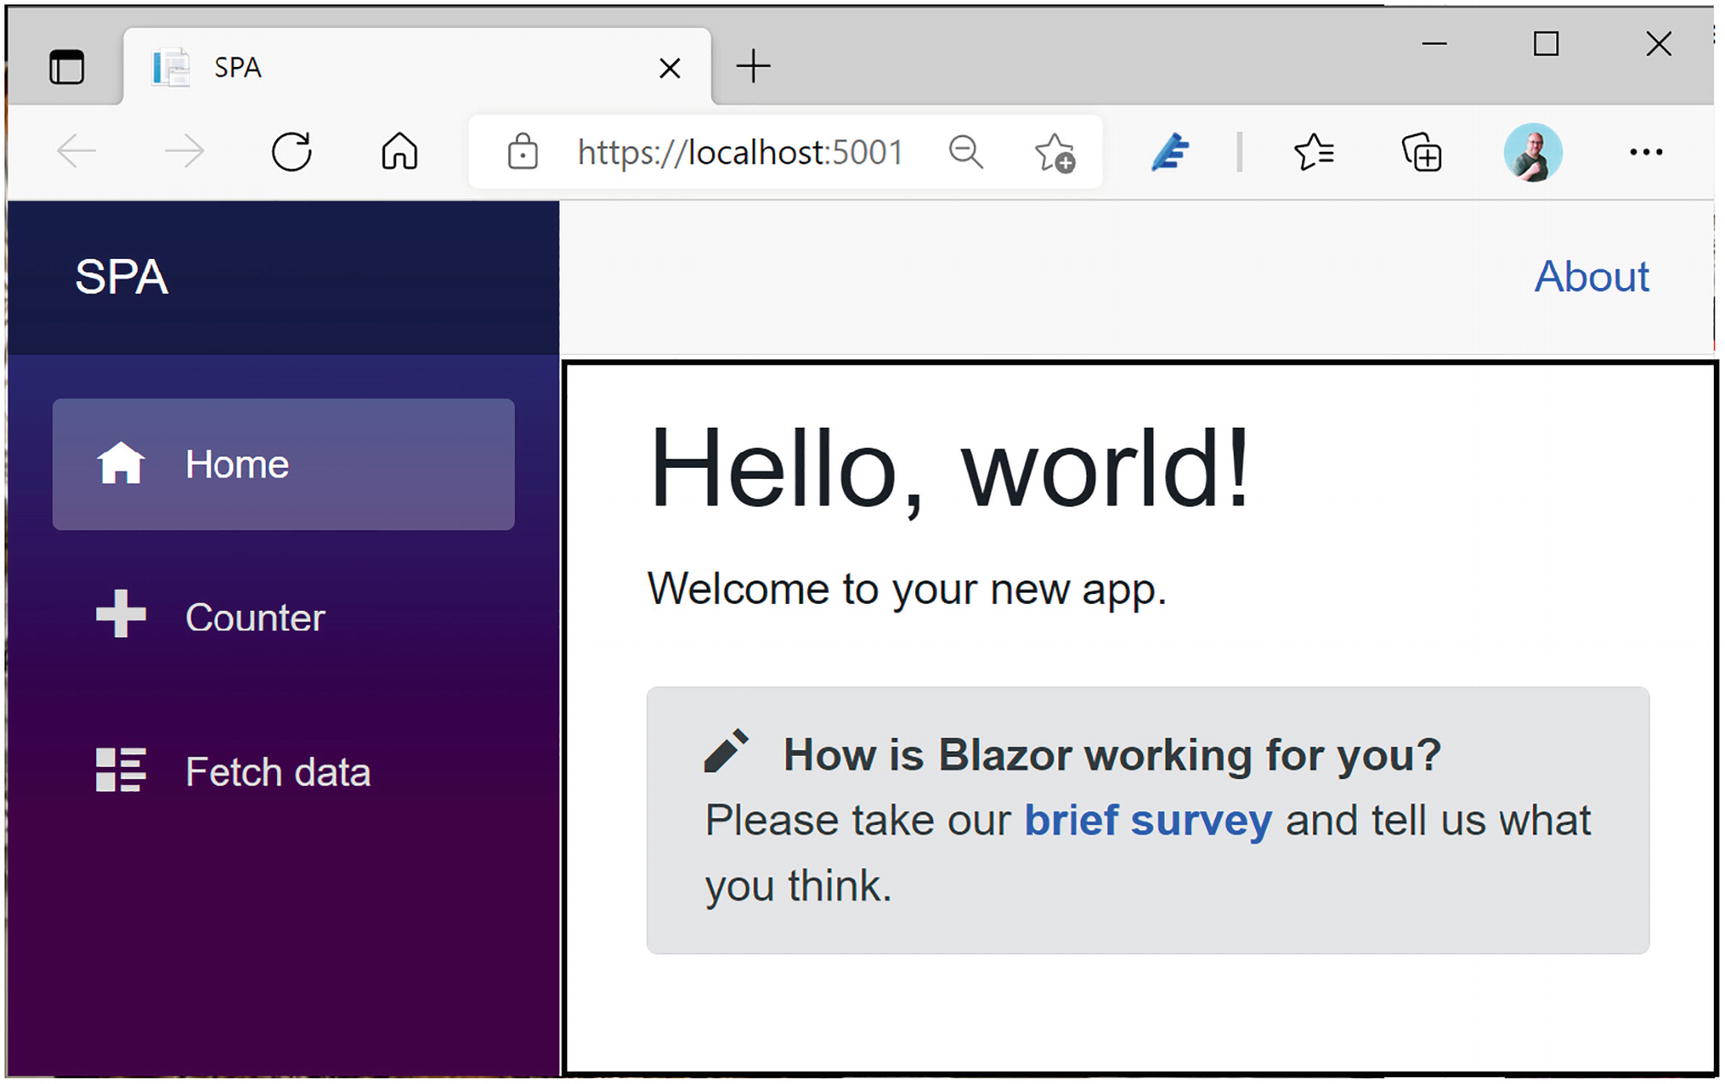
On the first line, the MainLayout component declares that it inherits from LayoutComponentBase. Then you see a sidebar and main <div> element, with the main element data binding to the inherited Body property. Any component that uses this layout component will end up where the @Body property is, so inside the <div class="content px-4">.
In Figure 9-1, you can see the sidebar on the left side (containing links to the different components of this Single-Page Application) and the main area on the right side with the @Body emphasized with a black rectangle (which I added to the figure). Clicking the Home, Counter, or Fetch Data link in the sidebar will replace the Body property with the selected component, updating the UI without reloading the whole page.
Figure 9-1
The MainLayout Component
You can find the CSS style used by this layout component in the MainLayout.razor.css file.
Configuring the Default Layout Component
So how does a component know which layout component to use? A component can change the layout component for itself, and an application can set a default layout component which will be used for all components that do not explicitly set their layout. Let us start with the application. Open the App.razor file as in Listing 9-3. The first thing to notice here is the RouteView component, which has a DefaultLayout property of type Type. This is where the default layout for this application is set. Any component selected by this RouteView component will use the MainLayout by default. And should no suitable component be found to display, the App component uses a LayoutView to display an error message. Again, this LayoutView uses the MainLayout, but of course you can change this to any layout you like.
<Router AppAssembly="@typeof(Program).Assembly">
<Found Context="routeData">
<RouteView RouteData="@routeData"
DefaultLayout="@typeof(MainLayout)" />
</Found>
<NotFound>
<LayoutView Layout="@typeof(MainLayout)">
<p>Sorry, there's nothing at this address.</p>
</LayoutView>
</NotFound>
</Router>
Listing 9-3
The App.razor Component
Internally, the RouteView component uses the LayoutView component to select the appropriate layout component. LayoutView allows you to change the layout component for any part of your component.
Let us create a simple error layout component, which will display the error horizontally centered. Start by adding a new razor component called ErrorLayout with markup from Listing 9-4 to the Shared folder.
@inherits LayoutComponentBase
<div class="error">
@Body
</div>
Listing 9-4
The ErrorLayout Component
Now add a CSS file called ErrorLayout.razor.css from Listing 9-5 to the Shared folder. This tells the error layout to place the body centered in the browser’s window.
.error {
position: relative;
display: flex;
justify-content: center;
align-items: center;
height: 100vh;
}
Listing 9-5
The ErrorLayout Style
Now replace the LayoutView’s Layout property from App.razor with Listing 9-6.
<Router AppAssembly="@typeof(Program).Assembly">
<Found Context="routeData">
<RouteView RouteData="@routeData"
DefaultLayout="@typeof(MainLayout)" />
</Found>
<NotFound>
<LayoutView Layout="@typeof(ErrorLayout)">
<p>Sorry, there's nothing at this address.</p>
</LayoutView>
</NotFound>
</Router>
Listing 9-6
The Updated App.razor File
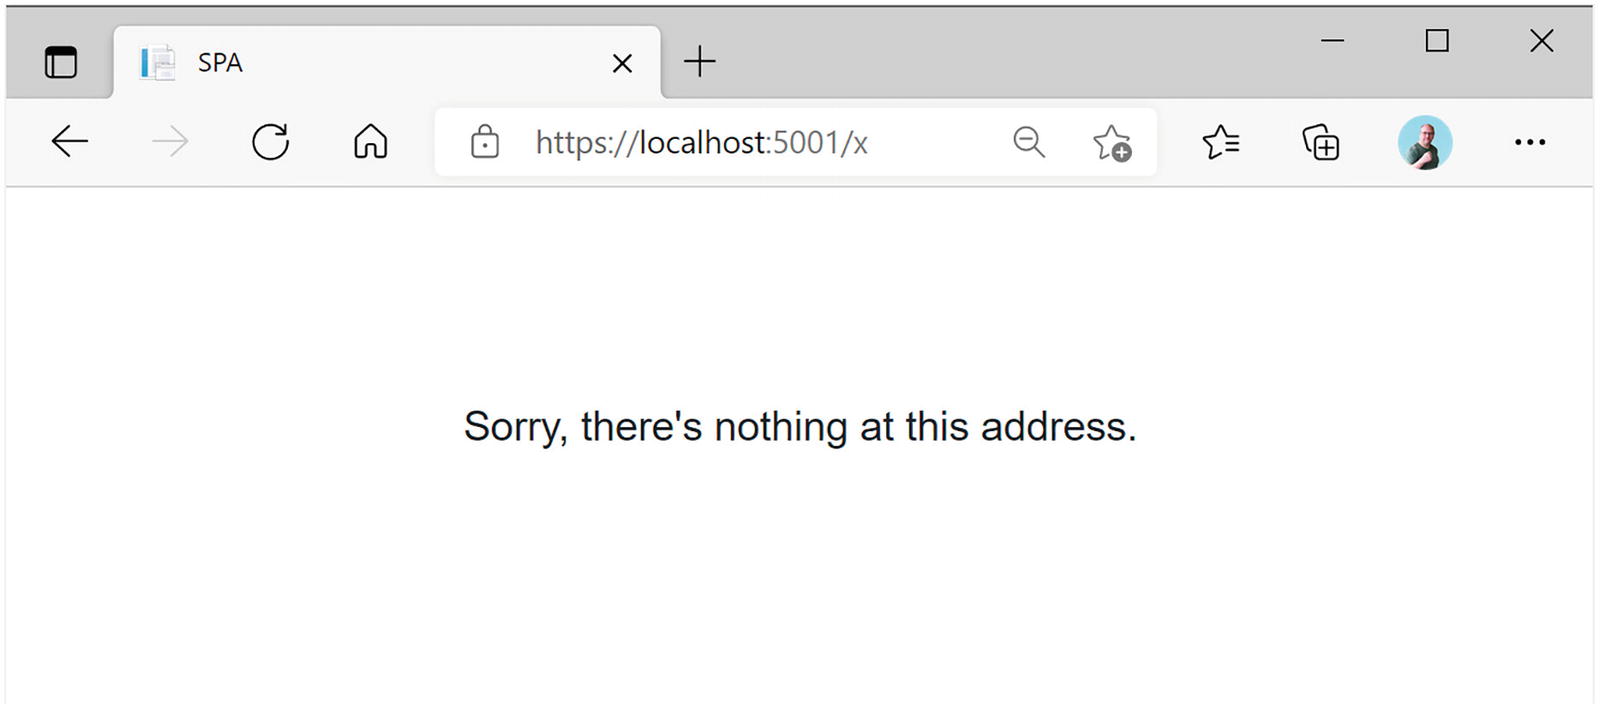
Run the Blazor application and manually change the browser’s URL by appending /x. Because there is nothing associated with this URL, the error layout will be used to display the error, as shown in Figure 9-2.
Figure 9-2
The ErrorLayout in Action
Selecting a Layout Component
Every component can select which layout to use by stating the name of the layout component with the @layout razor directive. For example, start by copying the MainLayout.razor file to MainLayoutRight.razor (this should also make a copy of the CSS file). This will generate a new layout component called MainLayoutRight, inferred from the filename (you might need to rebuild the project to force this). Inside the CSS file for this component, change both flex-direction properties to their reverse counterpart as shown in Listing 9-7.
.page {
position: relative;
display: flex;
flex-direction: column-reverse;
}
...
@media (min-width: 641px) {
.page {
flex-direction: row-reverse;
}
...
}
Listing 9-7
A Second Layout Component
Now open the Counter component and add a @layout razor directive as in Listing 9-8.
Run the application and watch the layout change as you alternate between Home and Counter.
Note
You can also use the LayoutAttribute if you’re building your component completely in code.
Most components will use the same layout. Instead of copying the same @layout razor directive to every page, you can also add a _Imports.razor file to the same folder as your components. Open the Pages folder from the SPA.Client project and add a new _Imports.razor file. Replace its content with Listing 9-9.
@layout MainLayoutRight
Listing 9-9
_Imports.razor
Any component in this folder (or subfolder) that does not explicitly declare a @layout component will use the MainLayoutRight layout component.
Nesting Layouts
Layout components can also be nested. You could define the MainLayout to contain all the UI that is shared between all components and then define a nested layout to be used by a subset of these components. For example, add a new razor view called NestedLayout.razor to the Shared folder and replace its contents with Listing 9-10.
@inherits LayoutComponentBase
@layout MainLayout
<div class="paper">
@Body
</div>
Listing 9-10
A Simple Nested Layout
To build a nested layout, you @inherit from LayoutComponentBase and set its @layout to another layout, for example, MainLayout. Our nested layout uses a paper class, so add a NestedLayout.razor.css file next to the component and add Listing 9-11.
.paper {
background-image: url("images/paper.jpg");
padding: 1em;
}
Listing 9-11
The NestedLayout Component’s Style
This style uses the paper.jpg background from the images folder.
Now add a layout directive to the _Imports.razer file within the Pages folder as in Listing 9-12.
@layout NestedLayout
Listing 9-12
Nested Layout
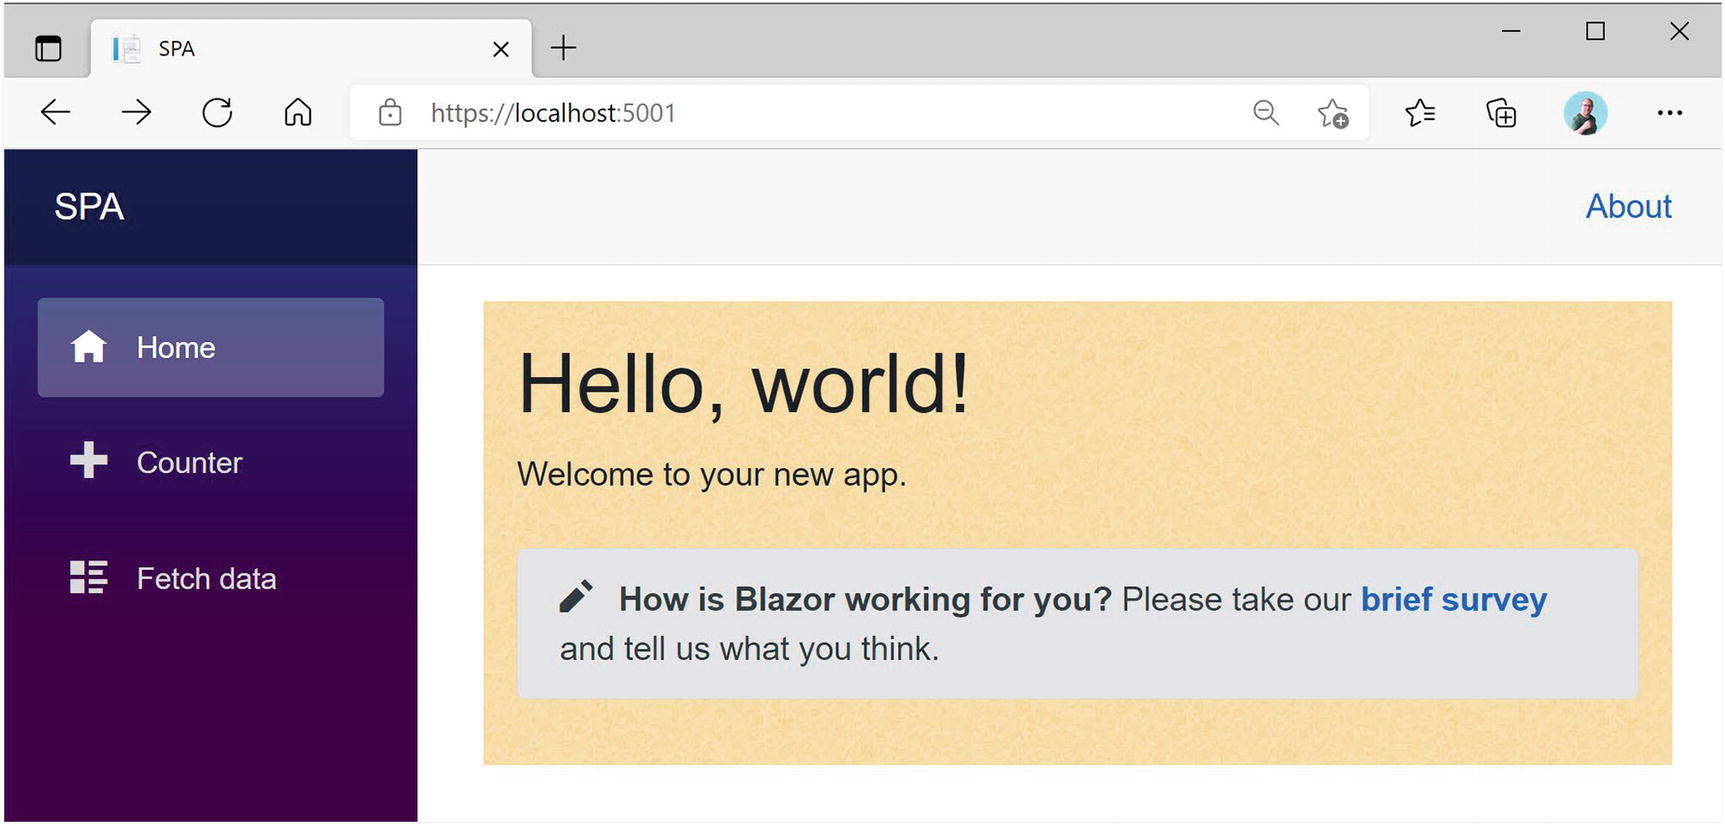
Run your application; now you have the Index component inside the nested layout which is inside the main layout, as shown in Figure 9-3.
Figure 9-3
The Index Component Using the Nested Layout
Blazor Routing
Single-Page Applications use routing to select which component gets picked to fill in the layout component’s Body property. Routing is the process of matching the browser’s URI to a collection of route templates and is used to select the component to be shown on screen. That is why every component in as Blazor SPA uses a @page directive to define the route template to tell the router which component to pick.
Installing the Router
When you create a Blazor solution from scratch, the router is already installed, but let’s have a look at how this is done. Open App.razor. This App component only has one component, the Router component, as shown in Listing 9-13.
<Router AppAssembly="@typeof(Program).Assembly">
<Found Context="routeData">
<RouteView RouteData="@routeData"
DefaultLayout="@typeof(MainLayout)" />
</Found>
<NotFound>
<LayoutView Layout="@typeof(ErrorLayout)">
<p>Sorry, there's nothing at this address.</p>
</LayoutView>
</NotFound>
</Router>
Listing 9-13
The App Component Containing the Router
The Router component is a templated component with two templates. The Found template is used for known routes, and the NotFound is shown when the URI does not match any of the known routes. You can replace the contents of the last to show a nice error page to the user.
The Found template uses a RouteView component which will render the selected component with its layout (or default layout). When the Router component gets instantiated, it will search its AppAssembly property for all components that have the RouteAttribute (the @page razor directive gets compiled into a RouteAttribute) and pick the component that matches the current browser’s URI. For example, the Counter component has the @page "/counter" razor directive, and when the URL in the browser matches /counter, it will display the Counter component in the MainLayout component.
The NavMenu Component
Review the MainLayout component from Listing 9-2. On the fourth line, you will see the NavMenu component. This component contains the links to navigate between components. This component comes with the template; feel free to use another component for navigation. We will use this component here to explore some of the concepts. Open the SPA.Client project and look for the NavMenu component in the Shared folder, which is repeated in Listing 9-14.
The first part of Listing 9-14 contains the Toggle button which allows you to hide and show the navigation menu. This button is only visible on displays with a narrow width (e.g., mobile displays). If you want to look at it, run your application and make the browser width smaller until you see the hamburger button in the top right corner, as in Figure 9-4. Click the button to show the navigation menu and click it again to hide the menu again.
Figure 9-4
Your Application on a Narrow Display Shows the Toggle Button
The remaining markup contains the navigation menu, which consists of NavLink components. Let’s look at the NavLink component.
The NavLink component is a specialized version of an anchor element <a/> used for creating navigation links, also known as hyperlinks. When the browser’s URI matches the href property of the NavLink, it applies a CSS style (the active CSS class if you want to customize it) to itself to let you know it is the current route. For example, look at Listing 9-15.
When the browser’s URI ends with /counter (ignoring things like query strings), this NavLink will apply the active style. Let’s look at another one in Listing 9-16.
<span class="oi oi-home" aria-hidden="true"></span> Home
</NavLink>
Listing 9-16
The Default Route’s NavLink
When the browser’s URI is empty (except for the site’s URL), the NavLink from Listing 9-16 will be active. But here you have a special case. Normally, NavLink components only match the end of the URI. For example, /counter matches the NavLink from Listing 9-15. But with an empty URI, this would match everything! This is why in the special case of an empty URI you need to tell the NavLink to match the whole URI. You do this with the Match property, which by default is set to NavLinkMatch.Prefix. If you want to match the whole URI, use NavLinkMatch.All as in Listing 9-16.
Setting the Route Template
The Routing component from Blazor examines the browser’s URI and searches for a component’s route template to match. But how do you set a component’s route template? Open the Counter component shown in Listing 9-8. At the top of this file is the @page "/counter" razor directive. It defines the route template. A route template is a string matching a URI, and that can contain parameters, which you can then use in your component.
You can change what gets displayed in the component by passing parameters in the route. You could pass the id of a product, look up the product’s details with the id, and use it to display the product’s details. Let’s look at an example. Change the Counter component to look like Listing 9-17 by adding another route template which will set the CurrentCount parameter. This listing illustrates a couple of things. First, you can have multiple @page razor directives, so the /counter and /counter/55 will both route to the Counter component. The second @page directive will set the CurrentCount parameter property from routing, and the name of the parameter is case-insensitive in the @page directive. Of course, parameters need to be encased in curly brackets so the router can identify it.
Just like routes in ASP.NET MVC Core, you can use route constraints to limit the type of parameter to match. For example, if you were to use the /counter/Blazor URI, the route template would not match because the parameter does not hold an integer value and the router would not find any component to match.
Constraints are even mandatory if you’re not using string typed parameters; otherwise, the router does not cast the parameter to the proper type. You specify the constraint by appending it using a colon, for example, @page "/counter/{currentCount:int}". You can also make the parameter optional by appending a question mark after the constraint as shown in Listing 9-17.
A list of other routing constraints can be found in Table 9-1. Each of these maps to the corresponding .NET type.
Table 9-1
Routing Constraints
Route Constraints
bool
datetime
decimal
double
float
guid
int
long
If you are building your components as pure C# components, apply the RouteAttribute to your class with the route template as an argument. This is what the @page directive gets compiled into.
Redirecting to Other Pages
How do you navigate to another component using routing? You have three choices: use a standard anchor element, use the NavLink component, and use code. Let’s start with the normal anchor tag.
Using an anchor (the <a/> HTML element) is effortless if you use a relative href. For example, add Listing 9-18 below the button of Listing 9-17.
<a class="btn btn-primary" href="/">Home</a>
Listing 9-18
Navigation Using an Anchor Tag
This link has been styled as a button using Bootstrap 4. Run your application and navigate to the Counter component. Click the Home button to navigate to the Index component whose route template matches “/”.
The NavLink component uses an underlying anchor, so its usage is similar. The only difference is that a NavLink component applies the active class when it matches the route. Generally, you only use a NavLink in the NavMenu component, but you are free to use it instead of anchors.
Navigating in code is also possible, but you will need an instance of the NavigationManager class through dependency injection. This instance allows you to examine the page’s URI and has a helpful NavigateTo method. This method takes a string that will become the browser’s new URI.
Let’s try an example. Modify the Counter component to look like Listing 9-19.
<button class="btn btn-primary" @onclick="StartFrom50">Start from 50</button>
@code {
[Parameter]
public int CurrentCount { get; set; }
private void IncrementCount()
{
CurrentCount++;
}
private void StartFrom50()
{
navigationManager.NavigateTo("/counter/50");
}
}
Listing 9-19
Using the NavigationManager
You tell dependency injection with the @inject razor directive to give you an instance of the NavigationManager and put it in the navigationManager field. The NavigationManager is one of the types that Blazor provides out of the box through dependency injection. Then you add a button that calls the StartFrom50 method when clicked. This method uses the NavigationManager to navigate to another URI by calling the NavigateTo method. Run your application and click the “Start from 50” button. You should navigate to /counter/50.
Understanding the Base Tag
Please don’t use absolute URIs when navigating. Why? Because when you deploy your application on the Internet, the base URI will change. Instead, Blazor uses the <base/> HTML element and all relative URIs will be combined with this <base/> tag. Where is the <base/> tag? With Blazor WebAssembly, open the wwwroot folder of your Blazor project and open index.html, shown in Listing 9-20.
Listing 9-20. index.html
If you are using Blazor Server, the base tag can be found in _Host.cshtml.
When you deploy in production, all you need to do is to update the base tag. For example, you might deploy your application to https://online.u2u.be/selfassessment. In this case, you would update the base element to <base href="/selfassessment" />. So why do you need to do this? If you deploy to https://online.u2u.be/selfassement, the Counter component’s URI becomes https://online.u2u.be/selfassessment/counter. Routing will ignore the base URI so it will match the counter as expected. You only need to specify the base URI once, as shown in Listing 9-20.
You can also access the base URI (with a trailing slash) using the NavigationManager BaseUri property. This can be useful for passing absolute URIs, for example, to certain JavaScript libraries. We will discuss JavaScript interoperability in the next chapter.
Lazy Loading with Routing
Some components in your Blazor application might not be used frequently. But even then, Blazor will need to load these components into the browser before running your application. For large applications, this can mean that your application will take even longer to load. However, with Blazor, we can load components the moment we need them. This is called lazy loading.
Lazy Loading Component Libraries
Lazy loading works by moving your infrequently used components into one or more component libraries, and then download right before you need them. We discussed building component libraries in Chapters 3 and 4. But let us start with a project, move these components and their dependencies into libraries, and then lazy load them. In the book’s download, you should find a solution called lazy loading. Open it. This project should look familiar. You should be able to build and run this application. Now, for the sake of the example, assume that the Counter and FetchData components are components we want to lazy load.
Let us start with the Counter component. Create a Razor Class Library project called LazyLoading.Library. Move the Counter component to this library. Now add a project reference to this library in the client project, and add a @using directive to the _Imports.razor (the one in the client project).
Build and run your solution. Click the Counter link. Hmm. No Counter has been found. Why?
When the Router component gets initialized, it searches the assembly from its AppAssembly parameter for components that have a @page razor directive. Before we moved the Counter component to the razor library, the Counter was part of this assembly. But now we have moved it to the razor library. So we need to tell the Router component to search this library for routable components. We can easily do this by setting the router’s AdditionalAssemblies parameter. Open App.razor and update it as in Listing 9-21. Here, we set the AdditionalAssemblies parameter to a List<Assembly>, which contains the Assembly for the Counter component. Now the application should show the Counter component.
@using System.Reflection
<Router AppAssembly="@typeof(Program).Assembly"
AdditionalAssemblies="@additionalAssemblies">
<Found Context="routeData">
<RouteView RouteData="@routeData"
DefaultLayout="@typeof(MainLayout)" />
</Found>
<NotFound>
<LayoutView Layout="@typeof(MainLayout)">
<p>Sorry, there's nothing at this address.</p>
</LayoutView>
</NotFound>
</Router>
@code {
private List<Assembly> additionalAssemblies =
new List<Assembly>
{
typeof(Counter).Assembly
};
}
Listing 9-21
Using AdditionalAssemblies
We moved the Counter component to a razor library, but we still load the Counter component when the application is loaded. Time to enable lazy loading for the razor library.
First, we will tell the runtime not to load the assembly automatically, and then we will load it when needed.
Marking an Assembly for Lazy Loading
Open the client project file using the editor and add the BlazorWebAssemblyLazyLoad element as in Listing 9-22. This tells the runtime not to load the LazyLoading.Library.dll automatically.
If you would try to run the application, you will get a runtime error:
Could not load file or assembly 'LazyLoading.Library, Version=1.0.0.0, Culture=neutral, PublicKeyToken=null' or one of its dependencies.
Dynamically Loading an Assembly
Now we need to load this assembly when needed. When do we load this assembly? When we navigate to a component that needs components from this assembly. How do we know we are navigating? The Router component has an event for this called OnNavigateAsync, and we will use it to detect when we navigate to a component that uses a lazy loaded component. Then we will download the assembly using the LazyAssemblyLoader so it is ready for use.
Update App.razor as in Listing 9-23. First, we get an instance of the LazyAssemblyLoader using dependency injection. Then we implement the OnNavigateAsync event using the OnNavigate method. This method receives a NavigationContext instance, and we check the Path if we are navigating to the Counter component. If so, we load the assembly for the Counter component (LazyLoading.Library.dll), and we add it to the additionalAssemblies collection, so the Router component can scan it for route templates.
var assemblies = await assemblyLoader.LoadAssembliesAsync(assembliesToLoad);
additionalAssemblies.AddRange(assemblies);
}
}
}
Listing 9-23
Loading an Assembly when Needed
Before we can run, we need to configure dependency injection
builder.Services.AddScoped<LazyAssemblyLoader>();
Build and run the application. It should start, and when we click Counter, the browser will download it and then render it.
What if we are on a slow network? Maybe we want to show some loading UI while the assembly downloads? The router has a Navigating RenderFragment which it shows while loading. So update the App.razor file again as in Listing 9-24, adding the Navigating UI.
Let us now try to lazy load the FetchData component. This component uses an IWeatherService instance, implemented by the WeatherService class (the one in the Blazor project). We will move both into the component library.
Start moving the FetchData component and WeatherService class to the component library. Add a project reference to the library project for the shared project since the WeatherService uses the Shared project’s IWeatherService.
Your library project should compile now.
Update the OnNavigate method from App.razor to check for the FetchData URI as in Listing 9-25.
if (context.Path == "counter" || context.Path == "fetchdata")
{
var assembliesToLoad = new List<string>
{
"LazyLoading.Library.dll"
};
var assemblies = await assemblyLoader
.LoadAssembliesAsync(assembliesToLoad);
additionalAssemblies.AddRange(assemblies);
}
}
Listing 9-25
The OnNavigate Method for FetchData
After fixing a couple of namespaces in C#, the project should build. But running will fail. Why? In Program.cs, you are adding the WeatherService class from the lazy loaded library, but that has not been loaded (because you told the runtime not to load it).
Maybe we could postpone registering the WeatherService? Sorry, that will not work. After initialization, dependency injection becomes immutable so you cannot add dependencies later. Of course, we could keep the WeatherService in the Blazor client project, but let us pretend it is worth our while to lazy load it. Time to introduce a little layer. We will use a factory method to create the dependency, and we will use dependency injection to inject the factory method. This will require a couple of changes.
Note
A factory is a class that has a method that will create an instance of some class, hiding the creation process. For example, a factory could create an instance, where the class of the instance depends on some business rule. Of course, all instances returned should have some common base class or interface. Actually, IServiceProvider used by dependency injection is also a factory, but we cannot use it here because it does not know about the existence of the WeatherService. Use your favorite search engine and search “Factory Pattern in C#” to learn more about this.
Both the component library and Blazor client application will need to share the factory interface, so add the IWeatherServiceFactory to the Shared project as in Listing 9-26.
namespace LazyLoading.Shared
{
public interface IWeatherServiceFactory
{
IWeatherService Create();
}
}
Listing 9-26
The IWeatherServiceFactory Interface
Update the FetchData component to use the IWeatherService factory to create the IWeatherService instance as in Listing 9-27.
Finally, we will implement the IWeatherServiceFactory interface in the client project as in Listing 9-28 to create the actual WeatherService. Because we only need WeatherService implementation when we use the factory, this will work because the library containing the WeatherService will be loaded through lazy loading. However, the WeatherService has its own dependencies, so we will request these in the factory and pass them to the actual service. The factory is a tiny class, and when the actual service with its dependencies is large, this technique becomes interesting.
using LazyLoading.Library.Services;
using LazyLoading.Shared;
using System.Net.Http;
namespace LazyLoading.Client
{
public class WeatherServiceFactory : IWeatherServiceFactory
{
private readonly HttpClient httpClient;
public WeatherServiceFactory(HttpClient httpClient)
{
this.httpClient = httpClient;
}
public IWeatherService Create() => new WeatherService(httpClient);
}
}
Listing 9-28
Implementing the IWeatherServiceFactory
Adding Another Page to PizzaPlace
Let us add a detail page to the PizzaPlace application. This will allow the customer to check the ingredients and nutritional information about pizzas.
When you navigate between different Blazor components with routing, you will probably encounter the need to send information from one component to another. One way to accomplish this is by setting a parameter in the destination component by passing it in the URI. For example, you could navigate to /pizzadetail/5 to tell the destination component to display information about the pizza with id 5. The destination component can then use a service to load the information about pizza #5 and then display this information. But in Blazor, there are other ways to pass information from one component to another. If both components share a common parent component, we can use data binding. Otherwise, we can use a State class (most developers call this State, but this is just a convention and you can call it anything you want; State just makes sense) and then use dependency injection to give every component the same instance of this class. This single State class contains the information that components need. We have seen this before in Chapter 5: this is known as the singleton pattern. Our PizzaPlace application is already using a State class, so it should not be too much work to use this pattern.
Start by opening the PizzaPlace solution. Open the Index component from the Pages folder (in the PizzaPlace.Client project) and look for the private State field. Remove this field (I’ve made it a comment) and replace it with an @inject directive as in Listing 9-29.
@page "/"
@inject IMenuService MenuService
@inject IOrderService orderService
@inject State State
...
@code {
// private State State { get; } = new State();
...
}
Listing 9-29
Using Dependency Injection to Get the State Singleton Instance
Now configure dependency injection in Program.cs to inject the State instance as a singleton, as in Listing 9-30.
using Microsoft.AspNetCore.Components.WebAssembly.Hosting;
using Microsoft.Extensions.DependencyInjection;
using PizzaPlace.Client.Services;
using PizzaPlace.Shared;
using System;
using System.Net.Http;
using System.Threading.Tasks;
namespace PizzaPlace.Client
{
public class Program
{
public static async Task Main(string[] args)
{
var builder = WebAssemblyHostBuilder.CreateDefault(args);
builder.RootComponents.Add<App>("#app");
builder.Services.AddScoped(sp => new HttpClient
{
BaseAddress = new Uri(builder.HostEnvironment
.BaseAddress)
});
builder.Services.AddTransient<IMenuService,
MenuService>();
builder.Services.AddTransient<IOrderService,
OrderService>();
builder.Services.AddSingleton<State>();
await builder.Build().RunAsync();
}
}
}
Listing 9-30
Configuring Dependency Injection for the State Singleton
Run the application. Everything should still work! What you’ve done is to use the singleton pattern to inject the State singleton into the Index component. Let’s add another component that will use the same State instance.
You want to display more information about a pizza using a new component, but before you do this, you need to update the State class. Add a new property called CurrentPizza to the State class, as shown in Listing 9-31.
using System.Linq;
namespace PizzaPlace.Shared
{
public class State
{
public Menu Menu { get; } = new Menu();
public ShoppingBasket Basket { get; } = new ShoppingBasket();
Now when someone clicks a pizza on the menu, it will display the pizza’s information. Update the PizzaItem component by wrapping the pizza name in an anchor, like in Listing 9-32. In the PizzaItem class from Listing 9-33, we add a new ShowPizzaInformation parameter, and if this is non-null, we wrap it in an anchor which invokes the ShowPizzaInformation action.
Update the PizzaList component to set the PizzaItem component’s ShowPizzaInformation parameter as in Listings 9-34 and 9-35.
When someone clicks this link, it should set the State instance’s CurrentPizza property. But you don’t have access to the State object. One way to solve this would be by injecting the State instance in the PizzaItem component. But you don’t want to overburden this component, so you add a ShowPizzaInformation callback delegate to tell the containing PizzaList component that you want to display more information about the pizza. Clicking the pizza name link simply invokes this callback without knowing what should happen.
You are applying a pattern here known as “Dumb and Smart Components.” A dumb component is a component that knows nothing about the global picture of the application. Because it doesn’t know anything about the rest of the application, a dumb component is easier to reuse. A smart component knows about the other parts of the application (such as which service to use to talk to the database) and will use dumb components to display its information. In our example, the PizzaList and PizzaItem are dumb components because they receive all their data through data binding, while the Index component is a smart component which talks to services.
Adding a PizzaInformation Callback to the PizzaList Component
using Microsoft.AspNetCore.Components;
using PizzaPlace.Shared;
using System;
using System.Collections.Generic;
namespace PizzaPlace.Client.Pages
{
public partial class PizzaList
{
[Parameter]
public string Title { get; set; } = default!;
[Parameter]
public IEnumerable<Pizza> Items { get; set; } = default!;
[Parameter]
public string ButtonClass { get; set; } = default!;
[Parameter]
public string ButtonTitle { get; set; } = default!;
[Parameter]
public EventCallback<Pizza> Selected { get; set; }
[Parameter]
public Action<Pizza>? ShowPizzaInformation { get; set; }
}
}
Listing 9-35
Add the ShowPizzaInformation Callback Parameter
You added a ShowPizzaInformation callback to the PizzaList component, and you simply pass it to the PizzaItem component. The Index component will set this callback, and the PizzaList will pass it to the PizzaItem component.
Update the Index component to set the State instance’s CurrentPizza and navigate to the PizzaInfo component, as shown in Listing 9-36. The Index component tells the PizzaList component to call the ShowPizzaInformation method when someone clicks the information link from the PizzaItem component. The ShowPizzaInformation method then sets the State’s CurrentPizza property (which we need in the PizzaInfo component) and navigates using the NavigationManager’s NavigateTo method to the /PizzaInfo route.
If you call NavigateTo as part of a callback, Blazor returns to the original route. That is why I use a background Task so Blazor will navigate after the callback.
The Index Component Navigates to the PizzaInfo Component
Right-click the Pages folder and add a new razor component called PizzaInfo, as shown in Listings 9-37 and 9-38 (to save you some time and to keep things simple, you can copy most of the PizzaItem component). The PizzaInfo component shows information about the State’s CurrentPizza. This works because you share the same State instance between these components. The Index component will set the CurrentPizza property in State, which is then displayed by the PizzaInfo component. Because State’s CurrentPizza property can be null, I also added a helper property to the PizzaInfo component that always returns a non-nullable CurrentPizza (using the null-forgiving operator) to avoid compiler warnings.
At the bottom of the markup, you add an anchor (and made it look like a button using bootstrap styling) to return to the menu. It’s an example of changing the route with anchors. Of course, in a real-life application, you would show the ingredients of the pizza, a nice picture, and nutritional information. I leave this as an exercise for you.
Summary
In this chapter, we looked at Single-Page Applications, layouts, routing, and lazy loading components. Single-Page Applications avoid navigating to another URLs because the browser will wipe its memory before loading the next page. By staying on the same page, we can keep data in memory, and to update the UI, we use code to replace part of the page. Layouts allow you to avoid replicating markup in your application and help keep your applications look consistent. We also saw that layouts can be nested. Routing is an important part of building Single-Page Applications and takes care of picking the component to show based on the browser’s URI. You define route templates using the @page syntax where you use route parameters and constraints. Navigation in your Single-Page Application can be done using anchor tags and from code using the NavigationManager class. We also saw that you can lazy load components by moving them into a component library and then dynamically load the library just when you need it. Finally, we modified the PizzaPlace application to show how to share information between different routes in a Blazor application.