In general, client-side browser applications need to store some of their data. In some cases, such as games, the application can store its data in the browser itself, using browser local storage. But in most cases, storage will happen on the server, which has access to database engines such as SQL Server. In this chapter, you will learn the basics of storing data using Entity Framework Core and exposing that data using REST and microservices built on top of ASP.NET Core.
What Is REST?
Storing data on the Web is ubiquitous. But how can applications communicate with one another? Representational State Transfer (REST) is a protocol built on top of the HTTP protocol for invoking functionality on servers, such as retrieving and storing data from/in a database.
Understanding HTTP
Before talking about REST, you should have a good understanding of the Hypertext Transfer Protocol, better known as HTTP. HTTP was created by Tim Berners-Lee at CERN in 1989. CERN is a center for elementary physics research, and what do researchers do when they have completed their research? They publish papers with their research findings. Before the Internet, publishing a paper was done literally on paper (hence the name), and it took a lot of time between writing the paper and getting it published in a research magazine. Instead, Tim Berners-Lee devised a way to put papers on a server and allow users to read these papers using a program, now known as a browser.
Also, scientific papers contain a lot of references, and when you want to read a paper like this, it helps to be able to access the referenced papers. The Internet facilitates reading papers through the use of HyperText Markup Language (HTML). Hypertext is an electronic document format that can contain links to other documents. You simply click the link to read the other paper, and you can go back to the first paper simply by clicking the back button in your browser.
Universal Resource Identifiers and Methods
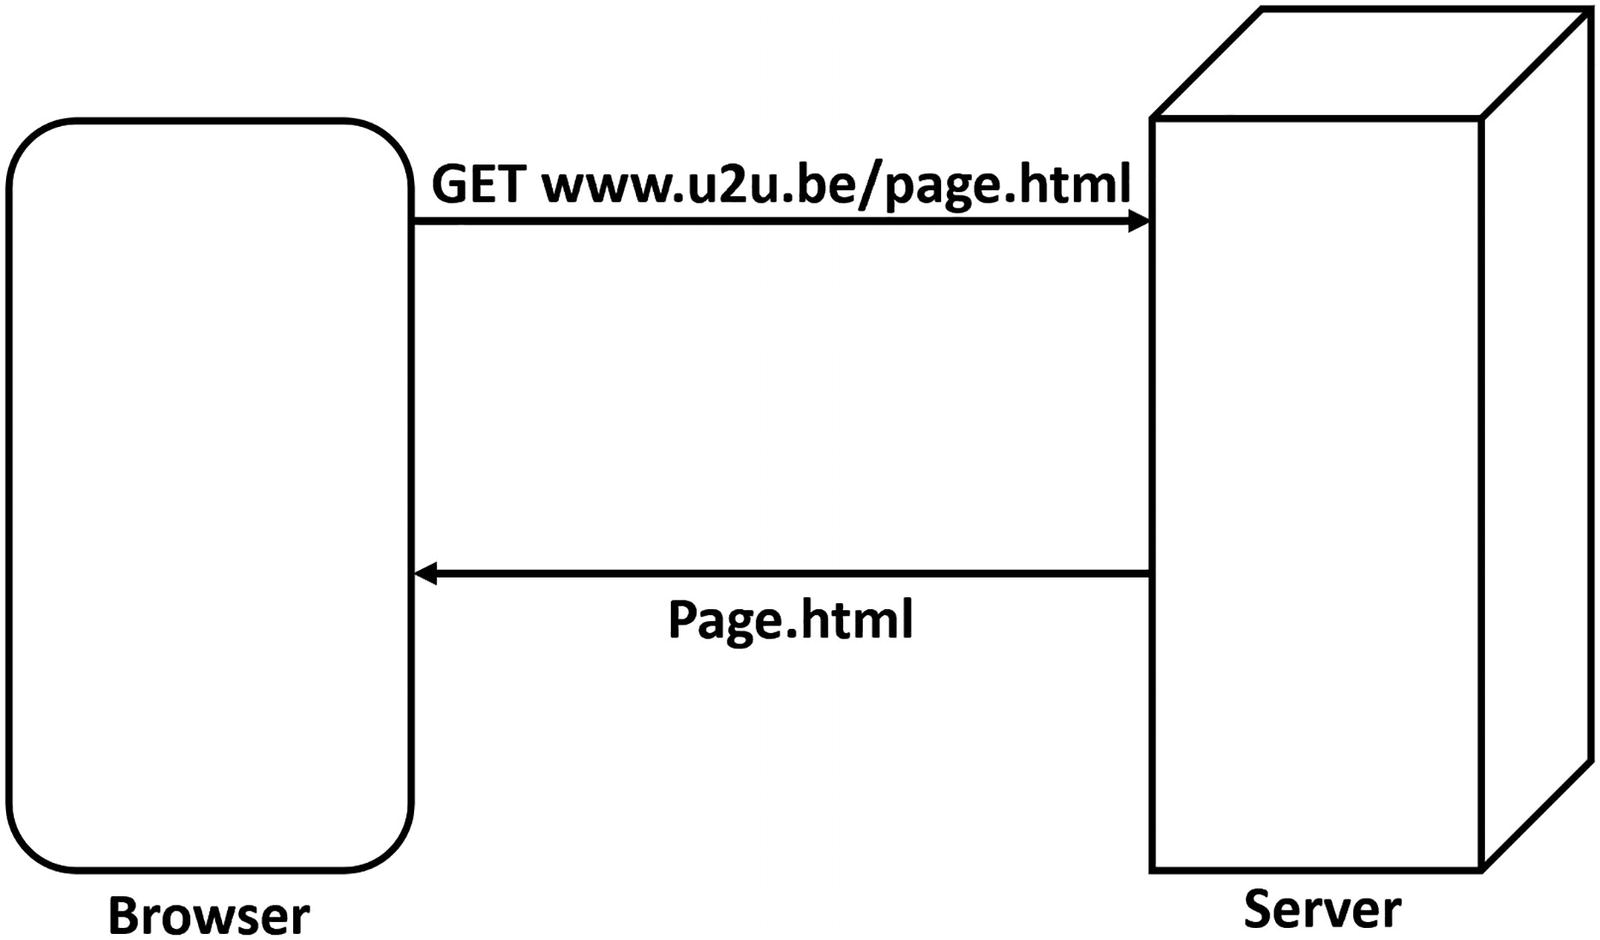
The Browser Uses the GET Method to Retrieve a Document
Each time you click a hyperlink in the HTML document, the browser repeats this process with another URI.
But there are other methods. If you want to publish a new paper, you can use the POST method to send the paper to the server, supplying it with a URI. In this case, the server will store the paper at the requested URI. If you want to make a change to your paper, for example, to correct a spelling mistake, you can use the PUT method. Now the server will overwrite the contents identified by the URI. And finally, you can delete the paper using the DELETE method and its URI.
Using the GET, POST, PUT, and DELETE methods like this is a convention. Nothing states that you have to do things like this, and there are REST services out there that use different methods and status codes.
HTTP Status Codes
What happens when you ask a server about something it doesn’t have? What should the server return? Servers not only return HTML, but they also return a status code about the result. When the server can process the request successfully, it will in general return status code 200 (other successful status codes exist – you can find the full list at https://en.wikipedia.org/wiki/List_of_HTTP_status_codes). When the server can’t find the resource, it will return a status code 404. Status code 404 simply means “Not Found”. The client will receive this status code and can react appropriately. When the browser receives a status code 200 (“OK”), it displays the HTML; when it receives a 404, it displays a not found screen; etc.
Invoking Server Functionality Using REST
Think about these methods we just talked about. With POST, you can CREATE something on a server; with GET, you can READ it back; with PUT, you can UPDATE something on the server; and with DELETE, you can DELETE things on the server. They are also known as CRUD operations (CREATE-READ-UPDATE-DELETE). Roy Fielding, the inventor of REST, realized that using the HTTP protocol you can also use HTTP to work with data stored in a database. For example, if you use the GET method with a URI http://someserver/categories, the server can execute some code to retrieve data from the categories relational table and return it. Of course, the server would use a format more appropriate for transferring data, such as XML or JSON. Because there are many different formats for data, the server also needs a way to convey which format it is sending. (At the beginning of the Web, only HTML was used as the format.) This is done through HTTP headers.
HTTP Headers
HTTP headers are instructions exchanged between the client and the server. Headers are key/value pairs, where the client and server agree on the key. Many standard HTTP headers exist which you can find at https://en.wikipedia.org/wiki/List_of_HTTP_header_fields. For example, a server can use the Content-Type header to tell the client to expect a specific format. Another header is the Accept header, which is sent by the client to the server to politely ask the server to send the content in that format; this is also known as content negotiation . Currently, the most popular format is JavaScript Object Notation (JSON). And this is the exchange format you will use with Blazor.
JavaScript Object Notation
An Example of JSON
This JSON format describes a book, which can easily be transformed into an object in memory. The simplest JSON object is a string, for example, “Hello world!”, but we can also create complex objects and arrays of JSON objects.
Objects are denoted using curly braces, and inside the curly braces, you will see a comma-separated list of properties. Each property uses a key : value notation. Listing 6-1 contains a single book object with as value another nested JSON object. This nested JSON object contains two properties: title and chapters. The title is a string "Microsoft Blazor". Note that the property name is also transferred as a string. And finally, the chapters property is an array of strings, where you use square brackets to indicate an array.
The JSON format is used for transferring data between two machines but today is also heavily used for configuring tools, such as ASP.NET Core (just look at appsettings.json in an ASP.NET server project). JSON today is way more popular on the Web than XML, probably because of its simplicity.
Some Examples of REST Calls
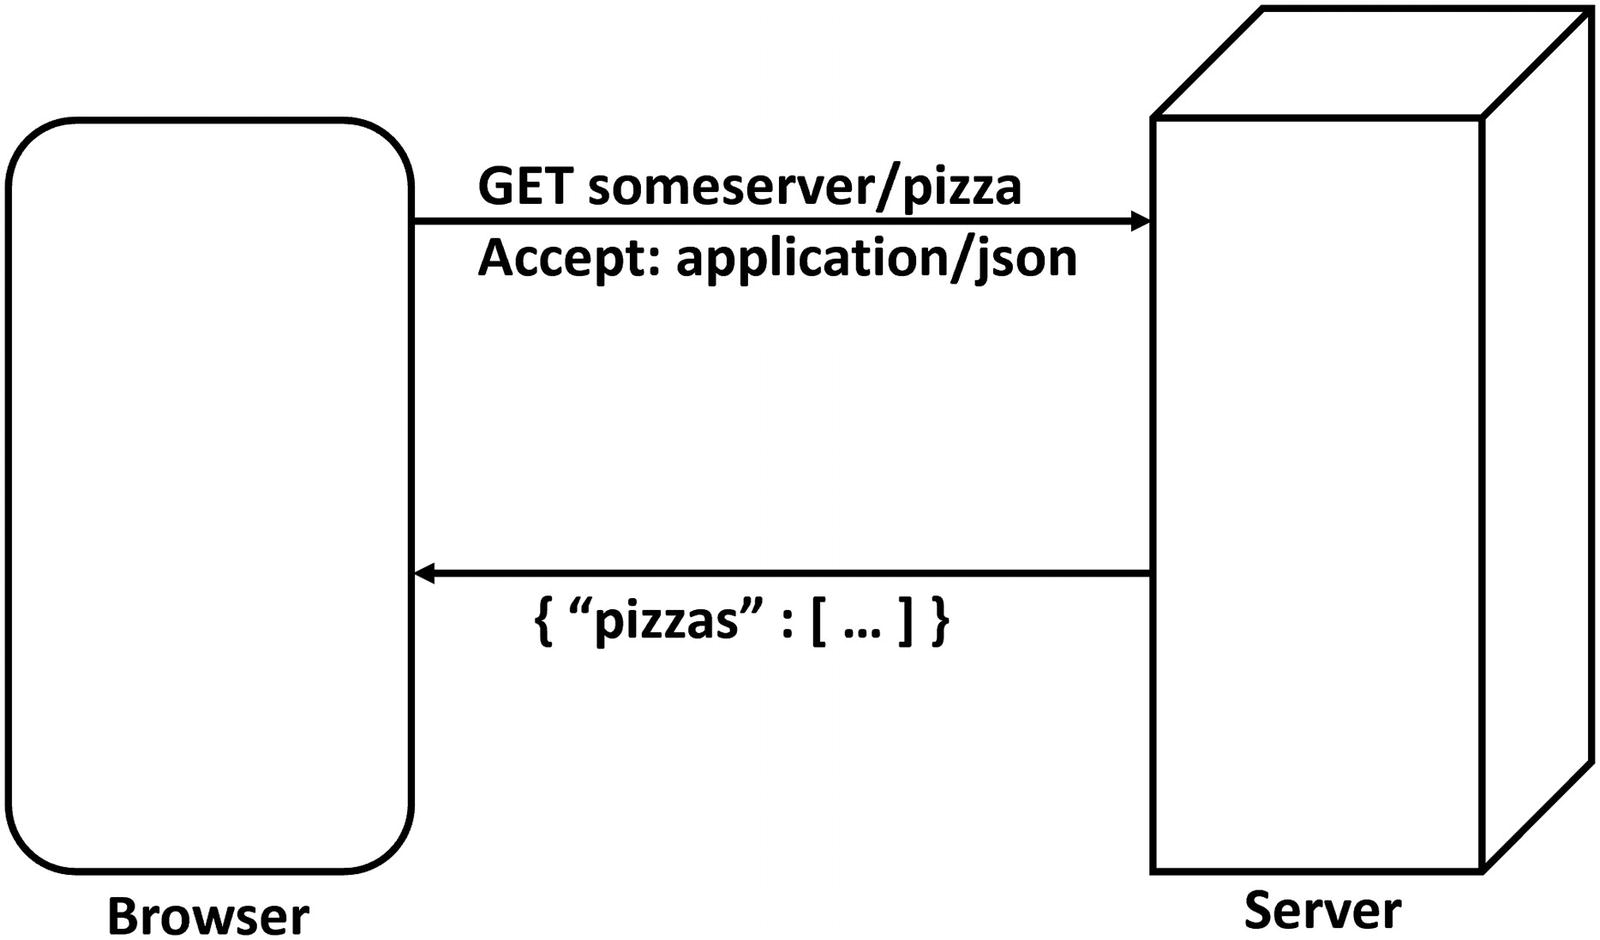
Using REST to Retrieve a List of Pizzas
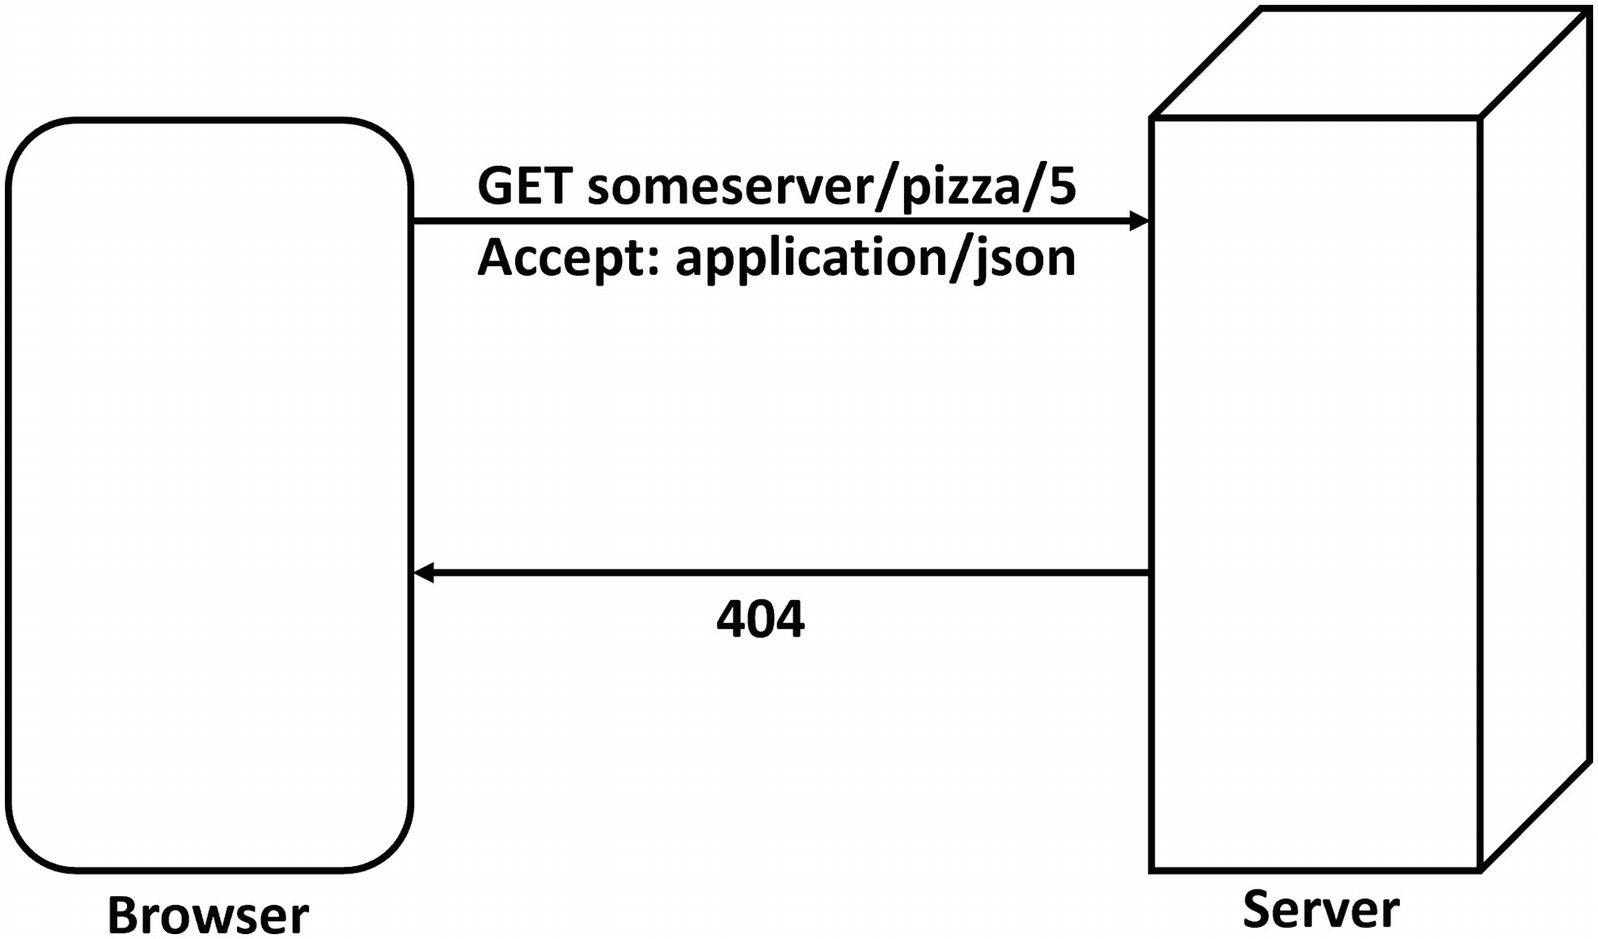
Using REST to Retrieve a Specific Pizza Through Its Unique Id
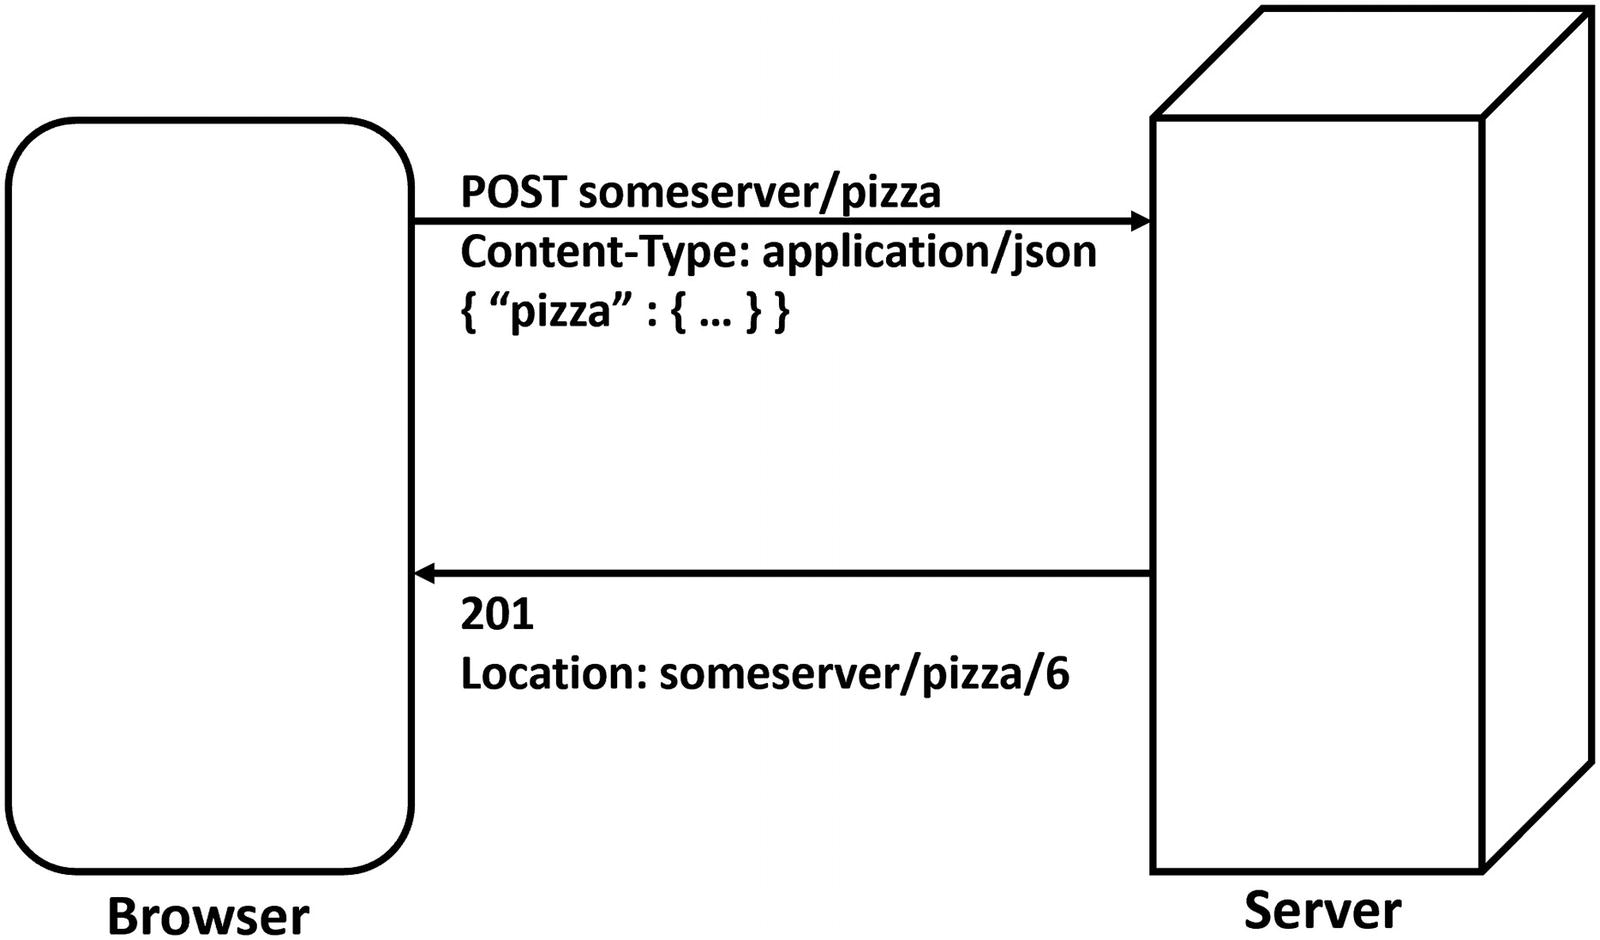
POSTing an Order to the Server
Building a Simple Microservice Using ASP.NET Core
So, how do you build a REST service? Your (hosted) Blazor project uses ASP.NET Core for hosting the Blazor client, and adding a REST service to your server project is easy. But first, let’s do a little intro to microservices.
Services and Single Responsibility
A service is something (here, it will be a piece of software) that listens for requests; when it receives a request, the service handles the request and returns with a response. In Chapter 5, we built a menu service which can return a list of pizzas. In real life, you also encounter services, and they are very similar. Consider a bank. You step into a bank, and you give the teller your account number, some ID, and request $100. The teller will check your account; if you have enough money in your account, the teller will deduct the money and give you the cash. Should your account be too low, the teller will refuse. In both cases, you got a response.
Services should also adhere to the principle of single responsibility. They should do one thing very well, and that’s it. For example, the pizza service will allow clients to retrieve, add, update, and delete pizzas. That’s it. A single responsibility, in this case, PIZZAS.
You can have other services too, each with their own responsibility. Services that take care of one thing are known as microservices.
The Pizza Service
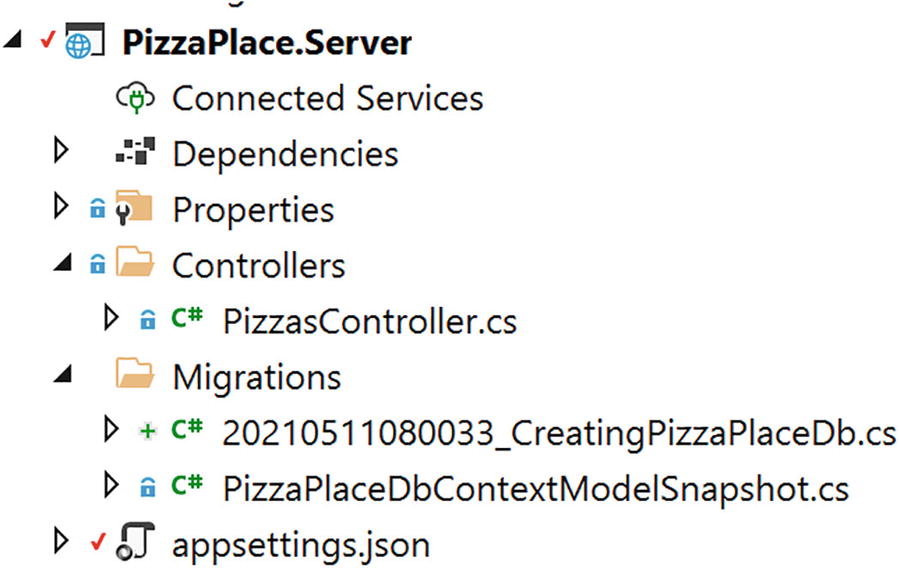
Open the PizzaPlace solution you worked on in previous chapters. In this chapter, you will focus on the PizzaPlace.Server project. The only role this project currently has is to host your Blazor client application, but now you will enhance this role by adding some microservices.
With .NET 6, you can also choose the minimal API approach, which uses a terse C# syntax to accomplish the same thing. In this case, you will need to look inside the Program.cs file instead of Startup.cs.
The Startup Class’s Configure Method
The last line with the endpoints.MapFallbackToFile("index.html") method takes care of your Blazor client project. But right before it, you see the endpoints.MapControllers() method that is used for hosting your services.
How the MapControllers method works is not the topic of this book, but I will cover what you need to know. If you want to learn more about ASP.NET Core, there are many good books about this topic, such as Pro ASP.NET Core MVC by Adam Freeman (www.apress.com/gp/book/9781430265290).
In a nutshell, ASP.NET MVC will give the HTTP request to a controller class which should inherit the ControllerBase class, and then the controller will execute one of its methods. How does it decide? The MapControllers method will take the request’s URL, for example, /pizzas, and use the first segment of the URL to search for a controller with a matching name, for example, PizzasController. Because we are using REST, the chosen controller will pick the method that matches the verb, for example, GET. If your method is called Get(), it will be invoked, but you can also use the HttpGet attribute on a method. In that case, the method’s name is not important. With the HttpGet attribute, you can specify what the URL should look like, which allows you to pass arguments in the URL to the method. We will look at an example shortly.
Next in line is the Controllers folder of the server project. Initially, this folder is empty, and the idea is that you put your service classes here. In ASP.NET, service classes are known as controllers, hence the name of the folder.
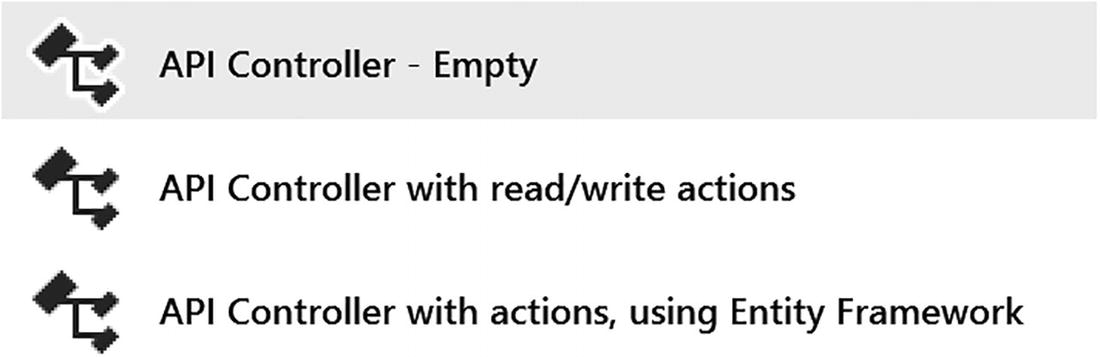
Adding a New Controller
Type PizzasController and click Add again.
If you are using Code, simply right-click the Controllers folder and select Add File. Name it PizzasController.cs. Now complete the class as in Listing 6-3.
The Empty PizzasController
Adding a Method to the PizzaController to Retrieve a List of Pizzas
Let’s walk through this implementation. First, you declare a hard-coded static list of pizzas. Next is the GetPizzas method , which has attribute HttpGet("/pizzas"). This attribute says that when you perform a GET HTTP method on the server with the /pizzas URI, the server should call the GetPizzas method. This attribute overrides the Route attribute on the class, so the default api/pizzas will not invoke the GetPizzas method.
The GetPizzas method returns an IQueryable<Pizza>, and ASP.NET Core will send this result back to the client as a list of pizzas. The IQueryable<Pizza> interface is used in .NET to represent data that can be queried, such as database data, and is returned by LINQ queries. Why IQueryable<Pizza>? Because later in this chapter, we will return data from a database which is exposed as this type.
Note that the GetPizzas method contains nothing about HOW the data will be transferred to the client. This is all taken care of for you by ASP.NET Core! By default, your implementation in ASP.NET Core will use JSON, which is what you want. ASP.NET Core allows you to pick other formats, including your custom format. The client can request a certain format, such as XML or JSON using the Accept header in the request. Here, we will be using the default JSON format.
Time to see if it works. First, ensure that the PizzaPlace.Server project is the startup project (with Visual Studio, right-click the PizzaPlace.Server project and select Set as Startup Project from the drop-down menu. The PizzaPlace.Server project should be shown as bold).
Now run your project and wait for the browser to open because you will perform a GET; you can use the browser for the GET method, but for other methods, you will use a nice tool called Postman.

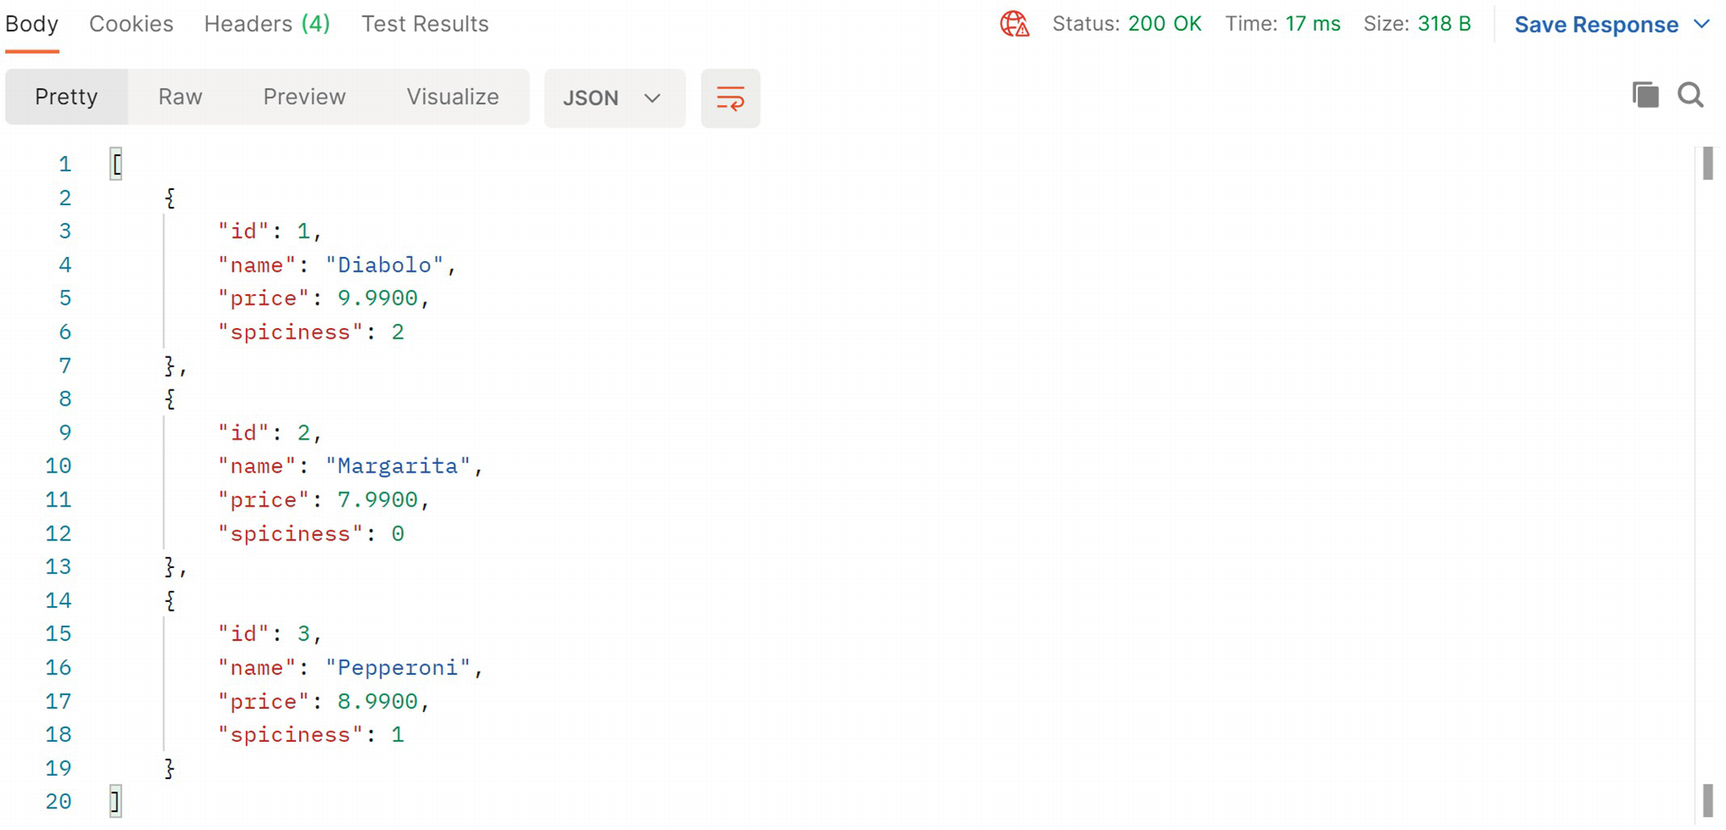
The Results of Getting a List of Pizzas from the Pizza Service
A JSON-encoded list of pizzas! It works! So here we see an array of objects, and each object has the properties of our Pizza class (except the properties use lowercase which is the convention with JSON).
Now you are ready to retrieve the data from a real database using Entity Framework Core.
What Is Entity Framework Core?
Entity Framework Core is the framework Microsoft recommends for working with databases. Entity Framework Core (EF) is an Object-Relational Mapper which allows you to write classes as normal C# classes and then store and retrieve .NET objects from a database without having to be an SQL expert. It will take care of querying, inserting, updating, and deleting objects in the database for you. This is also known as persistence ignorance , where your code does not need to know how and where data gets stored! Entity Framework Core has support for SQL Server, SQLite, and more.
Using the Code-First Approach
But of course, you need to explain to Entity Framework Core what kind of data you want to store. Entity Framework Core uses a technique called Code First , where you write code to describe the data and how it should be stored in the database. Then, you can use this to generate the database, the tables, and the constraints. If you want to make changes to the database, you can update the database schema with code-first migrations .
If you already have a database, you can also generate the code from the database, also known as EF Database First , but this is not the target of this book.
With code-first approach, you describe the classes (also known as entities ) that will map to database tables. You already have the Pizza class (which you can find in the PizzaPlace.Shared project) to describe the Pizza table in the database. But you need to do more.
In this part, you will be using SQL Server , or SQLite if you don’t have access to SQL Server. If you installed Visual Studio on your Windows machine, SQL Server was installed too.
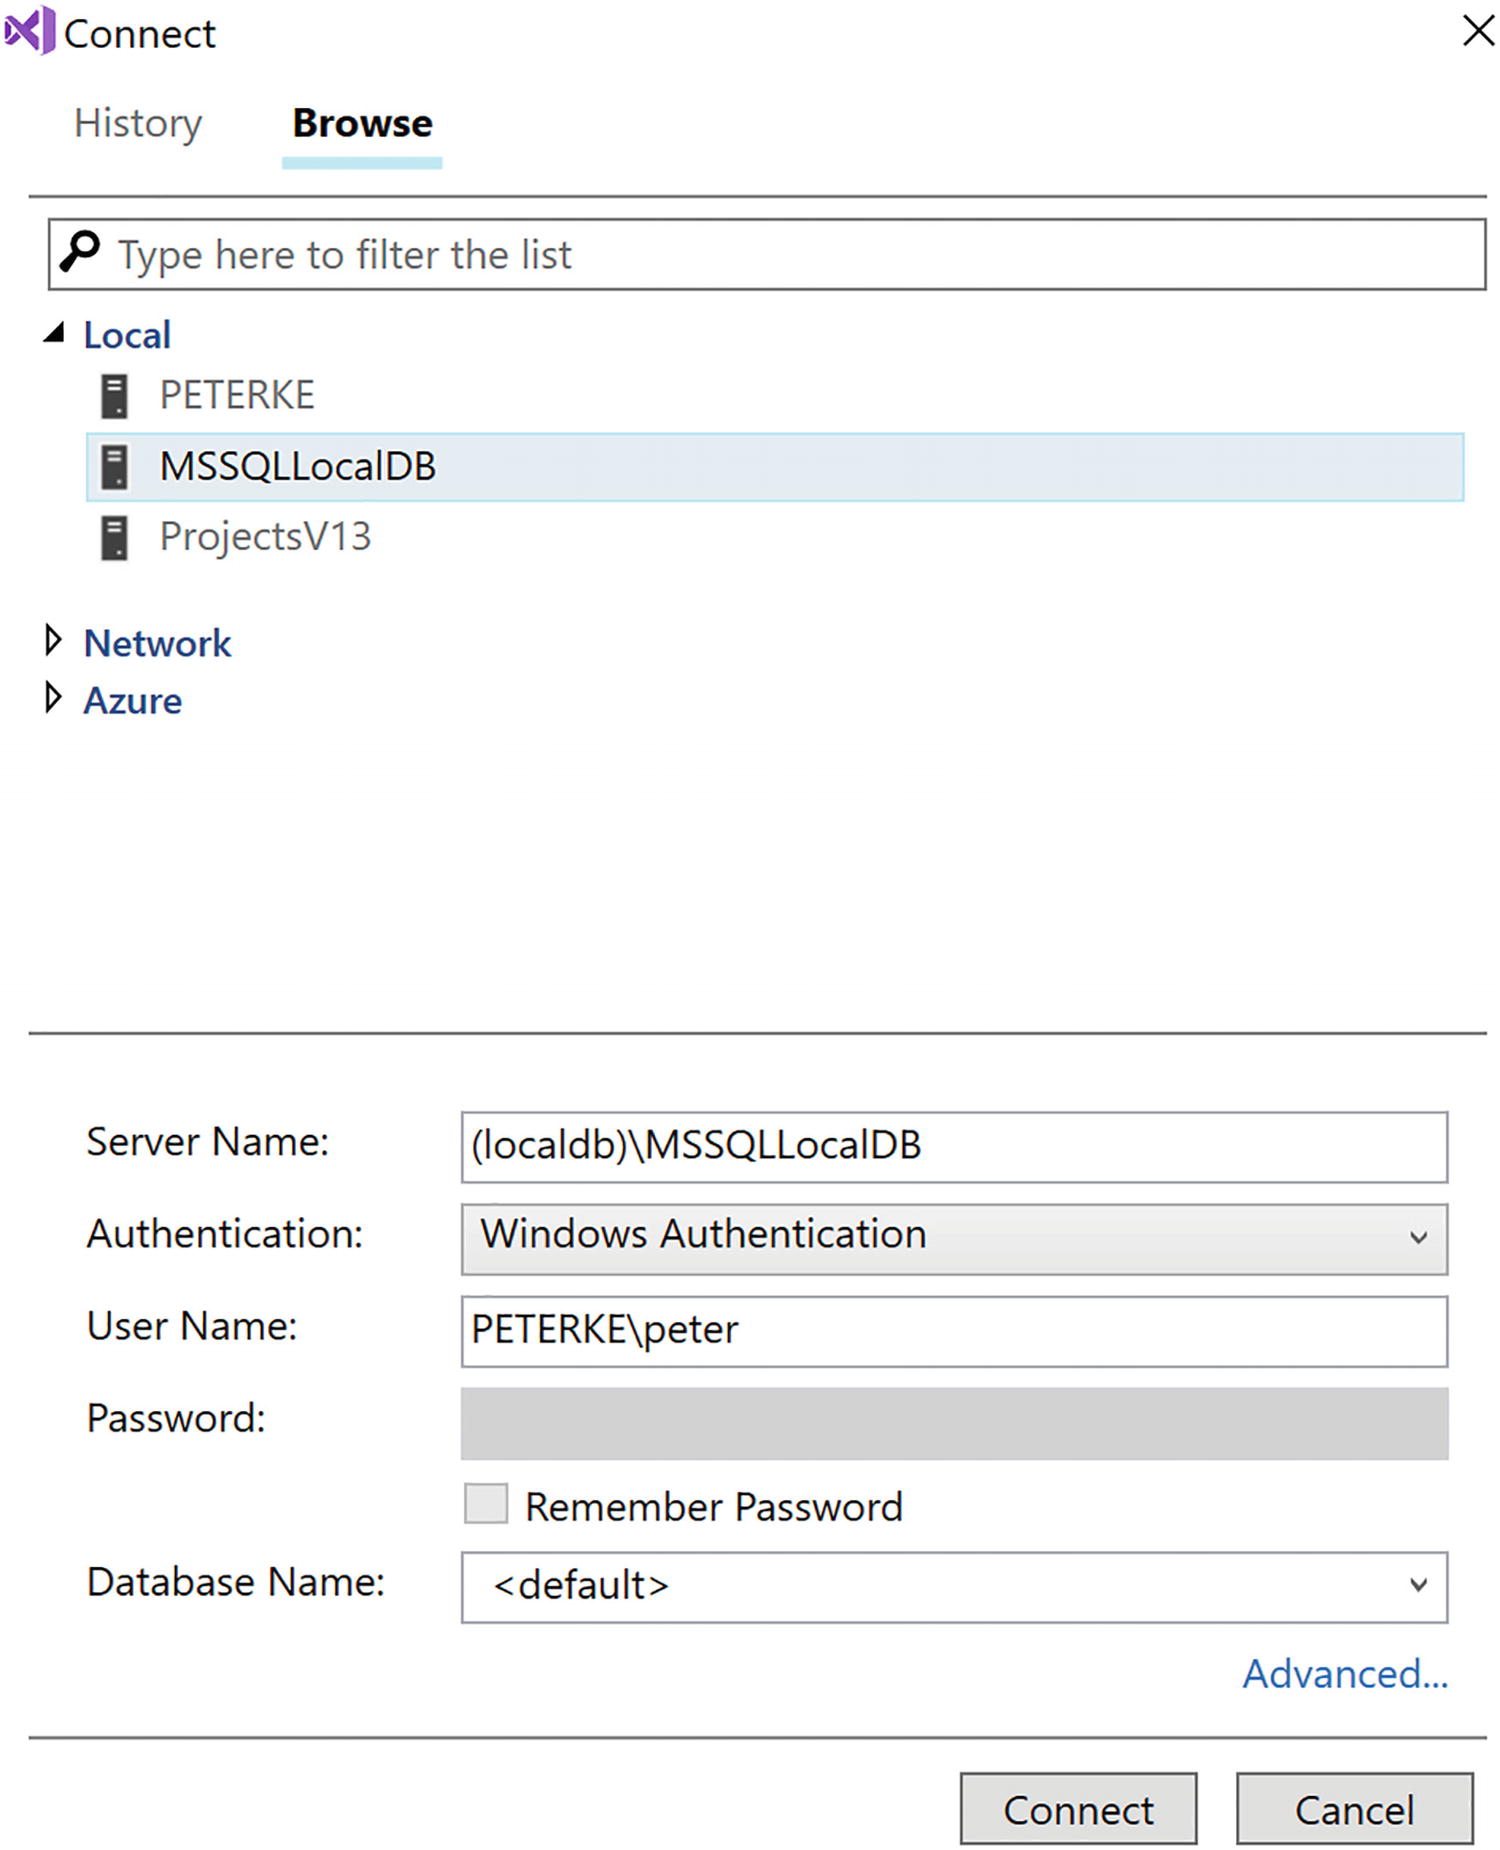
You can check if SQL Server was installed as follows: start Visual Studio and select View ➤ SQL Server Object Explorer from the menu. Now click Add SQL Server. Expand the local node. If you have SQL Server, locally it should be listed.
If you don’t have SQL Server on your machine, you can install a free version of SQL Server or use a SQL Server instance in the cloud, for example, SQL Server on Azure (https://azure.microsoft.com/get-started). You can even install SQL Server on Linux and OSX! There are some nice articles on the Web (e.g., https://database.guide/how-to-install-sql-server-on-a-mac/) that explain how. And if you don’t want to bother installing SQL Server, you can also use SQLite , which is available out of box with .NET Core, so you don’t need to install anything for SQLite.
Let us start by adding Entity Framework Core to the PizzaPlace.Server project. If you are using Visual Studio, right-click the server project and select Manage NuGet Packages. The NuGet window will open in Visual Studio. NuGet is a very practical way for installing dependencies such as Entity Framework Core to your project. It will not only install the Microsoft.EntityFrameworkCore.SqlServer library but also all its dependencies.
Select the Browse tab and type Microsoft.EntityFrameworkCore.SqlServer in the search box (or Microsoft.EntityFrameworkCore.Sqlite if you are using that). You should see this library as the top search result (if not, look at the top right corner of the NuGet window where you will see Package Source; select nuget.org as the source). Select it, then select the Latest stable version from the Version drop-down, and click the Install button.
Add a new class called PizzaPlaceDbContext to the PizzaPlace.Server project, as shown in Listing 6-5. This class represents the database, and you do need to give a couple of hints about how you want your data to be stored in SQL Server (or some other database engine; this uses the same code).
The whole idea of using Entity Framework is to abstract away the underlying database. In general, to switch to a different database engine, you install a different NuGet package which will take care of communicating with the database. The code stays the same and EF is really efficient!
The PizzaPlaceDbContext Class
First, you need to create a constructor for the PizzaPlaceDbContext class taking a DbContextOptions<PizzaPlaceDbContext> argument. This is used to pass some options and the connection to the database server, which you will do later in this section.
Next, you add a table to the database to represent your pizzas using a public property of type DbSet<Pizza>. DbSet<T> is the collection class used by Entity Framework Core to represent a table in the database, but you can think of it as a List<T> (one of the cool things with Entity Framework Core is that you work with collections instead of using SQL to talk to the database). Entity Framework Core will use the DbSet<T> to interact with a database table, in this case, the Pizzas table.
Finally, you override the OnModelCreating method , which takes a modelBuilder argument. In the OnModelCreating method, you describe how each DbSet<T> should be mapped to the database; for example, you can tell it which table to use, how each column should be called, which type to use in the database, etc. In this case, you tell the modelBuilder that the Pizza table should have a primary key, the Id property of the Pizza class. We tell it to make the Name maximum 80 characters and how the Price property should be mapped to a SQL type. You will use the MONEY type for that. Finally, we tell EF that the Spiciness enumeration should be mapped to a string using the HasConversion<string>() method . This way, we end up with nice readable entries for spiciness, instead of a number. For the moment, this is enough for your current implementation. You don’t have to explain everything about every property because there are a lot of defaults available. For example, the string type from .NET will be mapped to a type used for strings in the database.
Preparing Your Project for Code-First Migrations
The Startup.ConfigureServices Method
Remember IServiceCollection from Chapter 5? Here, dependencies for ASP.NET Core are added, such as dependencies for Controllers and razor pages, which are required for your service.
The Startup Class’s Constructor
You need this constructor to have access to the project's configuration file. The configuration will contain the connection string for the database to talk to.
Adding Entity Framework Dependencies
This single statement tells ASP.NET Core that you will be using the PizzaPlaceDbContext and that you will be storing it in SQL Server. This code also looks up the connection string for the database in configuration, which you still need to add.
Using SQLite As the Database
ASP.NET Core allows you to place your configuration settings in many different places, such as a JSON configuration file, environment variables, etc. Our server project already has a configuration file called appsettings.json, so open it.
The appsettings.json Configuration File
Finding Your Database Server’s Connection String
If you are not sure which connection string to use, you can find the connection string for SQL Server in Visual Studio by selecting View ➤ SQL Server Object Explorer.
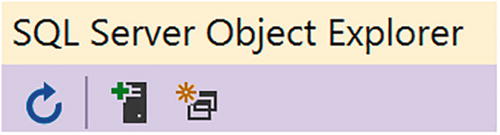
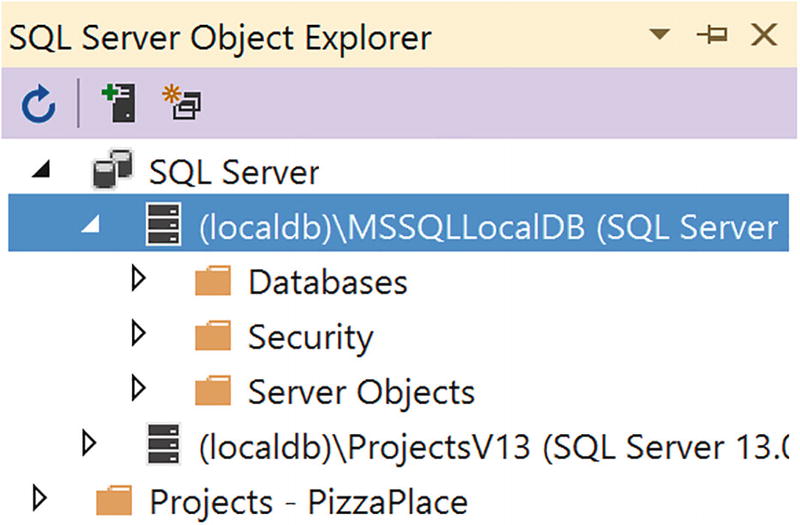
SQL Server Object Explorer
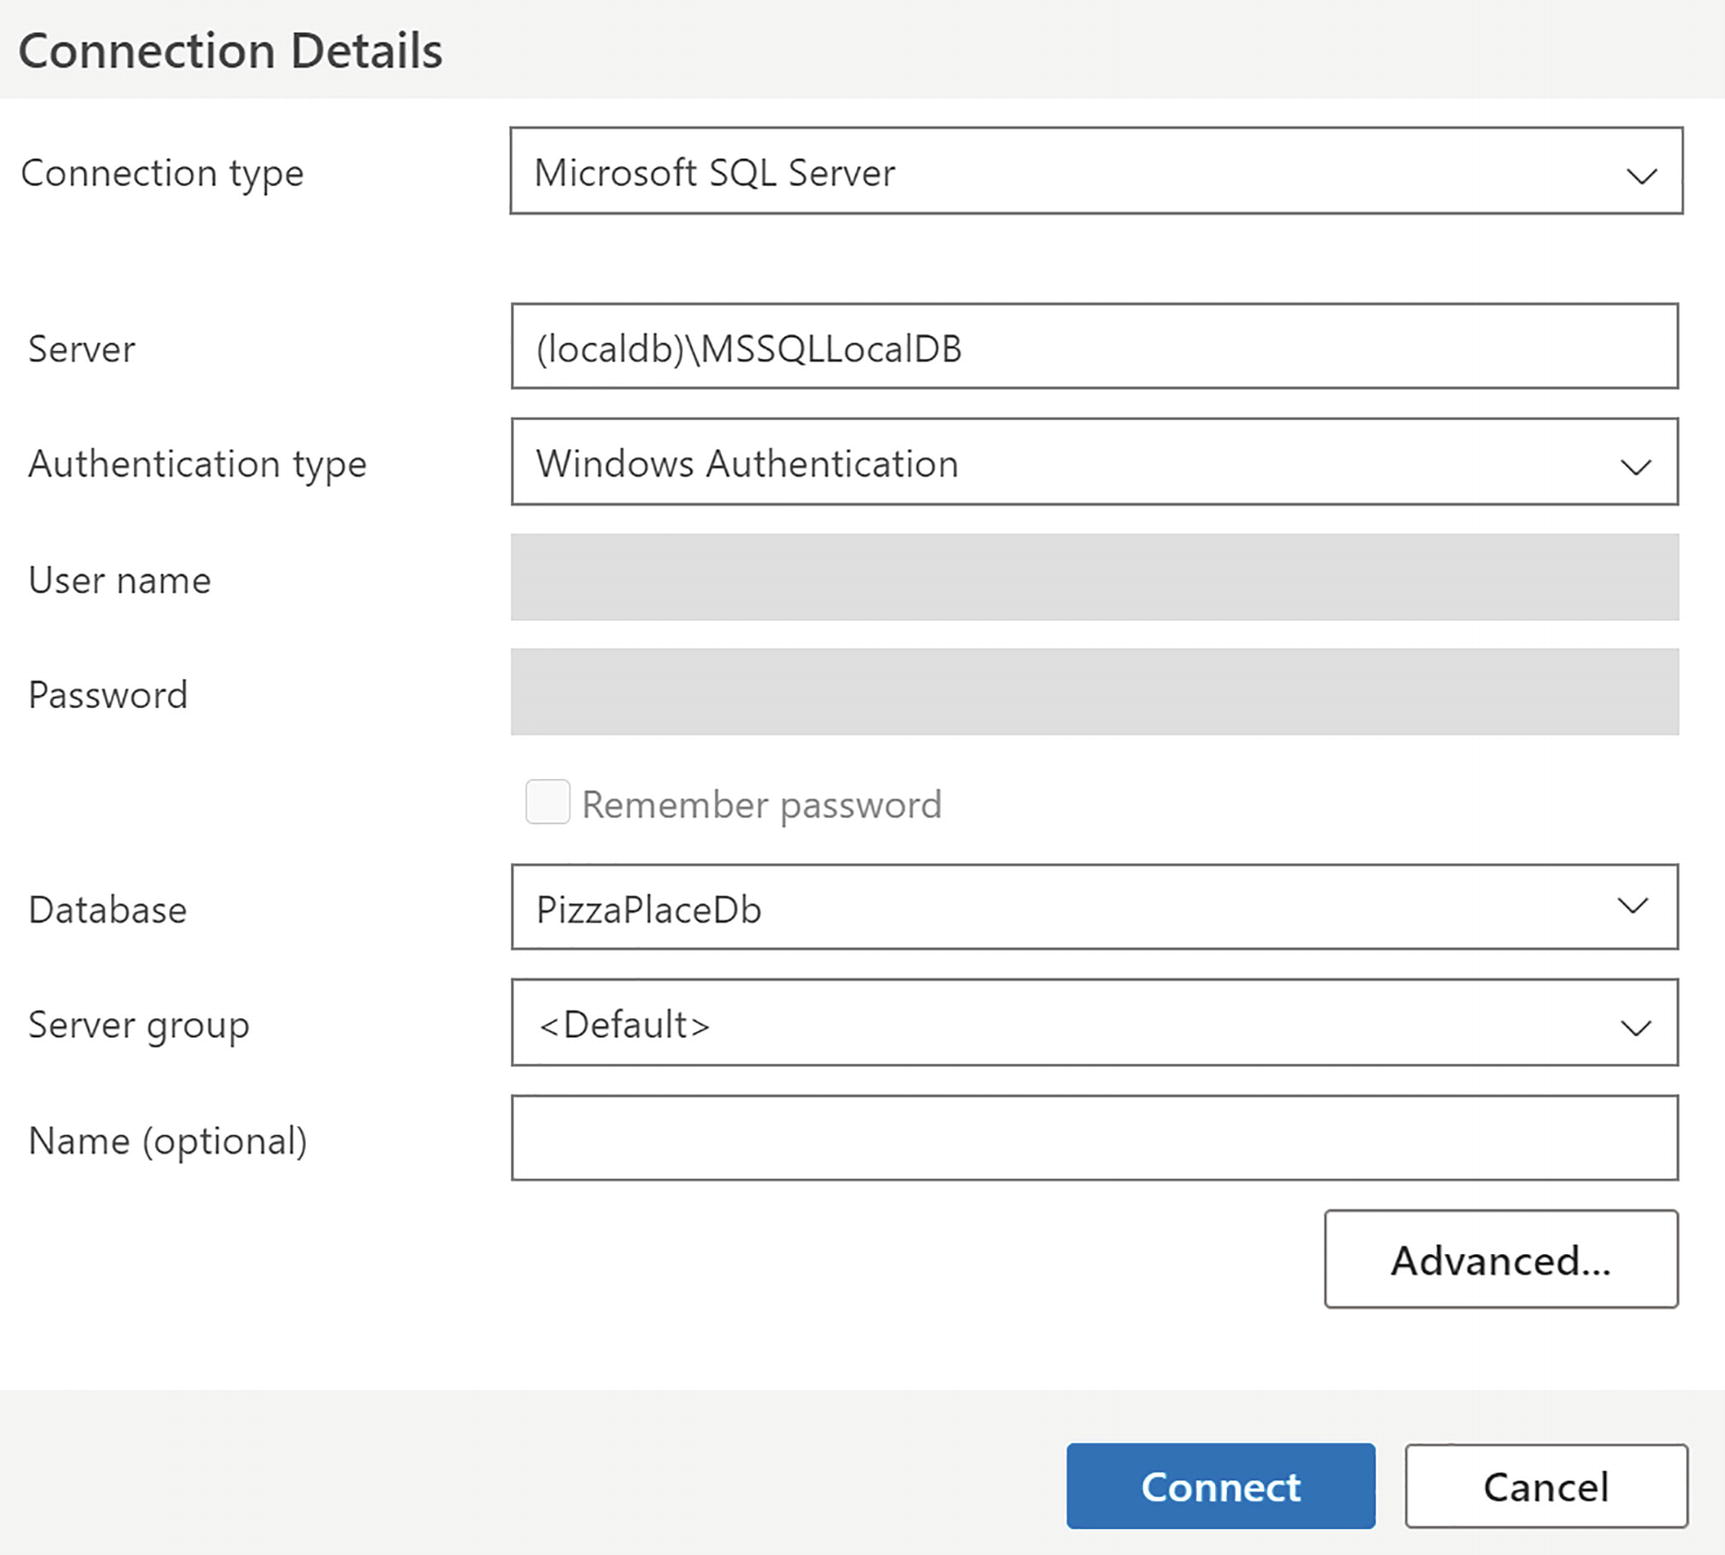
Finding the Connection String for a Database
Getting the Database’s Properties
Creating Your First Code-First Migration
You are almost ready to generate the database from the code. Start by adding the Microsoft.EntityFrameworkCore.Design NuGet package to the PizzaPlace.Server project. You need this package to perform code-first migrations.
Now you need to create a code-first migration . A migration is a C# class that contains the changes that need to be made to the database to bring it up (or down) to the database schema your application needs. This is done through a tool called dotnet-ef .
Start by selecting from the Visual Studio menu View ➤ Other Windows ➤ Package Manager Console. Or use the command line (cmd.exe) if you prefer. If you are using Code, use the integrated terminal or open a command prompt.
You must run the next command in the PizzaPlace.Server directory, so make sure you are in the correct directory (the one with the PizzaPlace.Server.csproj file).
You might need to install the global dotnet-ef command-line tool as well. This is the tool you use to generate the migration from your code and to update the database once you are happy with the generated migration. Run the following command to install the migration tool. You only need to install this tool once.
dotnet tool install --global dotnet-ef
Should you get an error or warnings, please review the code for the Pizza and the PizzaPlaceDbContext classes (and maybe compare with the provided sources for the book), ensure that all the Entity Framework packages are using the same version, and try again.
The Result of Adding the First Migration
The CreatingPizzaDb.cs File for SQL Server
A migration class has two methods: Up and Down. The Up method will upgrade the database schema. In this case, it will create a new table called Pizzas with Id, Name, Price, and Spiciness columns.
The Migration Class for SQLite
Generating the Database
This just created the database for you! Let’s have a look at the database. First, let’s look at SQL Server.
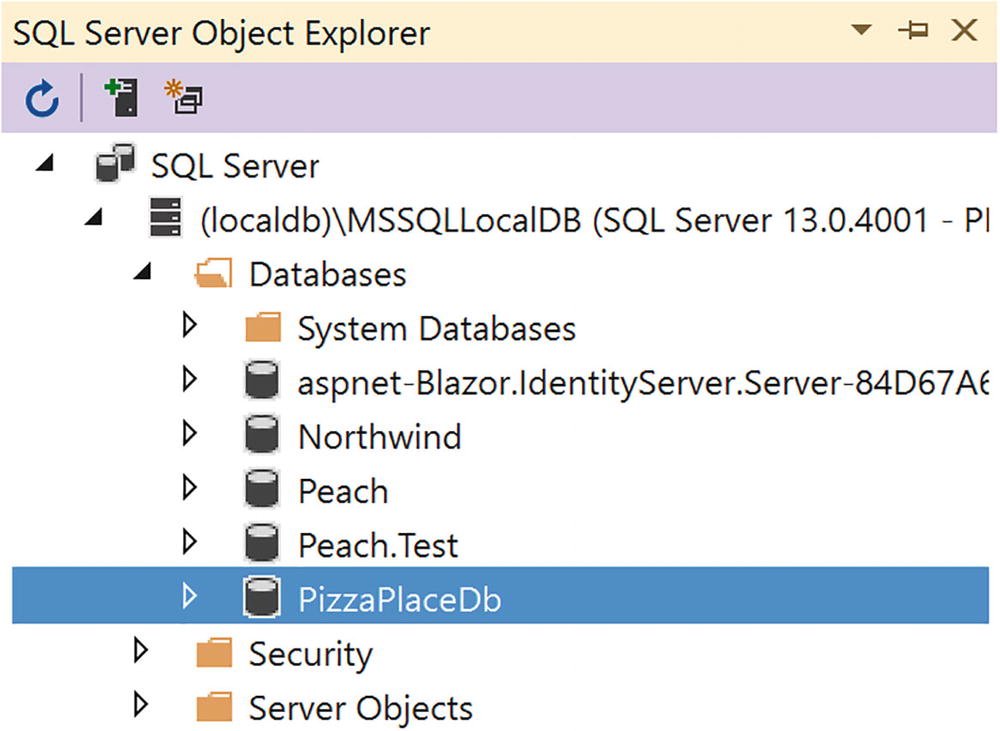
SQL Server Object Explorer Showing the PizzaPlaceDb Database
Connection with SQL Operations Studio
To look at the SQLite database, you will need to download and install the SQLite database browser from https://sqlitebrowser.org/.
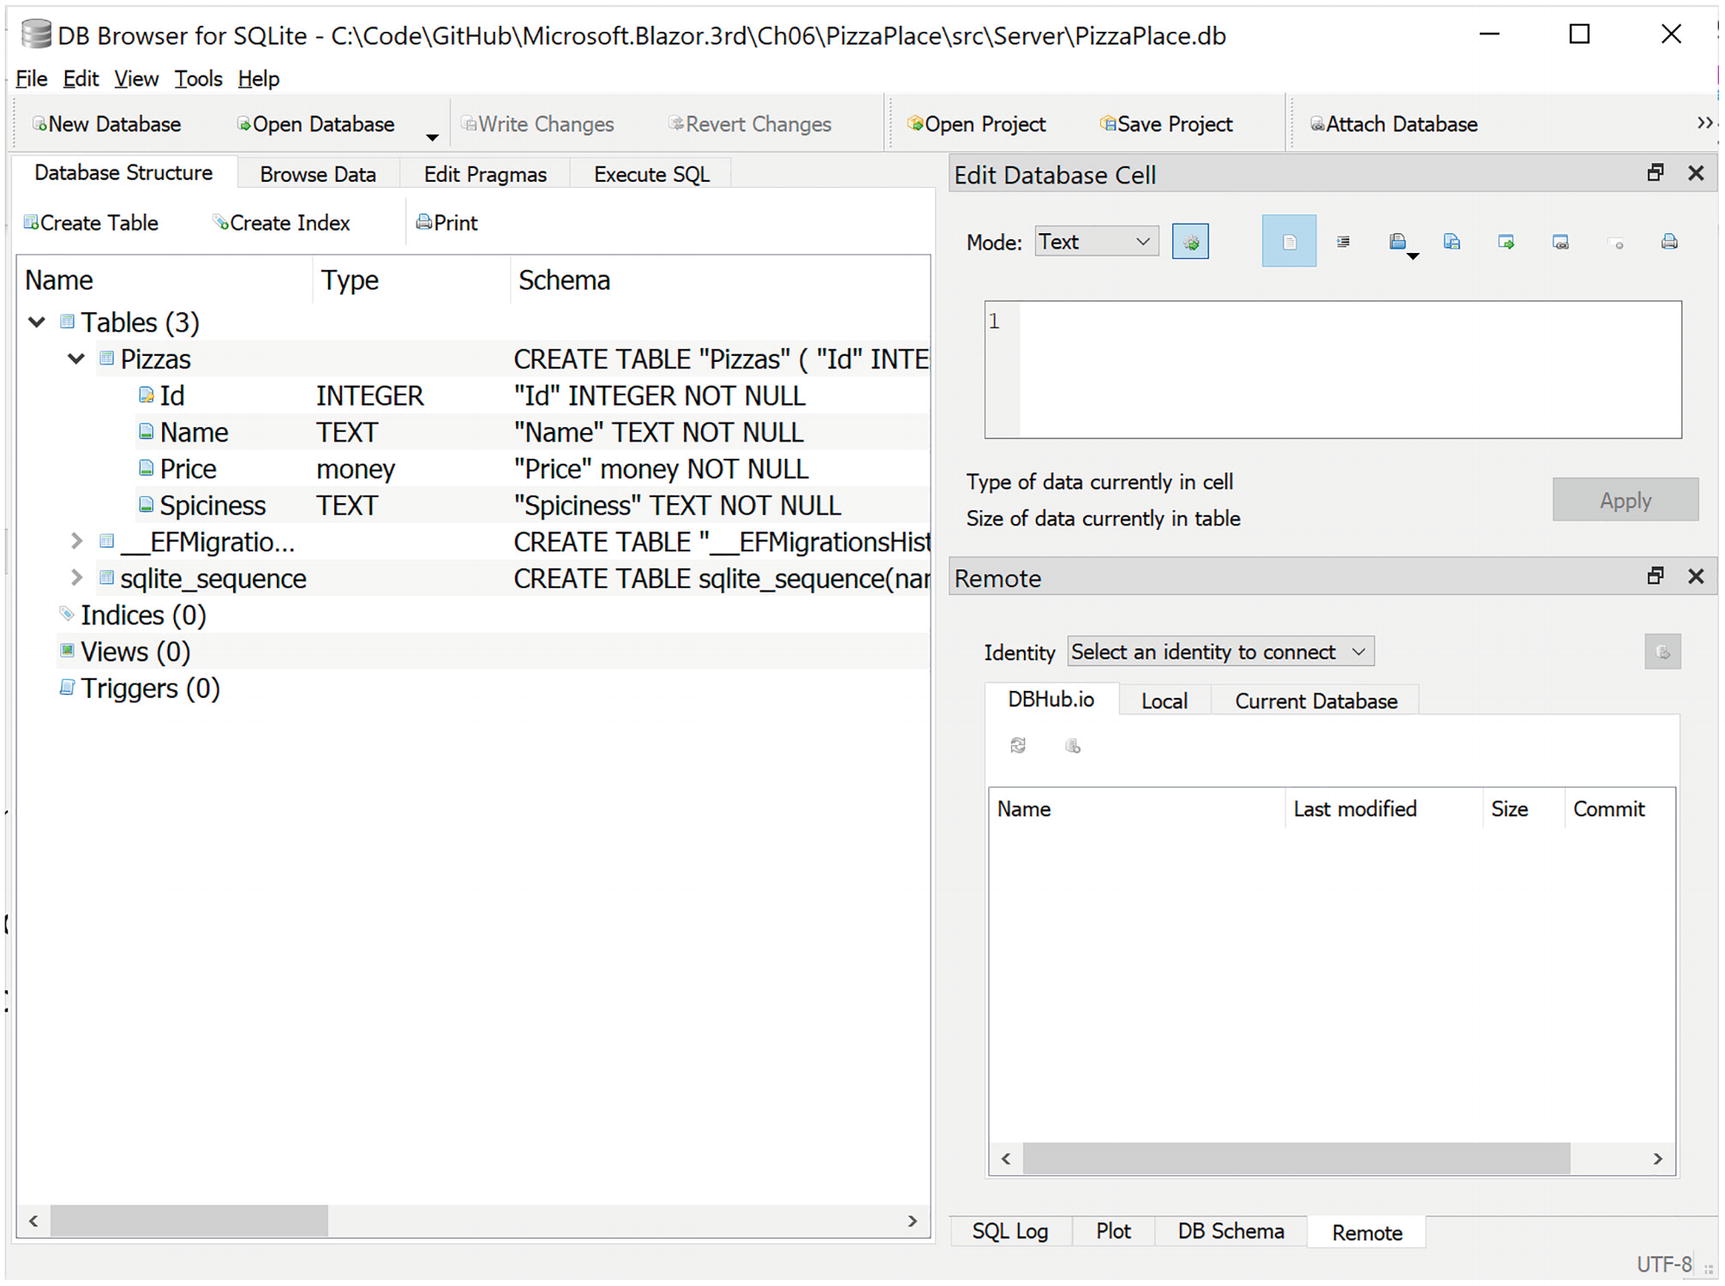
Using DB Browser for SQLite
Enhancing the Pizza Microservice
Let’s add some functionality to the Pizza microservice so it uses the database instead of hard-coded data and add a method to insert a pizza in your database.
Injecting a PizzaPlaceDbContext Instance into the Controller
To talk to the database, the PizzasController needs a PizzaPlaceDbContext instance, and as you learned in Chapter 5, you can use a constructor to do this. The constructor only needs to save the reference in a local field (for now).
Retrieving the Pizzas from the Database
The InsertPizza Method
This is an introduction to REST services. Building real services with all the different approaches and best practices can take up a whole book. The idea of this chapter is to get you up and running.
Testing Your Microservice Using Postman
So now you have your first microservice. But how do you test it? Previously, you used the browser to test the GetPizzas method , which uses the GET method. For other methods, such as POST, PUT, and DELETE, you need a better tool. Here, you will use Postman, which is a tool specifically for testing REST services.
Open your favorite browser and go to www.getpostman.com. Download the application and install it. By the time you read this book, the installation procedure may have changed a bit, so please follow the instructions from the installer.
After it has installed, run Postman.
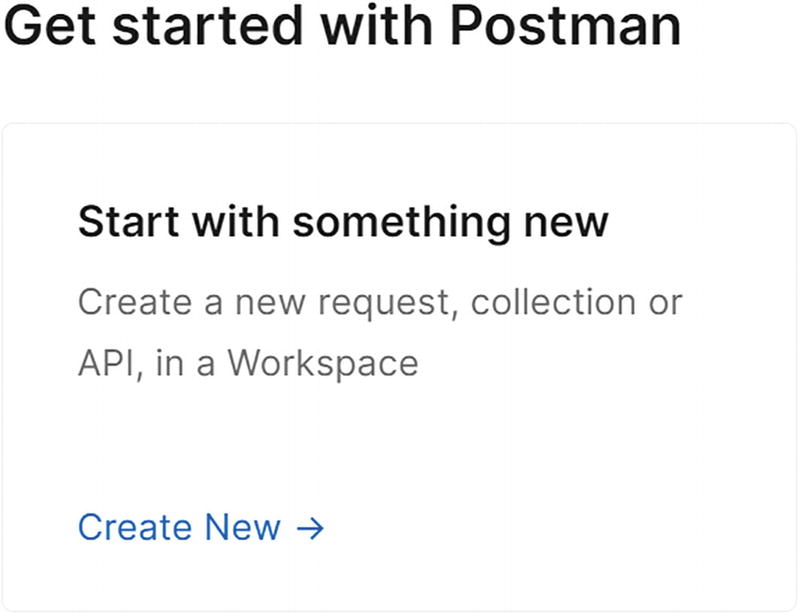
Select Create New to Get Started with Postman
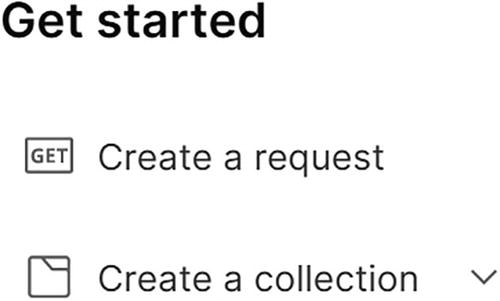
Create a Request with Postman

Making a GET Request with Postman

Adding Headers to the Request in Postman

Receiving an Empty List of Pizzas from the Server

Starting with the POST Request

Adding the Content-Type Header for the POST Request
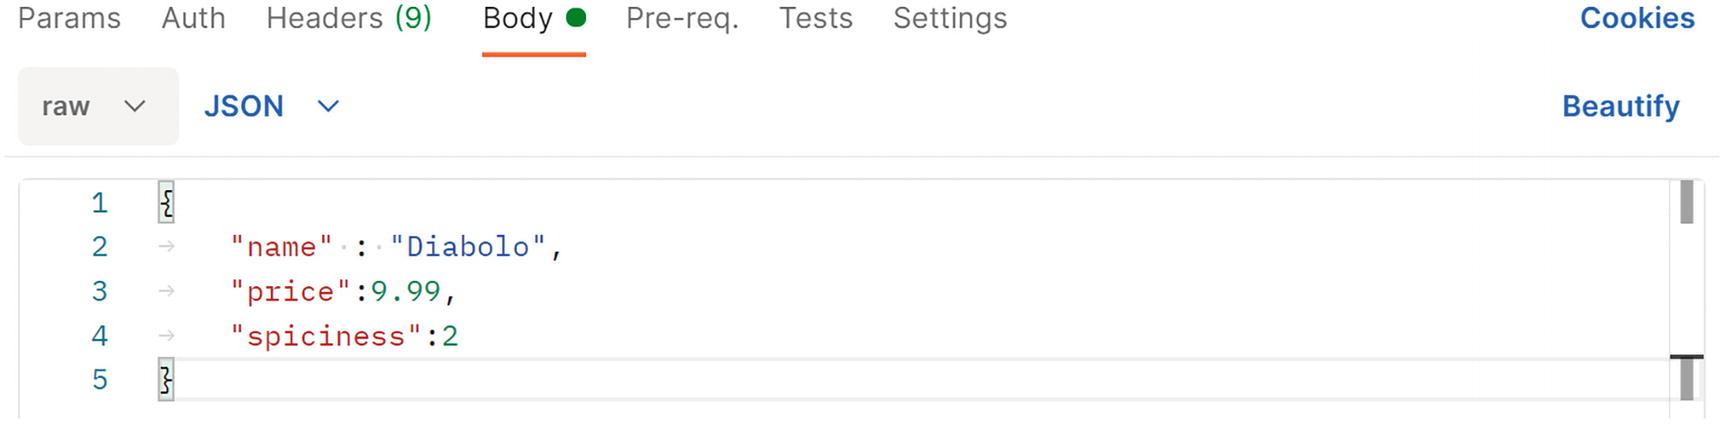
Entering a Pizza Using JSON
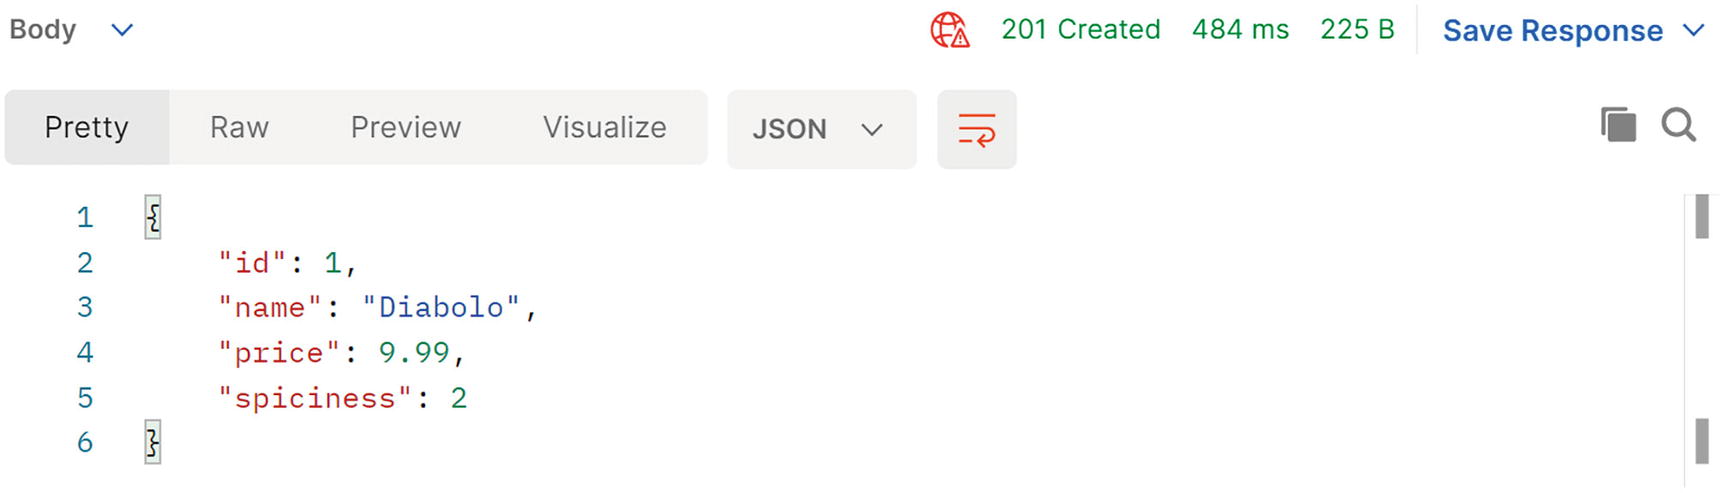
The POST Response in Postman
A List of Pizzas Stored in the Database
Summary
In this chapter, you had a look at how to store data on the server using Entity Framework Core and how to expose that data using Web API, REST, and microservices. You added a pizza service to the PizzaPlace application and then went on testing it with Postman.
In the next chapter, you will learn how to talk to your service(s) from Blazor.