At a certain point in time, your Blazor application will be ready for the big public. Yeah! But the work is not yet done. We need to take our application and copy it to a server connected to the network so other people can use their browser to admire your work! Let us look at how we can deploy our Blazor application.
Deploying Standalone Blazor WebAssembly
When your Blazor application does not require any server support, you can host the application just like any other static website. In this case, the host just needs to serve the files to the browser since everything is executed on the browser.
Hosting on GitHub
GitHub is a free service that allows you to collaborate with others on a development project. It has support for git source control, builds automation, and allows you to host static websites, all free of charge.
If you are not familiar with git source control, there is an excellent book available for free digitally at https://git-scm.com/book/en/v2.
Here, we will host our Blazor application on GitHub, and the process is similar for other static hosting platforms. There are many other excellent hosting solutions out there, but I had to pick one, and GitHub is widely known in the developer community.
Using GitHub requires some knowledge about git. If all of this is familiar, great. If not, the walk-through gives you the git commands you need to execute.
If you don’t have a GitHub account, you will need to create one on https://github.com/. Because modern websites have the tendency to change how they look, I won’t be using screenshots here, but the process should explain itself.
Once you have an account, you should create an organization at https://github.com/settings/organizations. GitHub allows you to have multiple organizations, and each can host a static website. Select a unique name for your organization; here, I will use the MicrosoftBlazorBook organization. After creating the organization, select it. Your browser will show the organization’s page, for example, https://github.com/MicrosoftBlazorBook.
Here, you can find a list of repositories. A repository will host all your sources and their history as you make changes to files using git source control. Since you just created the organization, you will have to create a new repository. Click the New button; give your repository a nice name and description. You should also choose if you want the repository to be public (anyone can see your code) or private. The deployment process is the same for either, so pick one. Complete creating the repository, but don’t add any files like README.
After completion, GitHub will show you a page that displays the command-line commands you can use to create the repository locally.
I will be using Windows Terminal here, which has built-in support for PowerShell commands. All commands should work well with Linux and OSX command line.
First, this will create a README.md file in the current folder, and then this will create a git repository in the current folder. Next, this adds the README.md file to the repository, creates a new commit with a comment, and finally pushes the repository to the GitHub server. Now we are ready to deploy a static website.
Creating a Simple Website
A Basic HTML File
Since we made a change to your site, we will upload these changes into GitHub using git in the command line.
When you refresh the GitHub repository page, you should see index.html.
Deploying a Simple Site in GitHub
After executing these commands, the deployment process will start, and by refreshing the pages page (the preceding URL), you can see the status. Refresh until GitHub tells you it is ready.
Click the link (e.g., https://microsoftblazorbook.github.io/StandAloneWASM/), and you should see your static website in action!
Deploying a Blazor WASM Project
When we compile our Blazor project, two new folders will be created: obj and bin. We don’t need to keep these folders in source control, and an easy way to do this is by telling git to ignore these. Since this is a common scenario, we can use
dotnet new gitignore
Now you can reload the site (which will not work yet); for example, in my case, this would be https://microsoftblazorbook.github.io/StandAloneWASM/.

Our Blazor Site Does Not Load Correctly (Yet)
Fix the Base Tag
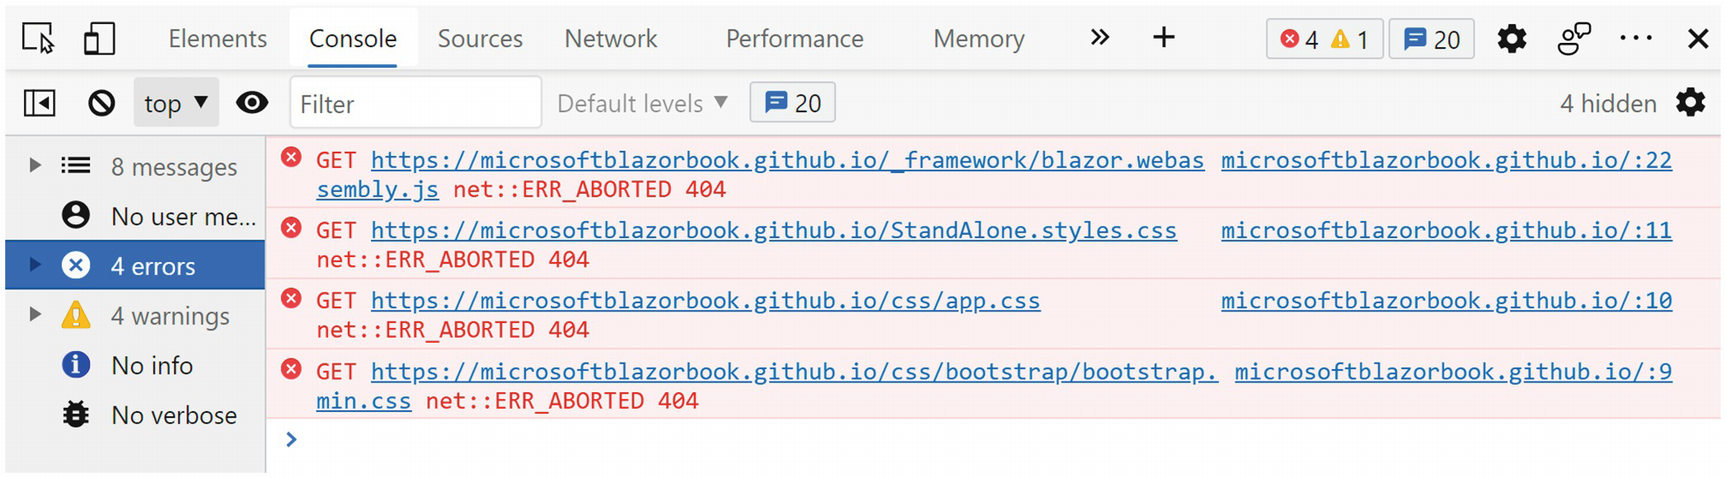
The Browser Debugger’s Console
As you can see, the browser is trying to load the JavaScript and CSS files from the root of https://microsoftblazorbook.github.io, but our files are hosted at https://microsoftblazorbook.github.io/StandAloneWASM/. What we need to do is to instruct the browser to prefix each file’s URL with StandAloneWASM. This is done through the index.html’s base tag. And if you remember from Chapter 9, routing also used this base tag to figure out which component to show! So use your favorite editor to update the base tag in index.html to use your repository’s name as in Listing 15-2.
Listing 15-2. Update the index.html’s Base Tag
Wait for the deployment to complete and refresh your site’s page. You can review the deployment process at https://github.com/MicrosoftBlazorBook/StandAloneWASM/deployments/activity_log?environment=github-pages, replacing your organization and repository name in the URL.
Disabling Jekyll

Blazor Does Not Find the _framework Files
Wait for the deployment to complete and refresh your site’s page. Your Blazor site should work! Great!
Fixing GitHub 404s
There is still one problem we need to fix. Navigate in your Blazor site to the Counter route and make the browser refresh by hitting F5. It will display a 404 page! This is because GitHub will try to load the Counter file from the URL. We can fix this by copying our root index.html file to a 404.html file, which GitHub will then send back to the browser.
Now refreshing the counter route will work.
Here, we have been deploying our standalone Blazor WebAssembly application by pushing changes in source control to GitHub. Some other hosts also allow you to do this too; for example, you can deploy your application using Azure DevOps. If you want to host your Blazor application on a host that does not have source control integration, you will have to upload the publish folder using the host its own tools; this might even be with FTP!
Alternatives for GitHub
There are many alternatives to deploy your Blazor Standalone WebAssembly project; each will have its own little quirks to make it work, but everyone will require you to set the base tag in index.html correctly. For example, you could also deploy your project as an Azure Static Website. For more information about deploying your project as an Azure Static Website, visit https://docs.microsoft.com/azure/static-web-apps/deploy-blazor.
Deploying Your Site As WebAssembly
With .NET 6, we can now compile our complete solution as a WASM file and run everything as WebAssembly. By default, you will run .NET assemblies in the browser where the WASM .NET runtime will interpret IL instructions. By compiling everything into WASM, you can get significant performance improvements! However, the WASM file is larger than the .NET assembly equivalent, so compiling everything as WASM will come at the cost of a longer initial download. This is also known as Ahead-Of-Time (AOT ) compilation . AOT mainly benefits applications that are CPU intensive, so you might not even need this for your application.
Enabling AOT Compilation
This will take some time, so grab something to drink. While you are developing, AOT is not used because compiling takes so much longer.
Once deployment is ready, look inside the release/_framework folder and search for dotnet.wasm. This file on my machine is around 12 MB! Without OAT, this file is around 2 MB. Do note that the actual download is a lot smaller due to the compression used by Blazor. You will also find the original .dll files in the release folder. Sometimes your application might use reflection; in that case, the necessary .dll files are still downloaded. So we still need to deploy these.
We can now deploy our AOT compiled release just like before.
Deploying Hosted Applications
For both the hosted Blazor WebAssembly and Blazor Server applications, you will need to deploy to a host that supports executing .NET on the server. You can deploy this to Windows Internet Information Services (IIS) or to Linux Apache.
Understanding the Deployment Models
With ASP.NET Core hosted applications, we have a number of choices for deploying our application.
One option is to use a framework-dependent deployment . In this case, the deployment files only contain your application files with their dependencies. No runtime is deployed, so this will only work on a server where the .NET runtime has been deployed before. One advantage of using framework-dependent deployment is that your deployment will work everywhere since portable .NET assemblies are used.
The other option is to use a self-contained deployment . In this case, the deployment contains all the files that are needed to run the application, including the runtime. Because of this, you need to specify which platform you want to target, for example, 64-bit Windows, and it will only deploy to that platform. The main advantage of this is that there is no dependency on what has been installed on the server, except for the platform of course. Another advantage is that you can use any version of .NET, even previews. Most commercial hosts will only give you long-term support versions of the .NET runtime.
Deploying to Microsoft Azure
Most of us don’t have a server lying around to deploy to, so here we will deploy to an Azure web app. If you don’t have an Azure account, you can get one for free. Open your browser and visit https://azure.microsoft.com/. Here, you can create a free account, and you even get $200 credit.
An Azure web app is a hosting service that makes it very easy to deploy and run your Blazor application.

Add Your Azure Account
Creating the Publishing Profile
Deploy to Azure
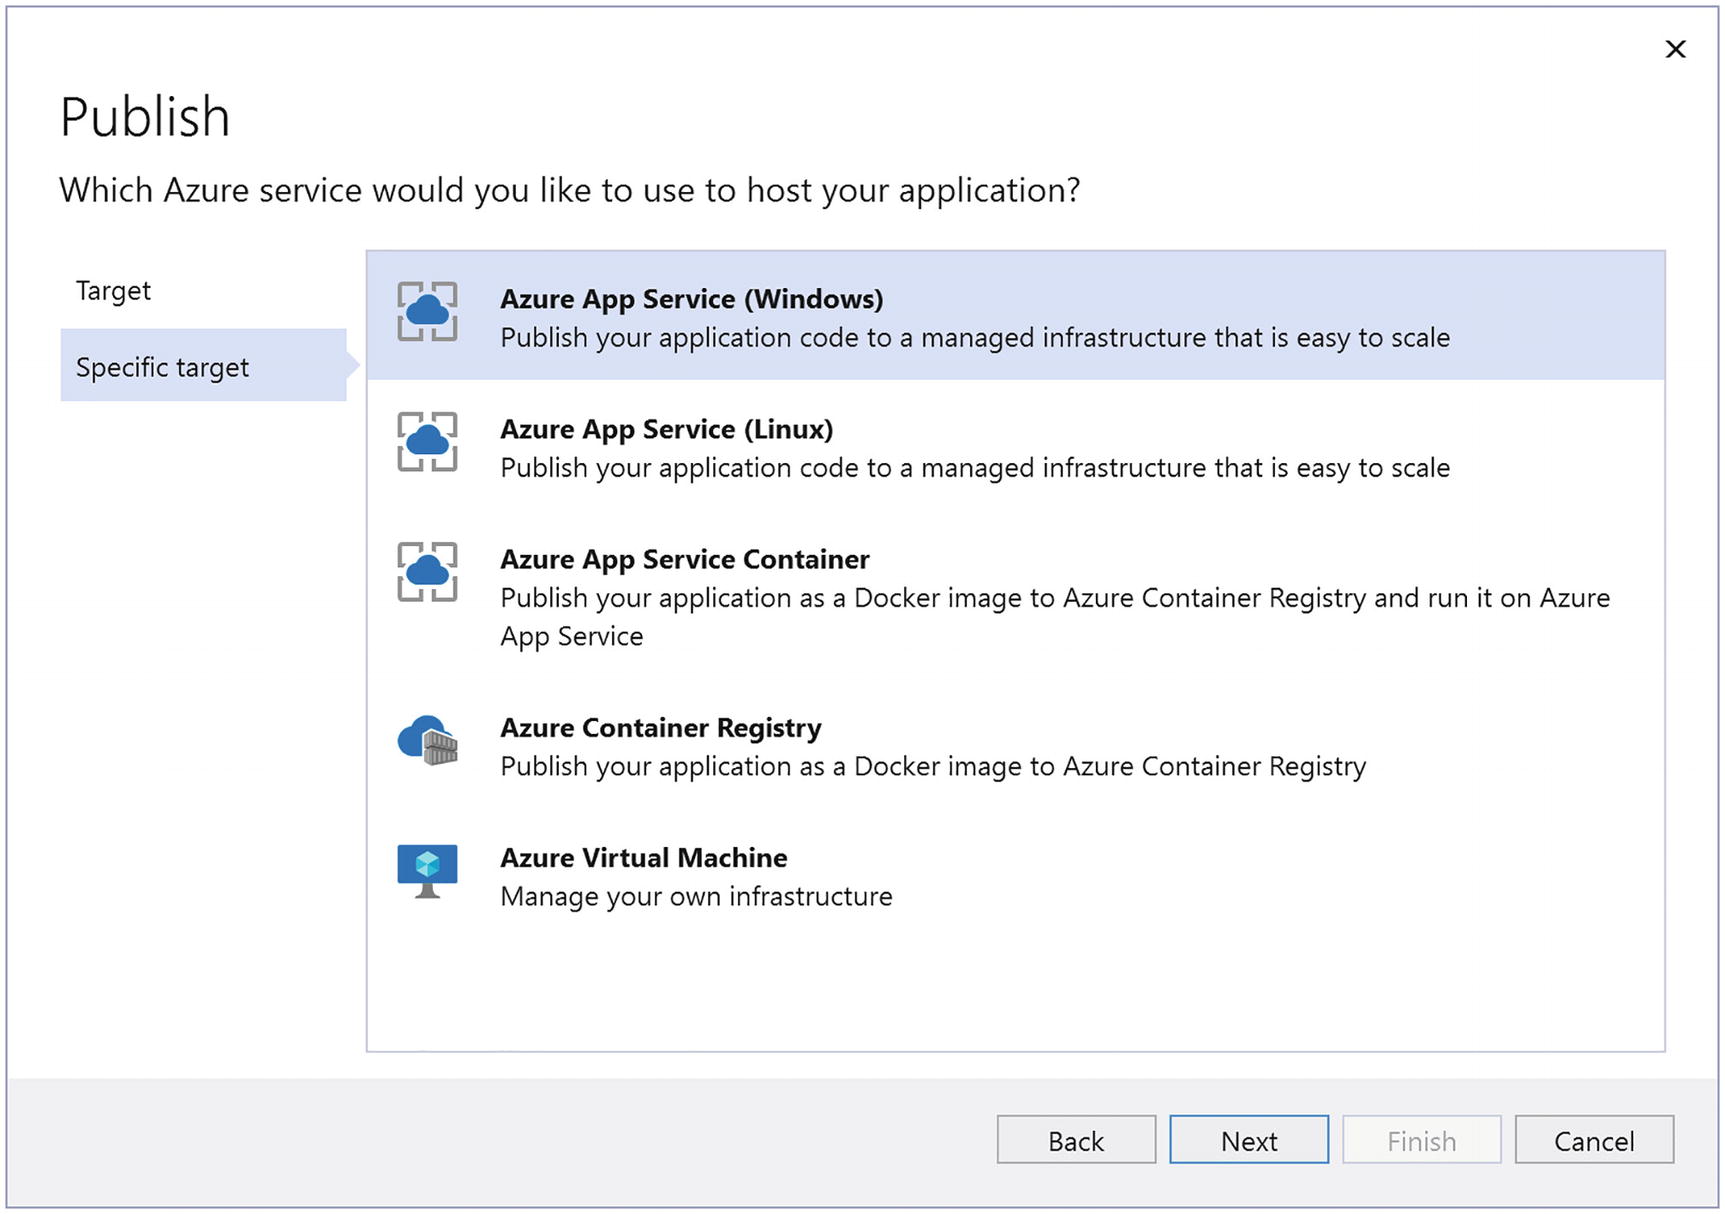
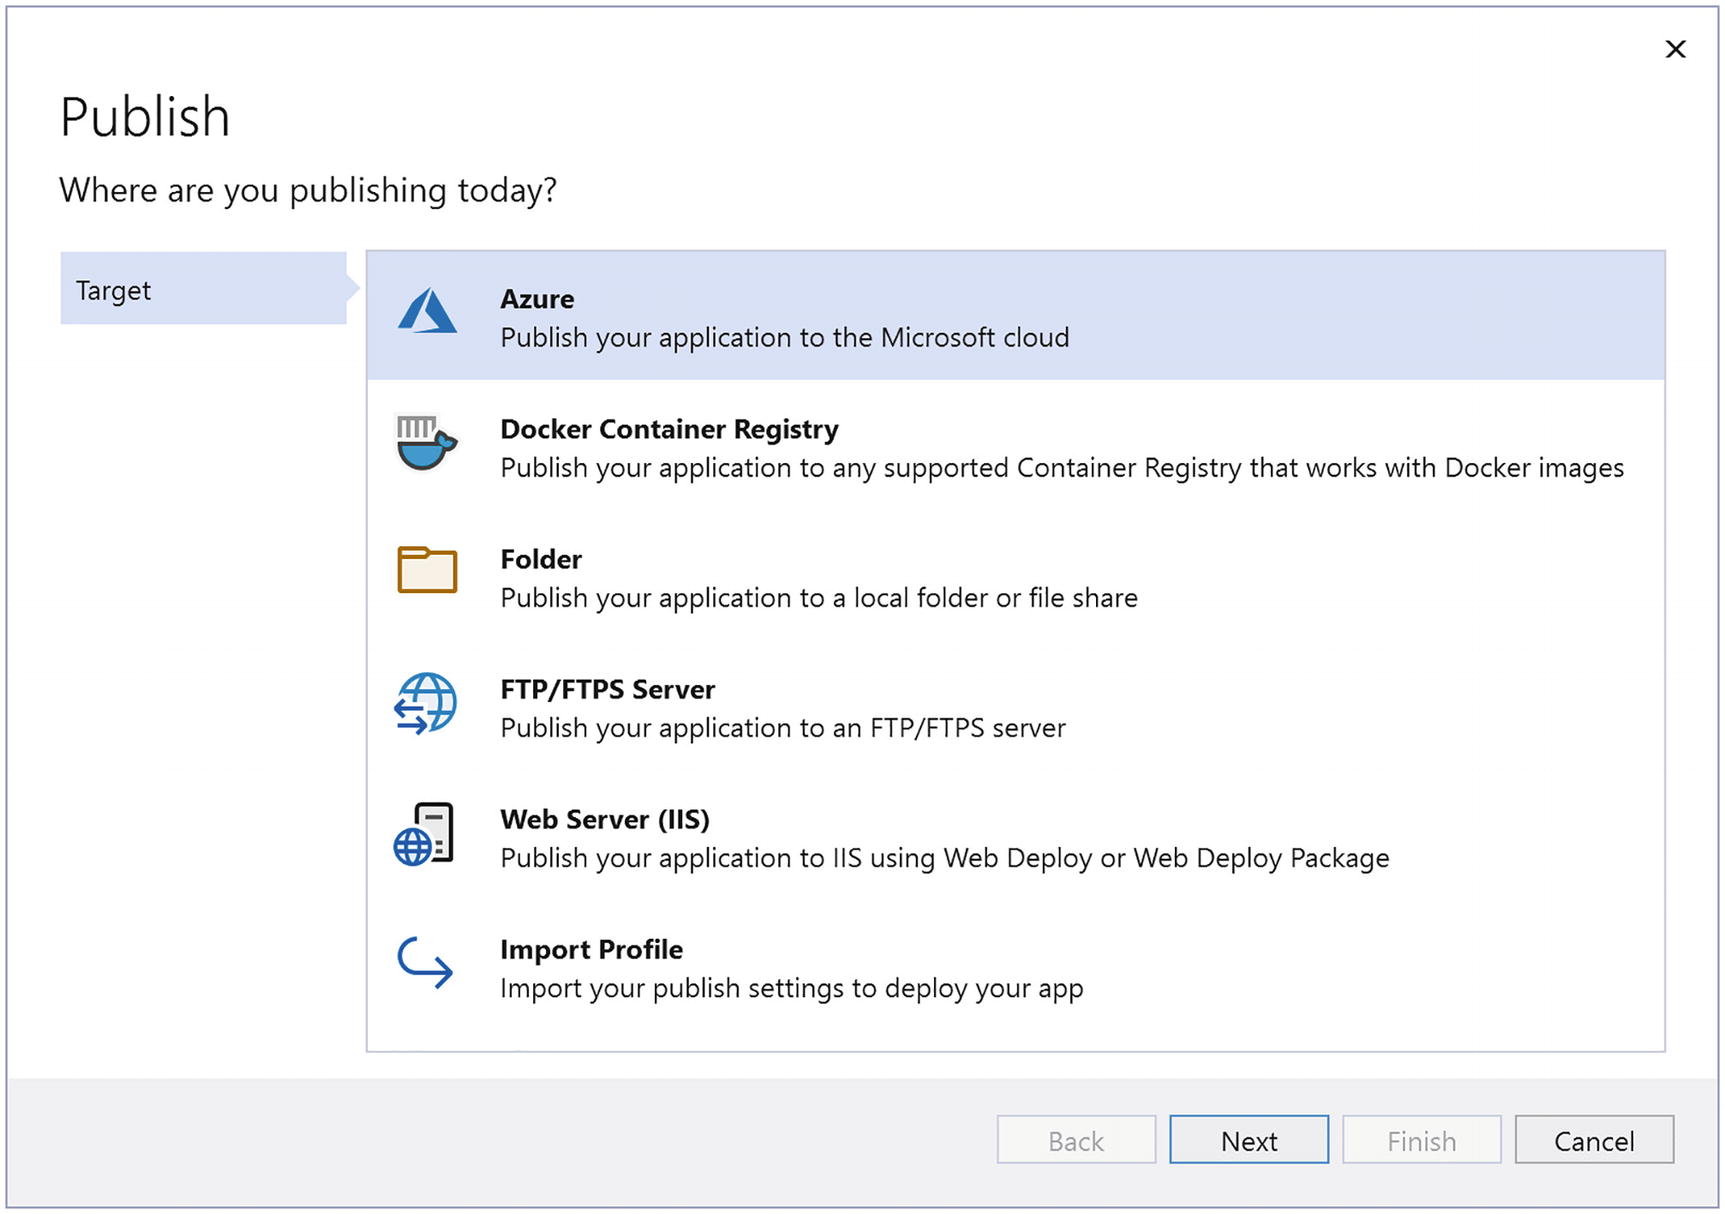
Azure Deployment Choices
Select Azure App Service
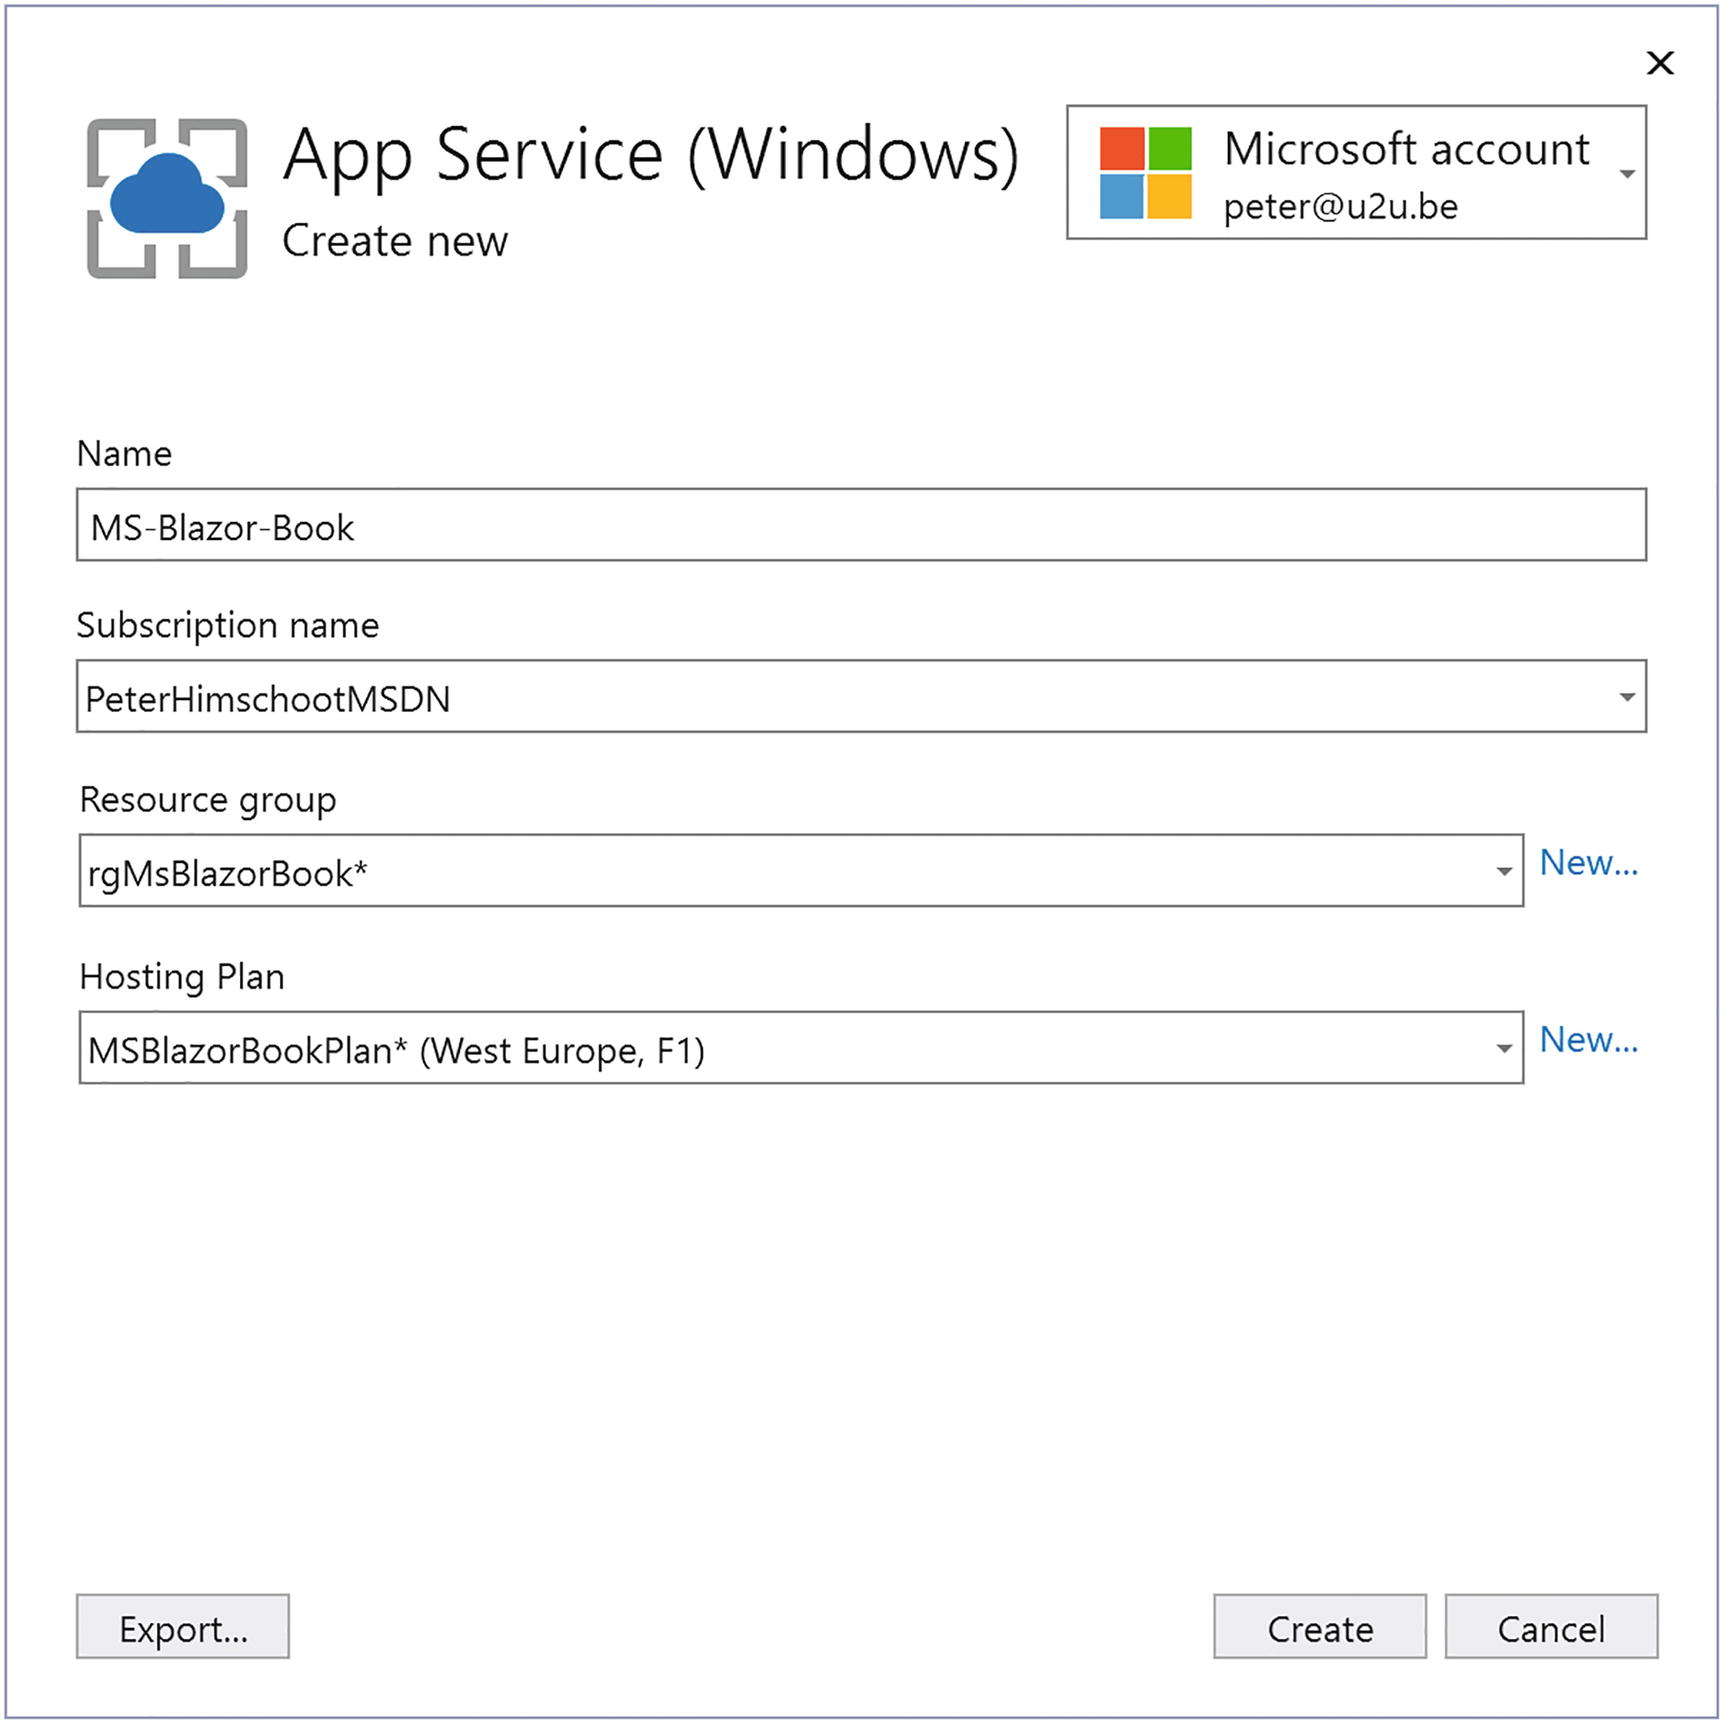
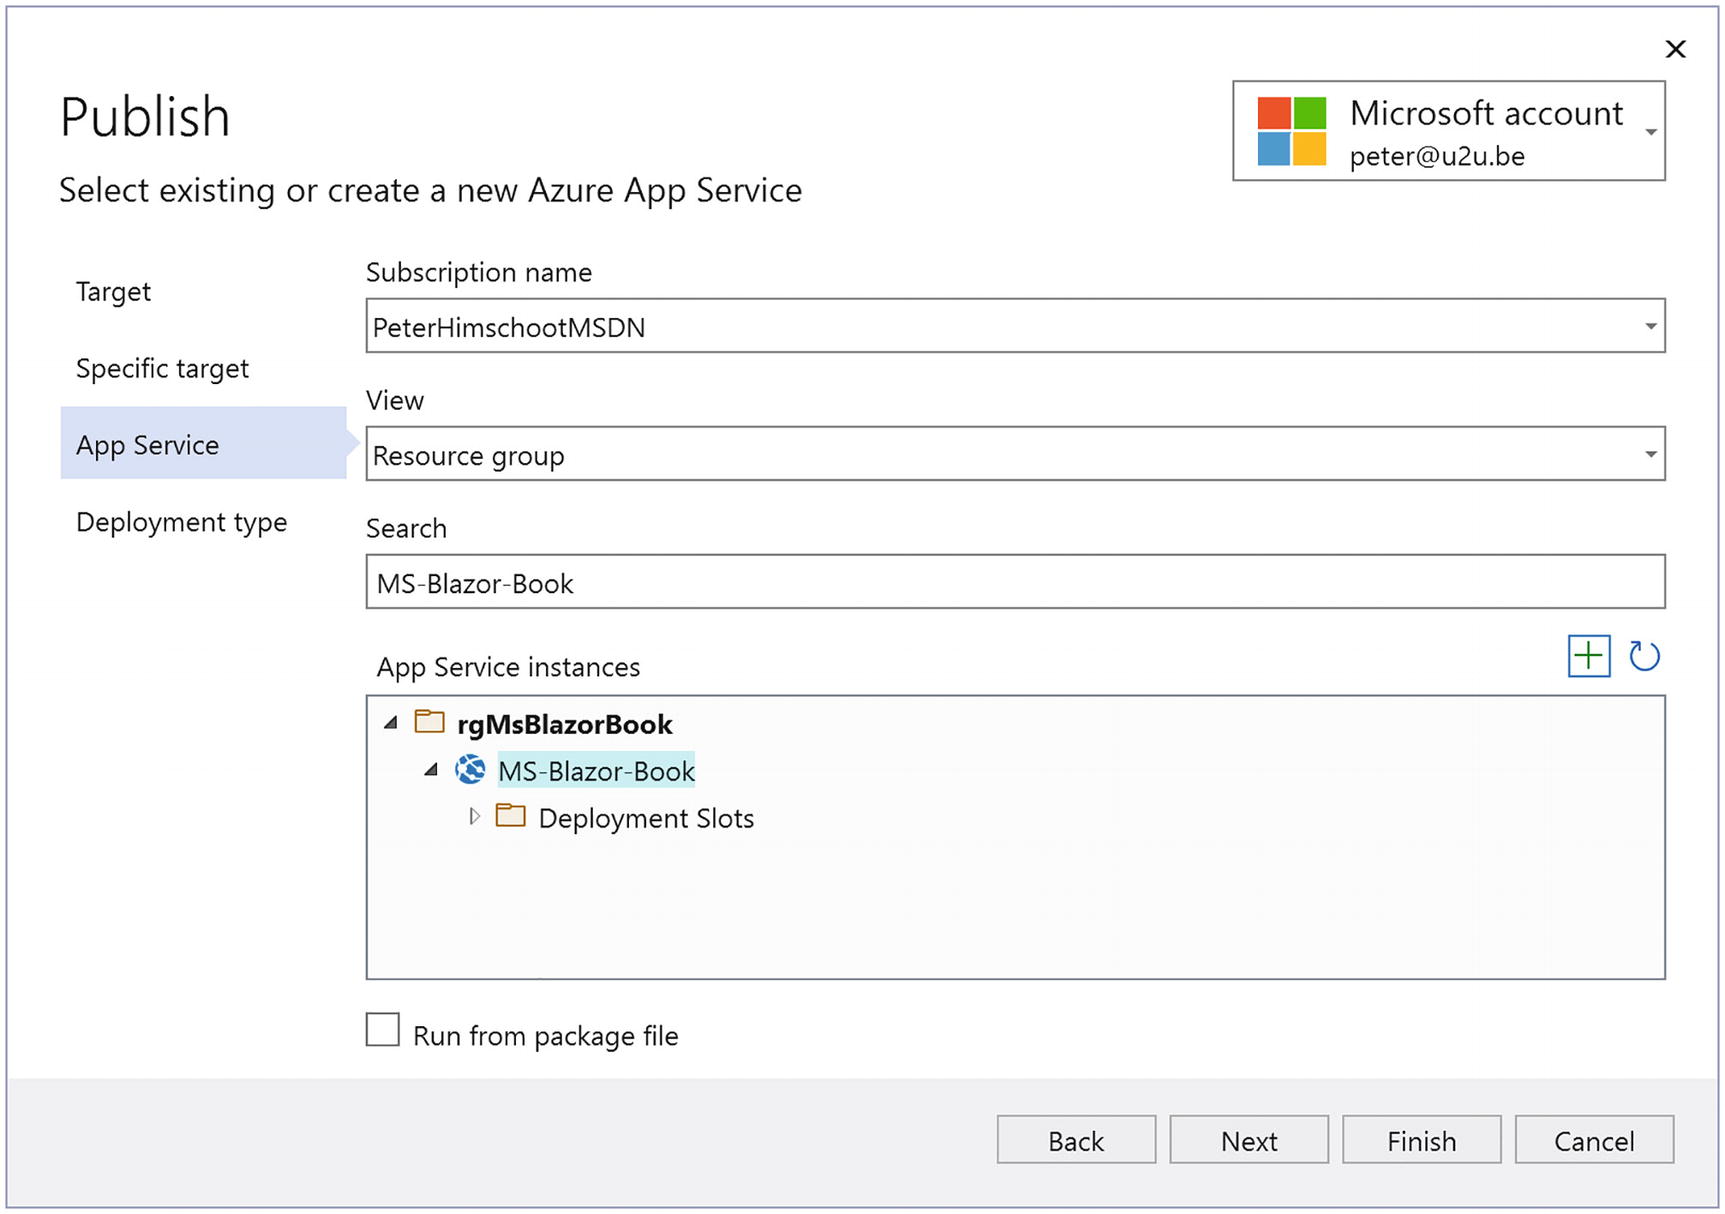
Create an App Service Dialog
A resource group groups together a bunch of Azure resources, such as a web app and its database, and allows you to manage and delete all of them as one. To create a new resource group, click New… and enter a new resource group name.

Create a Hosting Plan
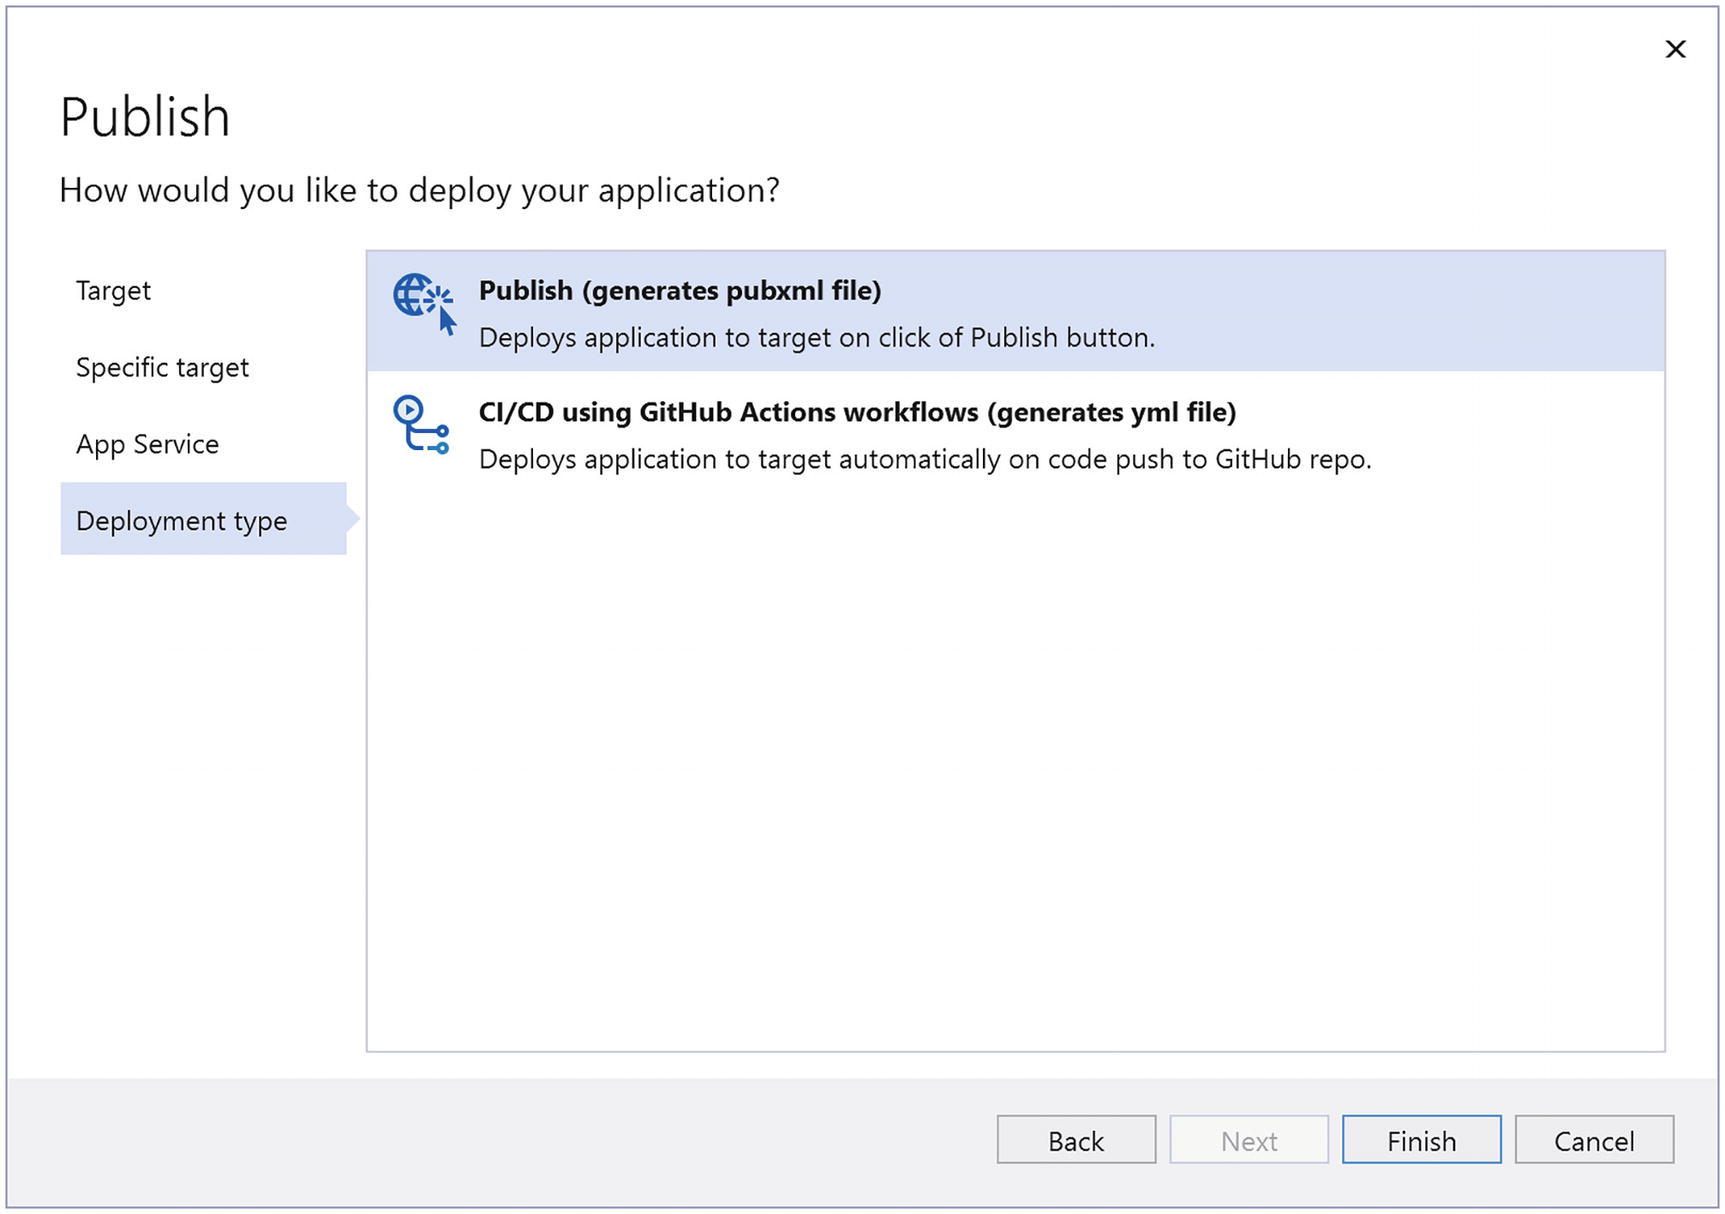
Publish or Use CI/CD
Select Finish.
Selecting Publishing Options
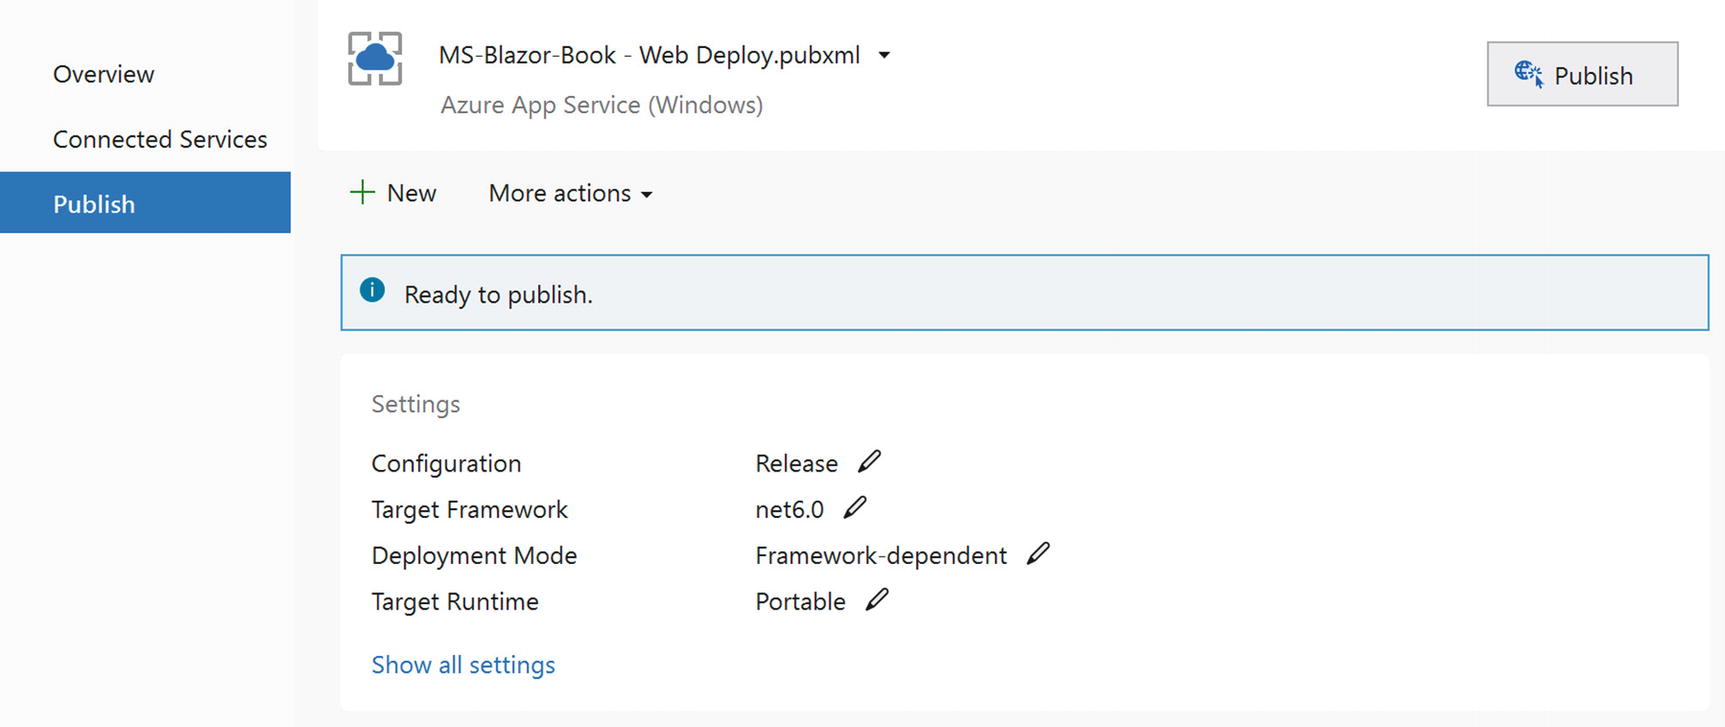
The Publish Profile
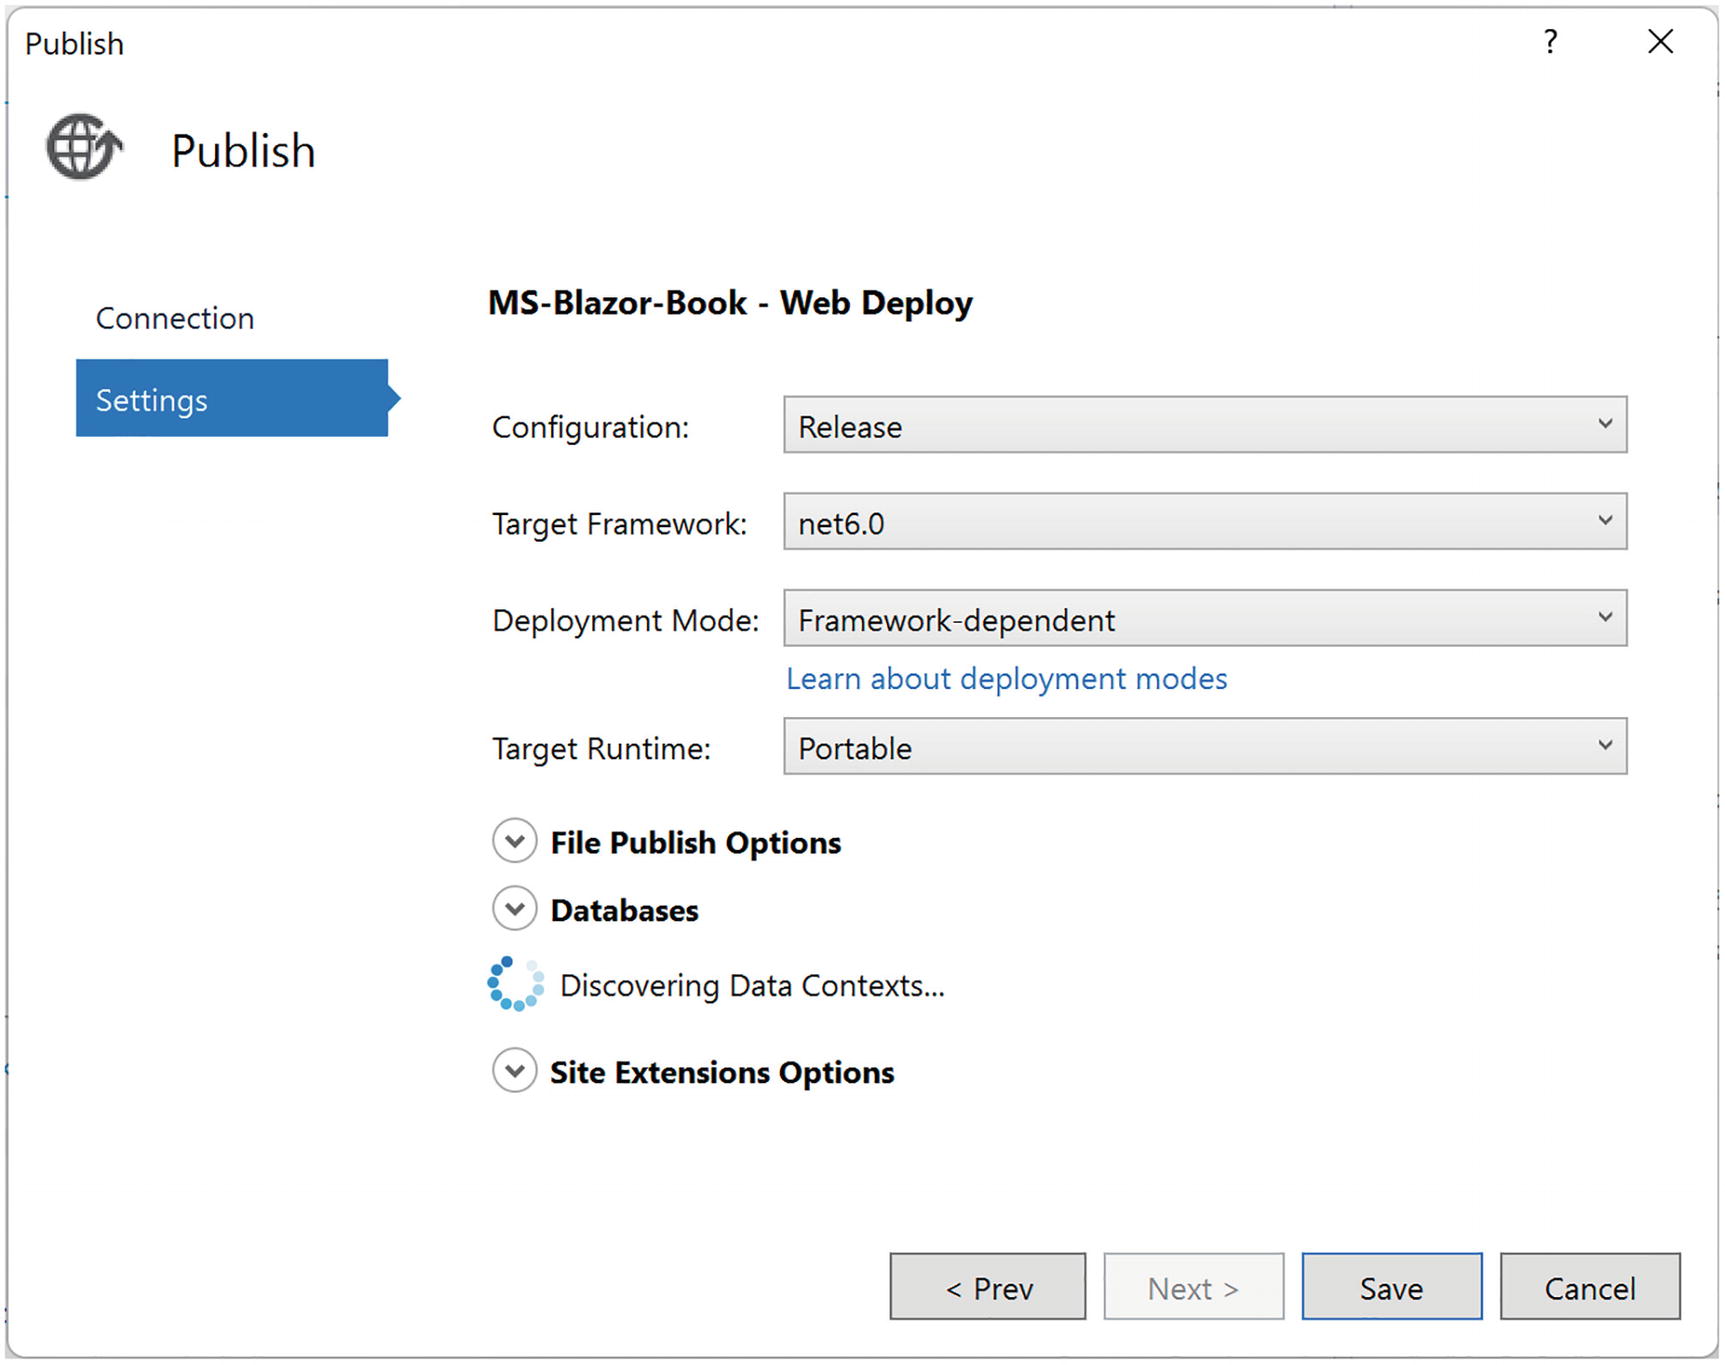
Publish Options
Publishing the Application
Now you can click the Publish button as shown in the top right corner of Figure 15-11. Visual Studio will build a release version and deploy it to Azure.
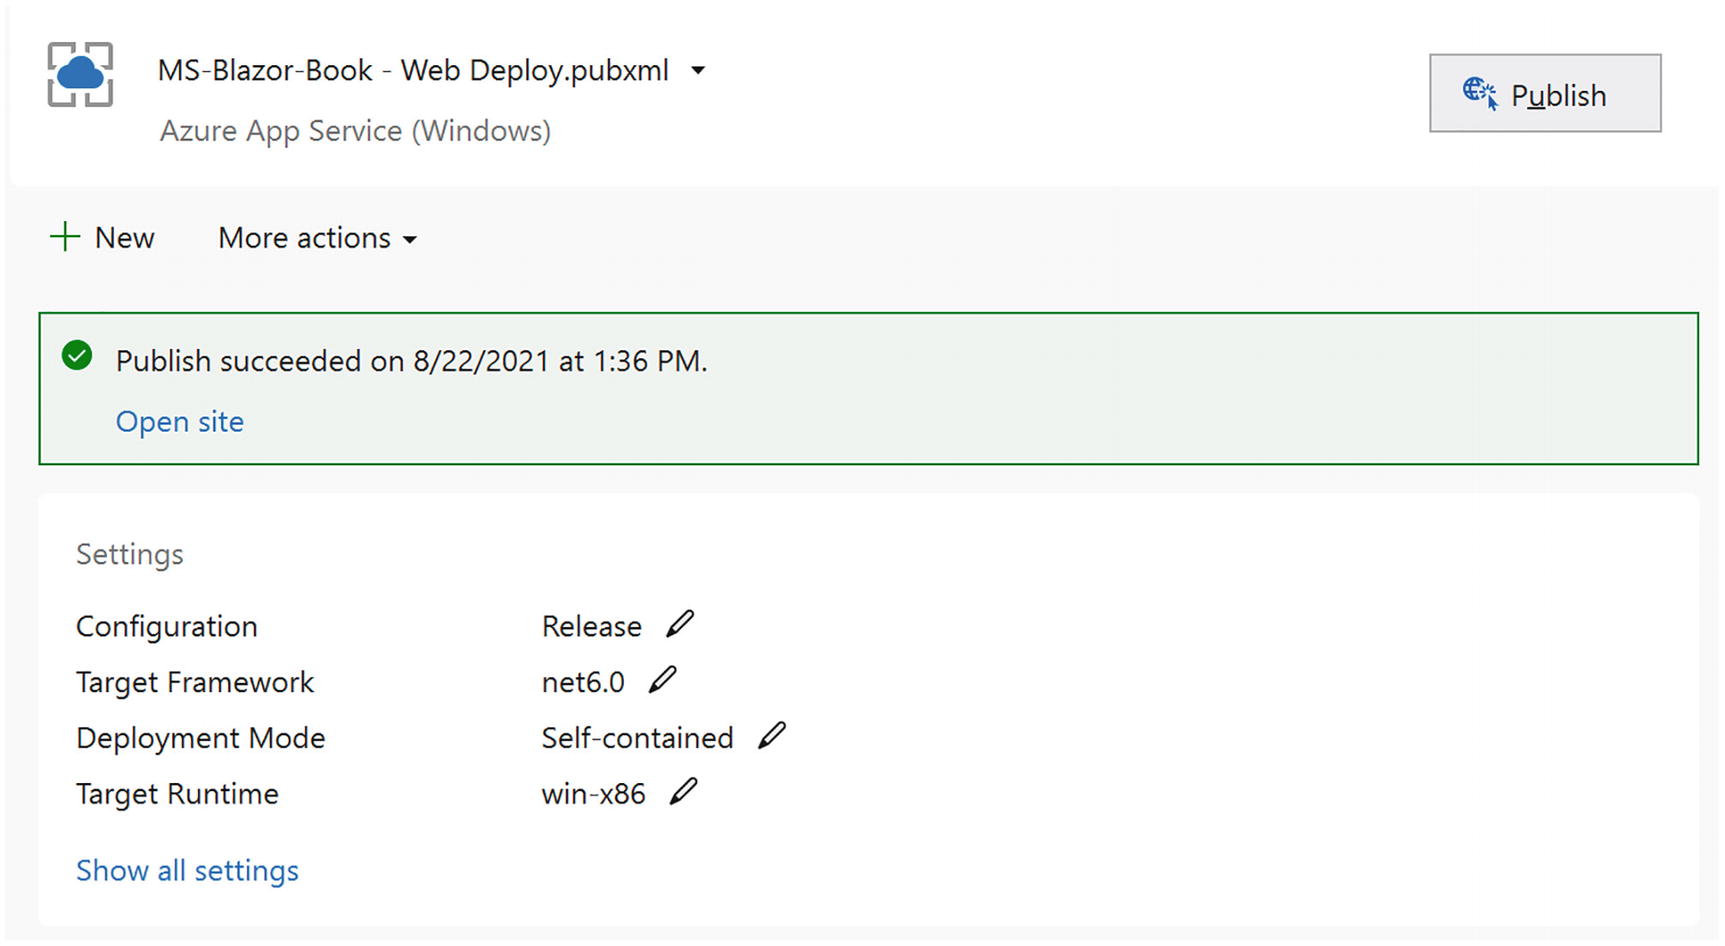
Publish Complete
Summary
In this chapter, we looked at deploying a Blazor application. With a standalone Blazor WebAssembly application, all we need is a file server so the browser can download the html, CSS, JavaScript, and DLL files. As an example, we used GitHub to deploy to. Remember to set the base tag in the html page to match the location where the files are downloaded from.
Deploying a Blazor Server or Blazor WebAssembly hosted project is just like deploying an ASP.NET Core site. As an example, we deployed our application to Azure as a web app. Visual Studio takes care of most of the work. Without Visual Studio, we can still create a deployment using the command line, and then we would need to upload the files onto the server. Each hosting provider has their own specific way of doing this.