What if your application needs some real-time communication between client and server and even between clients? In this case, you can use SignalR. In this chapter, we will explore how we can use SignalR in Blazor to build real-time applications.
What Is SignalR?
SignalR is a library that allows you to build real-time applications and allows the server and clients to send messages to each other. You can use SignalR in desktop applications, mobile applications, and of course websites. There is an implementation for .NET and also one for JavaScript. A typical application that should use SignalR is a chat application, where clients communicate with each other over a server. When the server receives a chat message from the client, it can send this message back to the other clients. SignalR is especially useful for applications that need high-frequency updates, such as multi-player games, social networks, auctions, etc.
How Does SignalR Work?
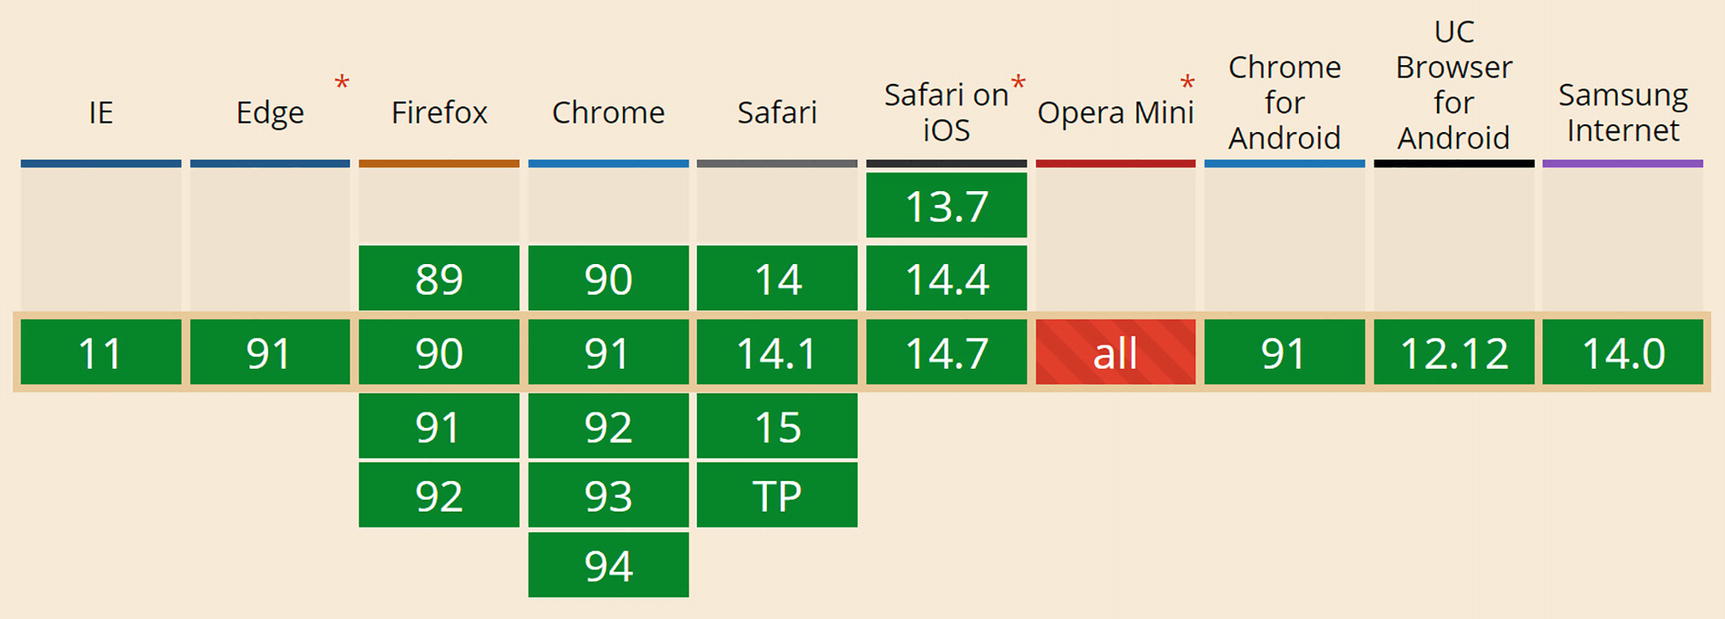
SignalR uses WebSockets, which, unlike HTTP, use a full-duplex connection between client and server, meaning that clients and server keep the TCP connection open and thus can send messages to each other without the classic model where the client has to start the conversation. To implement this, WebSockets set up a TCP connection between client and server over the existing HTTP connection, which is way more efficient to send small messages. All modern browsers support WebSockets, as shown on https://caniuse.com/?search=websockets and in Figure 12-1.
Figure 12-1
Supporting Browsers
SignalR takes care of the connection and allows you to send messages to all clients simultaneously or to specific groups of clients or even to a single specific client.
Building a WhiteBoard Application
Let us build a WhiteBoard application, in which you will have a white board (such as you can find in many offices) on which you can draw. After this, we will add SignalR so all users can interact with the white board and can see what others are drawing in real time.
Creating the WhiteBoard Solution
Start by creating a new server-hosted Blazor WebAssembly solution, and name it WhiteBoard. Remove all Blazor components from the Pages and Shared folder. We don’t need these. Also remove all contents of the App component. Finally, remove the @using WhiteBoard.Client statement from _Imports.razor.
Start by adding a new C# struct called LineSegment from Listing 12-1 to the shared project. We will use this struct in both the server and the client to represent the drawing, segment by segment.
using System.Drawing;
namespace WhiteBoard.Shared
{
public struct LineSegment
{
public LineSegment(PointF start, PointF end)
{
Start = start;
End = end;
}
public PointF Start { get; set; }
public PointF End { get; set; }
}
}
Listing 12-1
The LineSegment Class
Add a new component to the Pages folder and name it Board. Complete the markup as in Listing 12-2. Our Board component will use an HTML <canvas> element to show the drawing and handle the user interaction with the board.
<canvas width="600" height="600"
@onmousedown="MouseDown"
@onmouseup="MouseUp"
@onmousemove="MouseMove"
@ref="board">
</canvas>
Listing 12-2
The Board Component
Add a new C# file called Board.razor.cs as in Listing 12-3. For the moment, this class does not do a lot of useful stuff, except making the project compile, but we will get to this next.
using Microsoft.AspNetCore.Components;
using Microsoft.AspNetCore.Components.Web;
using Microsoft.JSInterop;
using System;
using System.Collections.Generic;
using System.Drawing;
using System.Threading.Tasks;
using WhiteBoard.Shared;
namespace WhiteBoard.Client.Pages
{
public partial class Board
{
[Parameter]
public List<LineSegment> LineSegments { get; set; }
= default!;
[Parameter]
public Func<LineSegment, Task> AddSegment { get; set; }
= default!;
public ElementReference board = default!;
private void MouseDown(MouseEventArgs e)
{
}
private void MouseUp(MouseEventArgs e)
{
}
private void MouseMove(MouseEventArgs e)
{
}
}
}
Listing 12-3
The Board Component’s Implementation
Now update the App component’s markup from Listing 12-4 with code behind from Listing 12-5. The App component will keep track of the line segments, so it passes the segments as an argument and passes the AddLineSegment callback to the board.
<Board LineSegments="@LineSegments"
AddSegment="@AddLineSegment" />
Listing 12-4
The App Component
using System.Collections.Generic;
using System.Threading.Tasks;
using WhiteBoard.Shared;
namespace WhiteBoard.Client
{
public partial class App
{
private readonly List<LineSegment> LineSegments
= new List<LineSegment>();
private Task AddLineSegment(LineSegment segment)
{
List<LineSegment> segments =
new List<LineSegment>() { segment };
this.LineSegments.Add(segment);
return Task.CompletedTask;
}
}
}
Listing 12-5
The App Component’s Implementation
Implementing the Mouse Handling Logic
Now we can implement the Board component’s mouse handling logic. When the user clicks and drags the mouse, we will add a new segment. Start by adding the MouseButton enumeration next to the Board class as shown in Listing 12-6. This abstracts the numbers used for mouse buttons by the mouse events (I hate using “mystery” numbers in code).
public enum MouseButton
{
Left, Middle, Right
}
Listing 12-6
The MouseButton Enumeration
Now update the Board’s mouse handling methods as in Listing 12-7. The trackMouse field is used to track whether the left mouse button is down. It is set to true in the MouseDown event handling method and back to false in the MouseUp event handling method.
The MouseMove event handling method calls the AddSegment callback when the trackMouse field is true. But we need another thing. Mouse events can easily trigger tens of times per second, so we need to throttle these events. That is why the lastEvent field tracks the difference between the mouse moves and will only call the AddSegment callback with at least 200 milliseconds between them. Of course, we need to know the mouse position, and for that, this implementation uses the lastPos field. We initialize this to the current mouse position in the MouseDown method when the left mouse button is pressed. We then use this field to invoke the AddSegment callback with lastPos and currentPos. Finally, we reset the lastPos to the current mouse position because this will become the starting point for the next segment.
private PointF lastPos = new PointF(0, 0);
private DateTime lastEvent;
private bool trackMouse = false;
private void MouseDown(MouseEventArgs e)
{
if (e.Button == (int)MouseButton.Left)
{
this.trackMouse = true;
this.lastPos =
new PointF((float)e.ClientX, (float)e.ClientY);
}
}
private void MouseUp(MouseEventArgs e)
=> this.trackMouse = false;
private void MouseMove(MouseEventArgs e)
{
var currentPos =
new PointF((float)e.ClientX, (float)e.ClientY);
DateTime currentEvent = DateTime.Now;
TimeSpan time = currentEvent - this.lastEvent;
if (this.trackMouse && time.TotalMilliseconds > 200)
Running the application will not yield the proper result. We need to paint the segments. And since we are using a <canvas> element, we need some JavaScript.
Add a new scripts folder below the wwwroot folder, and add a new JavaScript file called canvas.js as in Listing 12-8. This JavaScript module exports a single drawLines function, which draws each line segment on the canvas.
To draw on a canvas, we need a reference to it, so we pass the ElementReference as the first argument and the segments as the second argument. Next, we ask the canvas element to give us a 2D content by calling the getContext method. Then we iterate over each segment, calling the drawLine method. This method then uses the 2D context to draw the line.
We now should import this module in our Blazor component. Use dependency injection to get a reference to the IJSRuntime instance as in Listing 12-9.
public partial class Board
{
[Inject]
public IJSRuntime JSRuntime { get; set; } = default!;
Listing 12-9
Use the Inject Attribute to Inject the JSRuntime
Override the OnInitializedAsync method as in Listing 12-10. This code should be familiar from Chapter 10, and it loads a JavaScript module into an IJSObjectReference.
Where should we call the JavaScript module? We can only do this after the Blazor runtime has updated the browser’s DOM, so we should override the OnAfterRenderAsync method from Listing 12-11 as described in Chapter 3. There is one more problem. We are loading the JavaScript module in OnInitializedAsync, and because this is an asynchronous method, the module will not be loaded in the first call to OnAfterRenderAsync, so we need to check if the canvas field has been set.
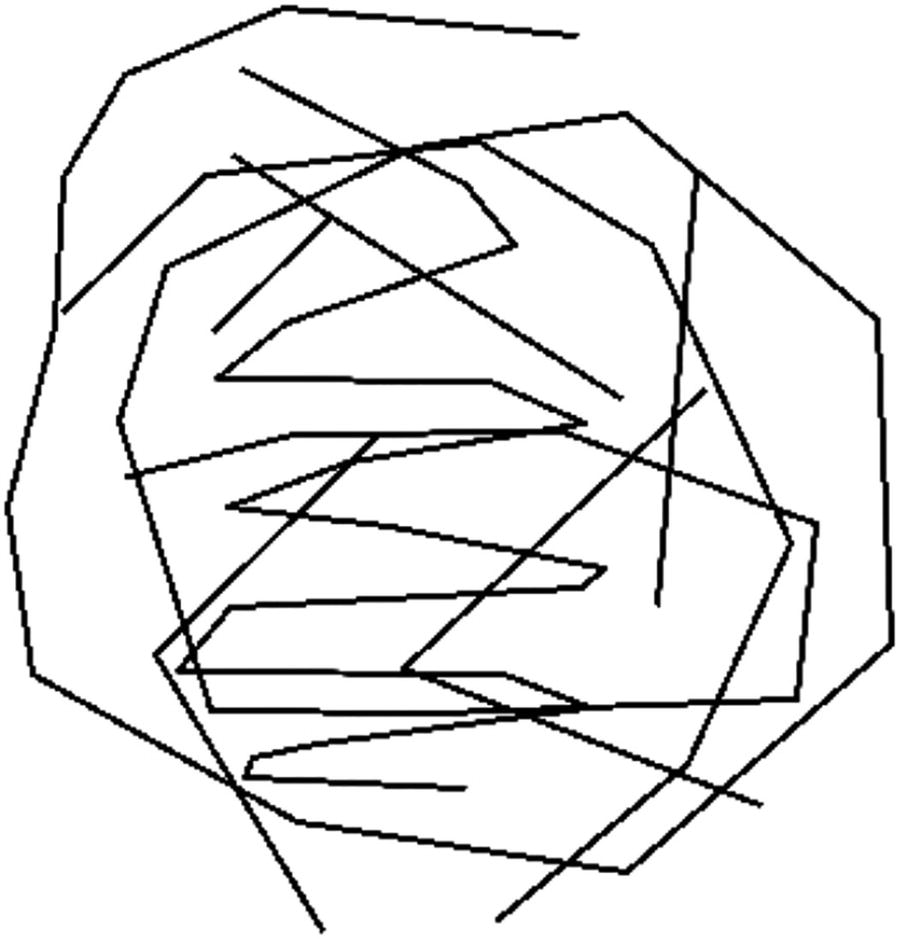
Build and run. Now you can make some abstract art like I did in Figure 12-2.
Figure 12-2
The WhiteBoard Application in Action
Adding a SignalR Hub on the Server
Our WhiteBoard application is currently single user. Let us make this an application where everyone can draw on the same white board using SignalR.
With SignalR, we need to create a Hub on the server, which will have methods we can call from the clients. On the client, we will implement methods that we will invoke from the hub. A hub sits at the heart of SignalR and runs on the server. The clients will send messages to the central hub, which can then notify the other clients. So we need a hub.
Implementing the BoardHub Class
In the server project, add a new Hubs folder and add the BoardHub class from Listing 12-12. We need to derive this class from the Hub base class (or strongly typed Hub<T> class). Currently, it has the allSegments list, containing the segments of the Board.
Our BoardHub needs two methods, GetAllSegments and SendSegments. The GetAllSegments method from Listing 12-13 is used by a new client to retrieve the already present segments from other clients. So how does the server know who the clients are? The Hub base class has a Clients property of type IHubCallerClients. This interface has three properties: All, Caller, and Others. The All property gives you access to all the clients connected to the Hub, the Caller property returns the client calling the BoardHub, and the Others returns all clients except the caller. Since the GetAllSegments method needs to return its allSegments collection to the client, we use Clients.Caller and call the client’s InitSegments method. This method also performs some server-side logging using the ILogger.
The SendSegments method from Listing 12-14 is used by a client to notify the other clients. Here, the server adds the client’s segments to its collection and notifies the other clients by calling their AddSegments method.
public async Task SendSegments(IEnumerable<LineSegment> segments)
Open Startup.cs on the server project and update the ConfigureServices method in Listing 12-15 to configure dependency injection for SignalR. To really make the SignalR messages as small as possible, we also add the response compression middleware.
public void ConfigureServices(IServiceCollection services)
Update Startup’s Configure method as in Listing 12-16. The response compression middleware should come first, and we need to add our BoardHub to the server’s endpoints. Our BoardHub can now receive messages from clients using the /board URL.
public void Configure(IApplicationBuilder app, IWebHostEnvironment env)
{
app.UseResponseCompression();
...
app.UseEndpoints(endpoints =>
{
endpoints.MapRazorPages();
endpoints.MapControllers();
endpoints.MapHub<BoardHub>("/board");
endpoints.MapFallbackToFile("index.html");
});
}
Listing 12-16
Adding SignalR Middleware
Implementing the SignalR Client
Start by adding the Microsoft.AspNetCore.SignalR.Client package to the client project.
Our Board component does not need to know we are using SignalR, so we will add the SignalR logic to the App component.
Making the SignalR Hub Connection
Start by adding the NavigationManager through dependency injection and a HubConnection field as in Listing 12-17.
public partial class App
{
[Inject]
public NavigationManager navigationManager { get; set; } = default!;
private HubConnection hubConnection = default!;
Listing 12-17
Adding Some Dependencies
We need to create the HubConnection in the OnInitializedAsync method as in Listing 12-18. First, we use the HubConnectionBuilder to create the HubConnection, passing the URL of our server’s SignalR endpoint. To retrieve the SignalR server’s URL, we use the navigationManager.ToAbsoluteUri method.
Then we define the AddSegments method (which the server will call) which simply adds the segments to the App component’s segments. Since this call is asynchronous, we need to call StateHasChanged so the App component will perform change detection and render itself.
We also add the InitSegments method, which by some weird coincidence does the same as the AddSegments method (but this may change in the future).
Now our hubConnection is ready, so we call StartAsync, and when this returns, the connection has been made, and we ask the server to send its segments (which could have been modified by other clients) using the GetAllSegments method.
Our App component should notify the server when the user added a segment, so we call the hubConnection’s SendSegments method, passing the extra segment. This will update any other client out there. Add the AddLineSegment method from Listing 12-19.
Finally, we should not forget to notify the server that we are not interested in other messages.
Start by declaring the IAsyncDisposable interface on the App component as in Listing 12-20.
public partial class App : IAsyncDisposable
Listing 12-20
Declaring the IAsyncDisposable Interface
Implement the DisposeAsync method in the App component as in Listing 12-21. Here, we call DisposeAsync on the hubConnection, which will unregister this client with the server’s hub.
public async ValueTask DisposeAsync()
{
if (this.hubConnection is not null)
{
await this.hubConnection.DisposeAsync();
}
}
Listing 12-21
Implementing IAsyncDisposable
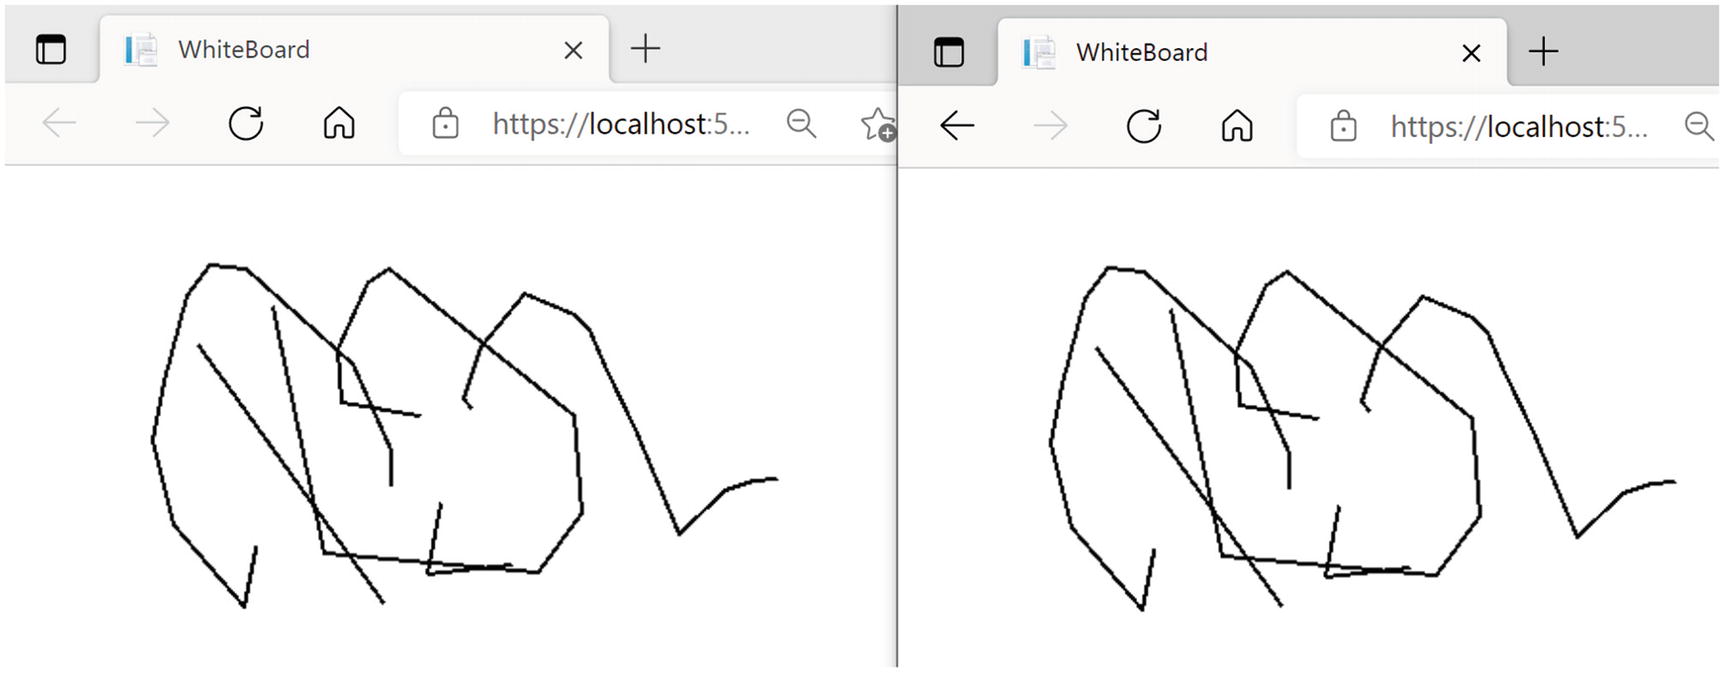
Build and run. Open another browser tab on the same URL (or another browser). Drawing in one tab will automatically draw in another tab. Again, open another tab or browser; the current drawing should be shown as in Figure 12-3.
Figure 12-3
The WhiteBoard Application in Action
Summary
In this chapter, we looked at using SignalR for building real-time applications. Who is using SignalR out there? First of all, Blazor Server uses SignalR to set up the two-way communication between the server and the browser. Microsoft Azure also uses SignalR. It is also used by lots of companies. Any time you need real-time communication, SignalR is the choice to make. We could integrate SignalR in our PizzaPlace application to notify the customers when their pizza enters the oven, then when it is put in the pizza box, and when delivery is estimated to arrive. They could even see where delivery is in traffic!
You start by adding a Hub to the server, and then you make clients connected to this hub using a HubConnection. Once this connection has been established, both client and server can send messages to each other. We only scratched the surface of what is possible with SignalR, but as we have seen, using SignalR is easy!